29 February, 2008

One is Not Enough: Double Decker Paratha

Photobucket
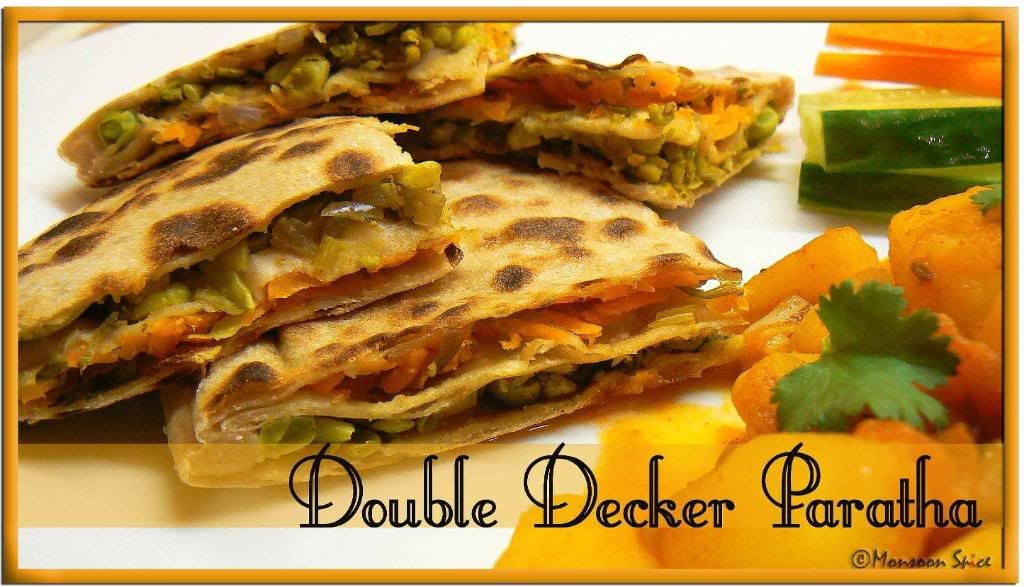
Double Decker Paratha

Have u ever been obsessed with anything? Something you can’t stop thinking about it. You see it everywhere even with your eyes closed. You dream of it when you fall asleep and still day dream about it when you are wide awake. Yes, that type of obsession and my current obsession is rolling Parathas. Not just plain parathas but some mean stuffed parathas. It feels good when you master (no place for modesty here ;) something which you thought to be impossible to make let alone master. No, actually it doesn’t feel good… It feels great!

I can already visualise many of you shaking your head and some even banging it against the wall. I am very well aware of the fact that many of you skilfully roll hundreds of these stuffed parathas everyday with ease. I salute all you Aunties. ~ducks her head ;) ~ But it’s a different paratha story for me. I feel like a small baby who just learned to walk without any support and happened to be enjoying this new found freedom!

After my successful attempt with Tofu, Aloo, Gobi, Mooli etc stuffing I wanted to make little different parathas. With little bit of googling (Long Live Google!!!) I came across very unusual recipe from none other than Indian cooking diva Mrs. Tarla Dalal’s blog. Although I don’t own even single book of hers (I really can’t call my single digit cook books as my cook book collection) and never cooked any of her recipes, I have had seen many of her creations being recreated and appreciated in blog world. More than everything what attracted me to this particular recipe of hers is the challenge involved! It was not some usual stuffed paratha. It was unique paratha which she calls Double Decker Paratha where two different fillings are used to create two layered paratha. One look at the recipe I knew I am not gonna rest until I make them. And that’s what exactly what I did on last weekend after postponing my spring shopping!!! For a shop-o-holic, I didn’t regret even for a moment to stay at home and create these babies. Although taste wise it might taste similar if you had to combine these two fillings and make just a usual stuffed parathas, it was gorgeous to look at. Two thin layers of parathas stuffed with crunchy carrots and sweet green peas were lovely to look at. For a foodie they were nothing less than a stunning piece of jewellery studded with corals and emeralds!!!

Click here to view the original recipe. I used the same main ingredients used by Mrs. Dalal but made few changes to suit our palette. I am planning to follow same technique and use different ingredients for my friends during Easter break. Yeah, what can I say? I am a big show off ;) I am sending this to dear Suganya who is guest hosting WBB-Healthy Eats. With colourful raw vegetables and just few drops of oil, I think it does qualify for healthy breakfast eats. Sug, I hope you like it:)

Photobucket Print This Recipe
Double Decker Paratha
Prep Time: 30 mins
Cooking Time: 30 mins
Makes: 4-5 Large Paratha
Recipe Inspiration: Mrs. Tarla Dalal

Ingredients:
For the Dough:
3 cups Atta/Wheat Flour
¼ tsp Salt
Warm Water for kneading

For the Carrot Stuffing:
1½ cups Carrot, grated
1-2 Green Chillies, finely chopped
½ tsp roasted Jeera/Cumin Powder
¼ tsp Red Chilli Powder
½ tsp Anardaana/Pomegranate Seeds Powder
1-2 tsp Lime Juice
1 tbsp Coriander Leaves, finely chopped
Salt to taste

For the Green Peas Stuffing:
1 cup fresh/frozen Green Peas, boiled and mashed
2 tbsp Onion, finely chopped
1 tsp Ginger-Garlic Paste
½ tsp Aamchur/Dry Mango Powder
½ tsp Kitchen King Masala
1 tbsp Mint Leaves, finely chopped
Salt to taste

Other Ingredients:
Little Atta/Wheat Flour for rolling
Ghee/Oil for Cooking (Optional)
Photobucket
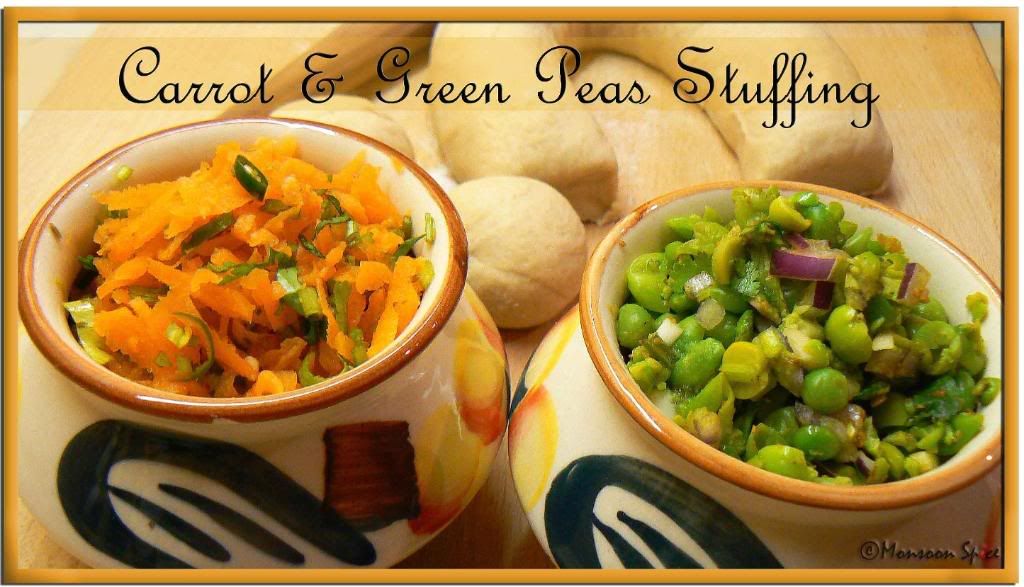
Carrot and Green Peas Stuffing for Paratha

Method:
For the Dough:
Place atta, salt and warm water in a bowl and mix well to form smooth dough. Keep aside for at least 30 mins covered with a wet cheese cloth.

For the Carrot Stuffing:
Mix grated carrot with all the ingredients listed and keep it aside.
Original recipe instructs to cook carrot for 2-3 minutes but I just mixed the raw ingredients to retain its colour and nutrition and also its crunch. And also it gets lightly cooked when you pan fry the Paratha over medium heat. So the choice is yours.

For the Green Peas Stuffing:
Mix cooked and mashed green peas with all the ingredients listed and keep it aside.
Again the original recipe instructs to cook the ingredients for few minutes.

Photobucket
Step-by-Step Instruction for Assembling the Paratha - Clock-wise from Top Left

Assembling, Stuffing and Rolling the Paratha:
Heat the tawa/griddle at high flame and reduce to low to medium flame.
Knead the dough for another minute or a two and divide it into 12 or 15 equal sized balls (for 4 or 5 Parathas respectively).
Roll them into equal sized discs and cook 4 or 5 chapattis lightly (for 4 or 5 Parathas respectively) and keep aside. Let them cool completely before you proceed.
Now place one uncooked chapatti on a surface and spread about 1 tbsp of carrot stuffing evenly leaving 1-1½ cms in the end.
Cover this carrot stuffing with a cooked chapatti and spread 1 tbsp green peas stuffing evenly on top of this.
Now place the second uncooked chapatti on top of this and seal the edges by pressing it lightly with your fingers. Make sure that you seal the edges well.
Place this Double Decker Paratha on tawa and cook on a very low heat by applying little ghee/oil if desired. Cook till the both the sides are cooked well and brown spots starts to appear.
Cut them into quarters and serve hot with a curry or just plain yogurt and enjoy.

Photobucket
Double Decker Paratha


Notes:
Make sure that the chapattis are completely cooled down before you proceed with assembling the paratha as if assembled when it is still warm may tear the uncooked paratha due to moisture produced.
If you are a beginner, you can start off by making small parathas and not stuffing too much of filling.
You can also cook these parathas in Quesadilla maker.
Try using different ingredients for stuffing and follow the same technique to create different flavoured parathas.

Reminder!

PhotobucketAn Ode to Potato ends on 15th of March. Send in your entry before the deadline and join us in the singing. Bake, boil, mash, fry, sauté, grill, stuff, cook... The choice is endless.

Deadline: 15th March, 2008

Please go through the guidelines and include all the required information in your post and mail when sending me your entry. Don't forget to add Your Name, Your Blog Name, Name of the Dish you cooked, Perm Link of the entry along with the gorgeous Photo of Potato dish.

Click Here to find out more information on this event.

25 February, 2008

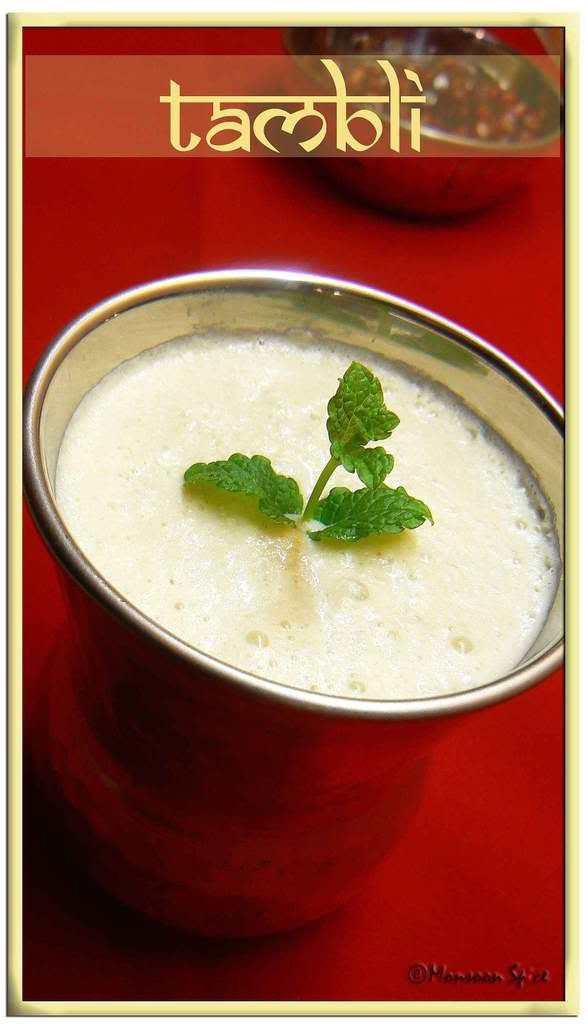
Ayurveda in Cooking: Sun Dried Pomegranate Peel Tambli

Photobucket
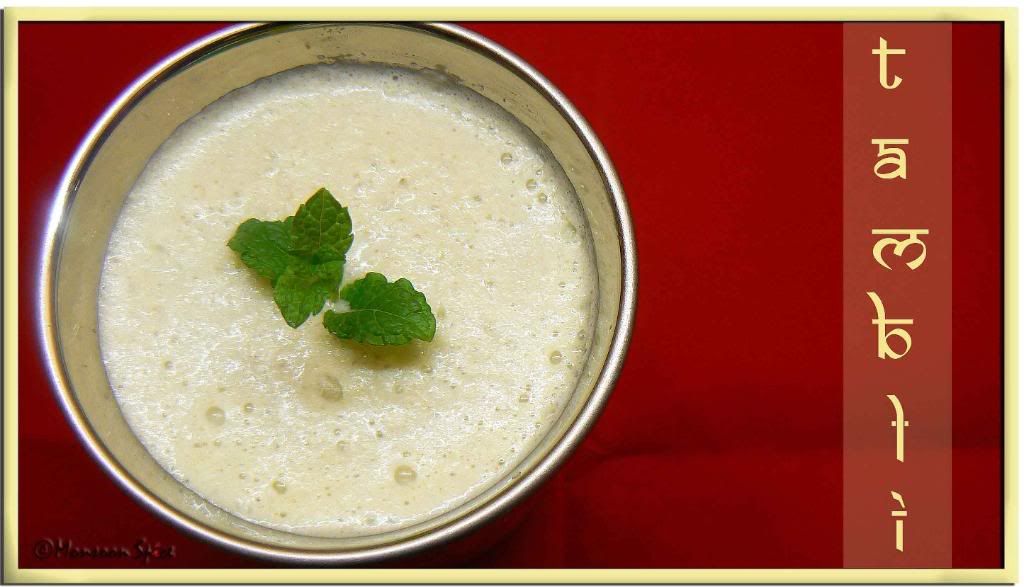
Sun Dried Pomegranate Peel Tambli

Indian cooking is not all about curries, biriyanis and spices. Indian home food also benefits from the combination of Ayurvedic knowledge with day to day ingredients. In Ayurveda, India's ancient science of life, health and longevity, food plays a prominent role in promoting health and is therefore considered medicine. Dating back over five thousand years, Ayurveda is still a highly respected form of health care in India today.

It is ironic how something as obvious as nutrition has become overlooked in the modern health care system, and how in the name of convenience our fast paced society has given way to fast foods, canned foods, take-away, microwaves, quick fix meals, and eating on the run. With the hike in growing obesity and unhealthy eating habits, it is more important to focus on the understanding the importance of role that nutrition plays in maintaining good health and healthy lifestyle. It is not necessary to pop tablets for each and every little health problems. There are natural ingredients which can be used to cure health problems.

My Ajji was one such person who believed in using natural ingredients and Ayurvedic knowledge in cooking when someone fell sick. This treasure of recipes with Ayurvedic approach is what I treasure from my Ajji’s (Grandma) kitchen. These recipes are simple and are prepared using common ingredients which will be present in your pantry any time of the day. And the best part is you don’t feel like you are forced to take some bitter medicine. These recipes not only cured your illness but also tingled your taste buds.

One such recipe is Tambli or Tambuli. There is no cooking involved when making tambli. The main two ingredients used are fresh grated Coconut and chilled Yogurt which is very common ingredients found in any South Indian homes. Based on the season and health condition different ingredients like Brahmi, Onion, Jeera etc are used in making Tambli.

Whenever a kid or even grown up had Diarrhea, Pomegranate is used in treatment. But it is not possible to find pomegranate through out the year and hence the pomegranate peels comes to rescue. The sun dried pomegranate peels were ground with coconut and some fresh herbs and mixed with yogurt to make this unusual Tambli which is used to treat Diarrhea. It is such a simple and effective therapy which is much better than popping tablets. I usually make Tambli once in every fortnight with different ingredients as they are not only healthy things to eat but also tastes great. I am sending this Sun dried Pomegranate Peel Tambli to dear Sra who is guest hosting AFAM-Pomegranate. Sra, I kept my promise ;)


Sun Dried Pomegranate Peel Tambli
Prep Time: 5-10 mins
Cooking Time: -
Serves: 3-4

Ingredients:
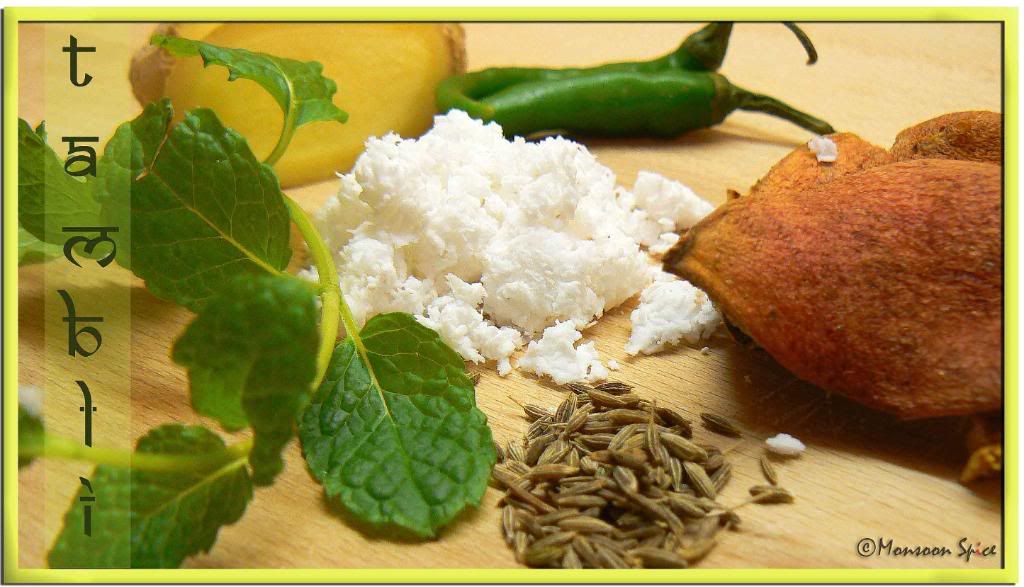
2 inch sun dried Pomegranate Peel
½ cup Fresh/Frozen Coconut, grated
1-2 Green Chillies
½ inch Ginger
½ tsp Jeera/Cumin Seeds
Few Mint Leaves
1 cup Yogurt
Salt to taste
Photobucket
Sun Dried Pomegranate Peel Tambli-Ingredients Used

Method:
Soak sun dried pomegranate peel in a cup of water for 15-30 minutes.
Drain and grind to smooth paste with grated coconut, green chillies, ginger, jeera, and mint leaves adding very little water.
Add the ground paste with yogurt and mix well. Refrigerate and serve chilled with rice and pickle.

Photobucket
Sun Dried Pomegranate Peel Tambli


Note:
To sun dry the Pomegranate Peels, peel a pomegranate and save the peels. Cut them into 1 inch pieces and lay out in the sun to dry. The peels are ready when they become hard and are easy to break. Store them in a dry air tight bottle and use as and when necessary.
Another way to treat Diarrhea is to take 3-4 pieces of sun dried pomegranate peels and place them in a glass. Pour boiling water and cover and keep aside for few minutes. Drink half a cup of this water and see how it goes. If required drink other half a cup of this drink after 3-4 hours.
More Tambli Recipes from Monsoon Spice

Update:

Looks like second season of Blog Awards is giving tight competition with Oscars and Filmfare! Guess what?! My blog is Excellent! Nope, it’s not me who is self praising here;) This is what Pravs of Simply Spicy says.
Thanks Pravs for passing me this E for Excellent Award. It means a lot to me from coming from wonderful fellow bloggers. I am flattered :)

An Update:

Purnima of Fantasy Cooking nominated Monsoon Spice for E for Excellent Award. Thank you dear Purnima. I am really flattered by your kind words and gesture.

20 February, 2008

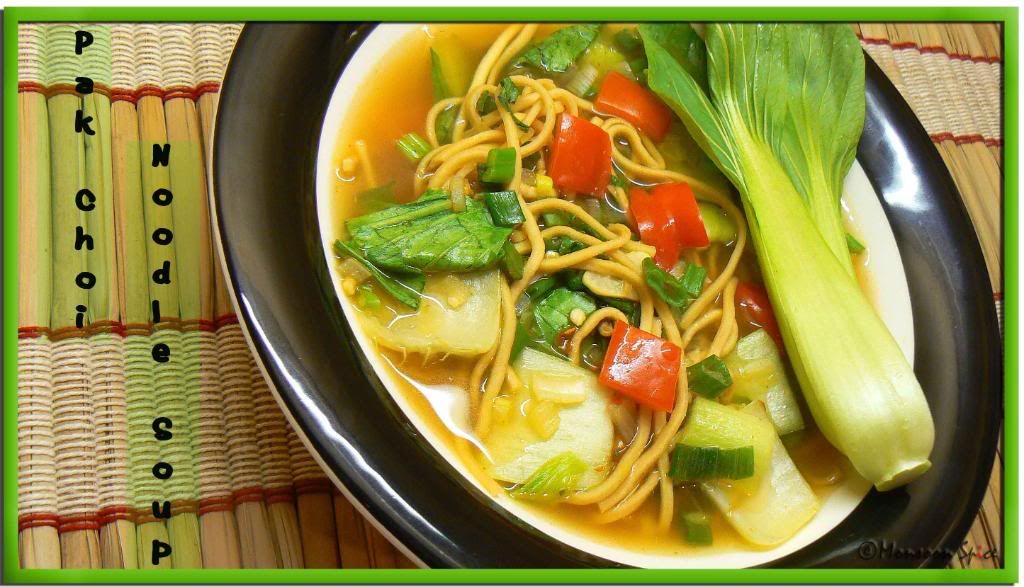
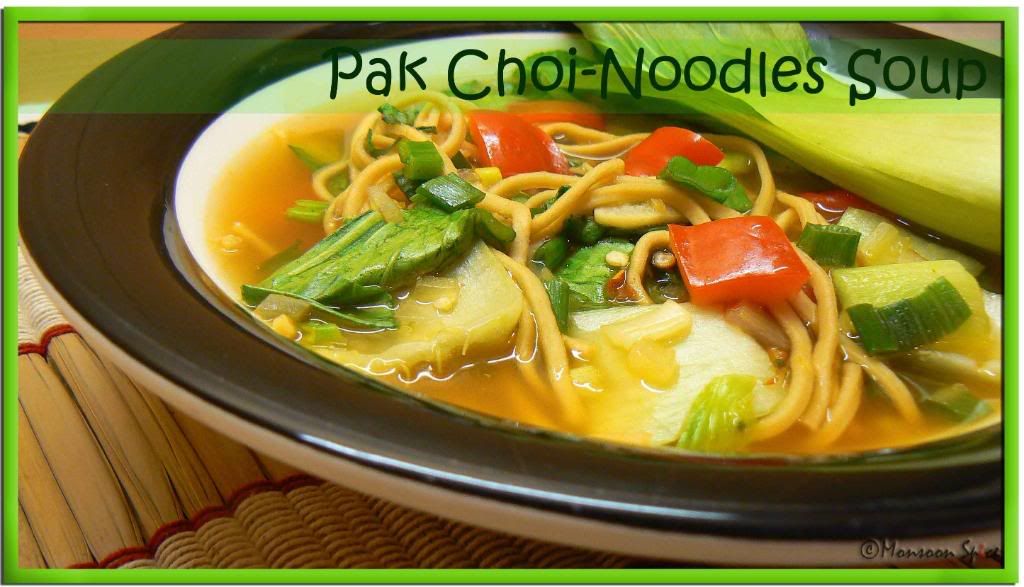
Soup for the Soul: Pak Choy – Noodles Soup

Photobucket
Pak Choi - Noodles Soup


Where else could you catch a massive cold, if not in wet and cold Britain? I was surprised to see how I survived from Jan to mid Feb from the clutches of cold and flu when colleagues in my office were walking around with a tissue stuck to their nostrils!! Just when it seemed like we are going to celebrate early springs with daffodils smiling at clear blue skies, the temperature plunged to -10 degree celcious. Ha!!! Serves me right for planning my early spring shopping. Once I stocked up enough of cold remedies and boxes of Kleenex, I tried to research the latest findings on how best to tackle the illness that is still eluding the pharmaceutical industry. Well, what else I could have expected. As usual the results were not very encouraging. It seems there is actually no remedy for cold and one wise (wo)man even mentioned "Medicate a cold and it will be gone in 14 days; ignore it and it will be gone in two weeks." So if the cold usually lasts for two weeks then there is not conclusive proof that popping Vitamin C or zinc supplements is gonna work for you. These supplements might simply mask the cold but they don’t actually cure you.

With my nose looking like that of a buffoon’s, blood shot eyes watering continuously due to my coughing night concert, and tissue dangling from my nostrils I usually rely on some tried and tested recipes like pepper rasam, kashayam or bowl of piping hot soup. After all, there is nothing more comforting than boiling few tomatoes with little spices and a good pinch of salt or boiling a glass of water with tulsi (holy basil) with few crushed peppercorns and honey/jaggary. Well, it’s also all you likely to feel up to if you have a really nasty cold. But if it’s your hubby dear who is cooking for the poor you, then you as well give yourself a special treat;)

We created this Pak Choi-Noodles Soup using the ingredients which is sure to comfort me and clear the congestion. Who says creativity can't kick in when your nose is blocked? It's just your nose that is blocked not brain;). This sunshine coloured soup doesn’t require any fancy ingredients or too much of time and energy to prepare. The ingredients used are lemon grass stalk, ginger, black pepper corns and garlic which is a natural remedy for cold and a splash of soya sauce and lemon juice for tingling taste. Addition of noodles, pak choi, and red bell peppers make this filling as well as very comforting meal. I am sending this bowl of Sunshine to Lisa who is hosting No Croutons Required event and she wants us to make a soup that even the most carnivorous diner would drool over. Thank you Pooja for the tip:)

Photobucket Print This Recipe
Pak Choi – Noodles Soup
Prep Time: 5-10 mins
Cooking Time: 10 mins

Serves: 2

Ingredients:
4-5 cups Vegetable Stock
1-2 Pak Choy/Pak Choi, cut into bite size pieces
Handful of Noodles (I used medium noodles)
1 small Red Bell Pepper, cut into bite size pieces
1 small Onion, finely chopped (Optional)
4-5 stalks of Spring Onion, sliced
1 inch Ginger, crushed
2-3 Garlic flakes, sliced thinly
¾ tsp Lemongrass Paste/1 stalk of Lemon Grass, outer skin removed and bruised
Few Black Pepper corns, crushed
1-2 Green Chillies, slit (Optional)
¾ tbsp Soya Sauce
1 tbsp Lime Juice
1 tsp Sambal Olek (Optional)
Few Basil, roughly chopped
1 tsp Oil
Salt to taste
Photobucket
Pak Choi - Noodles Soup

Method:
Heat oil in a pan and add finely chopped onion and sliced garlic. Sauté it on medium flame till onions turns translucent.
Pour in vegetable stock and add bruised lemon grass stalk, sambal olek, slit green chillies and crushed ginger. Bring it to gentle boil.
Mix in noodles, red bell pepper, crushed peppercorns, soya sauce and salt to taste. Cook on a medium heat till noodles are cooked.
Add pak choi, spring onion and cook for another minute or two.
Switch off the flame and discard the lemongrass stalk and crushed ginger. Mix in lemon juice and basil and serve hot.

Update:
With my nose and brain blocked, I kind of forgot to thank Sig for sending me this cute You Make Me Smile Award. Thank you sweetie for this award (You can send me the confession mail stating whether I really make you smile. I cross my heart and promise not disclose the contents of your mail). Well, it really means a lot to me when somebody says I make them smile and I take it as a great compliment. And the big surprise (read shock;) was there are some people who really read my l-o-n-g posts filled with everything under the sun. Boy!!! You guys really have patience ;) So thank you for reading my rants and continue to knock on my door in spite of driving you all mad with my non stop talking. Now to keep my reputation I think I need to post some jokes instead of my monologues dialogues to make you all smile! And I am passing this award to all you people who make me smile with your wonderful comments, suggestions and feedbacks. So spread the smile around because that’s what the world really needs.

18 February, 2008

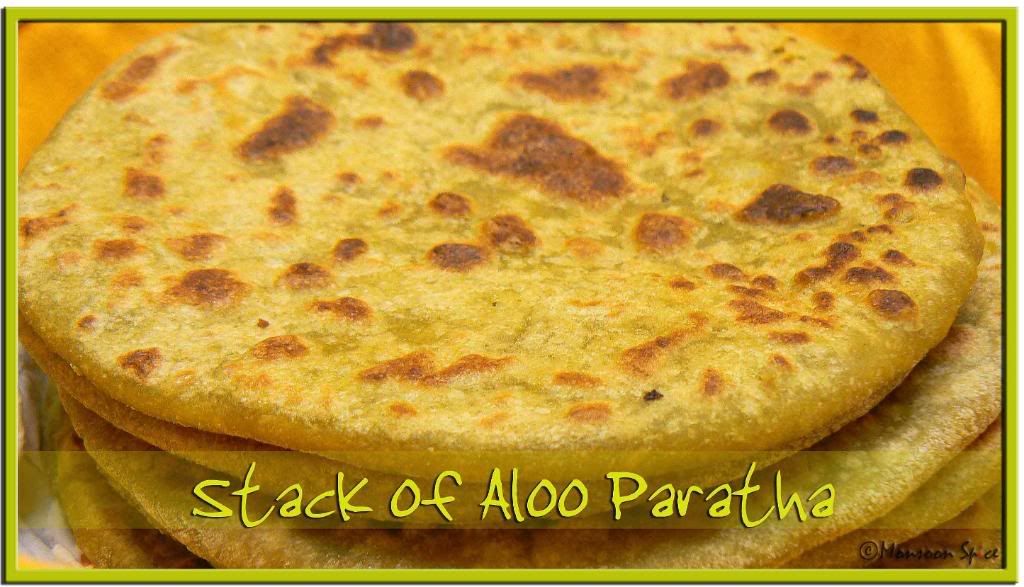
Finally... I did it: Aloo Paratha

Photobucket

Stack of Aloo Paratha

I have had seen his larger than life pictures in many blogs, glossy cookbooks and magazines, cooking shows. He had tempted and seduced me enough to touch his well toned body, caress his face, and smell his heavenly fragrance! Oh!!! How badly I wanted him. He was always out of my reach and it was my friends whom he favoured. I envied them and the way they seemed to compliment each other. He never seemed to mind the way my friends treated him and never complained about it when most of them seemed to take him for granted. I never knew I was capable of loving someone so much but all I could do was admire him from distance. I was scared of rejection and couldn’t bear the thought of him or my friends laughing at my poor attempt to attract him. I had attempted few times to lure him and failed miserably until two months back… Yes, at last I conquered my fear of rejection and I can’t stop beaming stupidly. It was just few weeks back that I got hold of necessary ingredients to get his attention and since then there is no looking back. Like every fairly tale or M&B's it is happily ever after for me and my round, dark, handsome Paratha!!!


Mastering the art of making perfectly round, well shaped Paratha is not an easy task. And it’s more so when you make stuffed parathas. My Roties and Chapattis are (in)famous among my friends as they use them as examples for Geography classes. It seemed I somehow didn’t manage to inherit ‘perfect round chapatti rolling’ genes from my Amma. To make things worst, it seemed I skipped making ‘soft chapatti’ genes too. There was no trick and tips that I didn’t follow to get soft, round chapattis and the more I tried, the more it resembled some country map. Just when I was thinking of shooting the person who said ‘practice makes perfect’ everything changed drastically. Nope, I didn’t stop making chapattis. I just happened to find the purr-rrr—fect Atta (whole wheat flour). Well, I am not kidding when I say that 90% of credit goes to Atta for delicious Roti/Chapatti/Paratha I make. Using good quality Atta has always been the secret for soft, fluffy roties which you can tear using your thumb and fore finger. Three brands which Amma likes in India are Pillsbury Chakki Fresh Atta, Annapurna and ITC’s Ashirwad. I use Pillsbury Chakki Fresh because that’s the only brand I get in my Indian grocery store and I am happy with the soft, fluffy chapattis it makes. And since then it’s been stuffed Parathas at our place every weekend. Don’t be surprised if you see Stuffed Paratha Parade coming in Monsoon Spice because I am kind of enjoying (read obssesed with) making stuffed parathas these days. And please do share about the brand of Atta, little tricks and tips you follow at your home to make soft, fluffy roties. :)


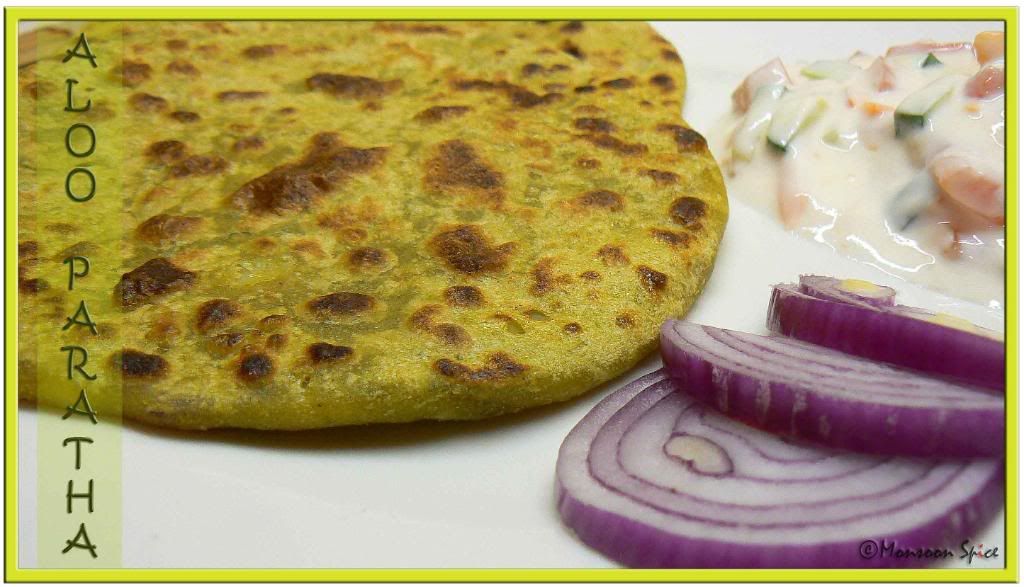
Today I am posting Aloo Paratha. I used Fresh Green Peas in Atta to give it colour, taste and also little boast of nutrition. The green chillies give bit of heat and mint leaves gives little kick of freshness to the dough. The filling I used is usual mashed potatoes flavoured with kalonji and jeera powder. You can also add Garam Masala if needed but I like the subtle flavours of pungent garlic and hing which compliments sweet taste of potato. This Aloo dish is my humble entry for my an Ode to Potato event and lovely Dhivya's The Potato Fe(a)st.

Photobucket Print This Recipe
Aloo Paratha
Prep Time: 20-30 mins
Cooking Time: 15-30 mins
Makes: 10 Medium Parathas

Ingredients:
For Dough:
3 cups Chapatti Atta/Whole Wheat Flour
1 cup Fresh Green Peas
2 Green Chillies
Few Fresh Mint Leaves
Salt to taste
Warm water to knead

For the Stuffing:
2 large Potatoes
2 tbsp Onion, finely chopped
2 Green Chillies, finely chopped
1 tsp Garlic, finely chopped
¼ tsp Amchur/Dry Mango Powder
¼ tsp Nigella Seeds/Kalonji
A big pinch Hing/Asafetida
½ tsp Jeera/Cumin Powder
½ tsp Turmeric Powder
½ tsp Jeera/Cumin Seeds(Optional)
1 tsp Oil
Salt to taste
Photobucket
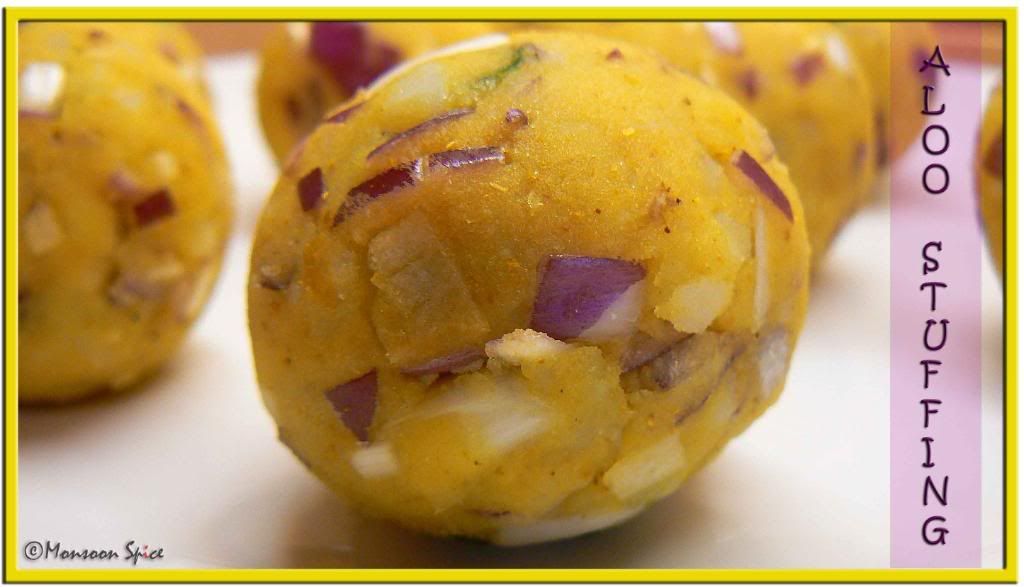
Aloo Stuffing

Method:
For Dough:
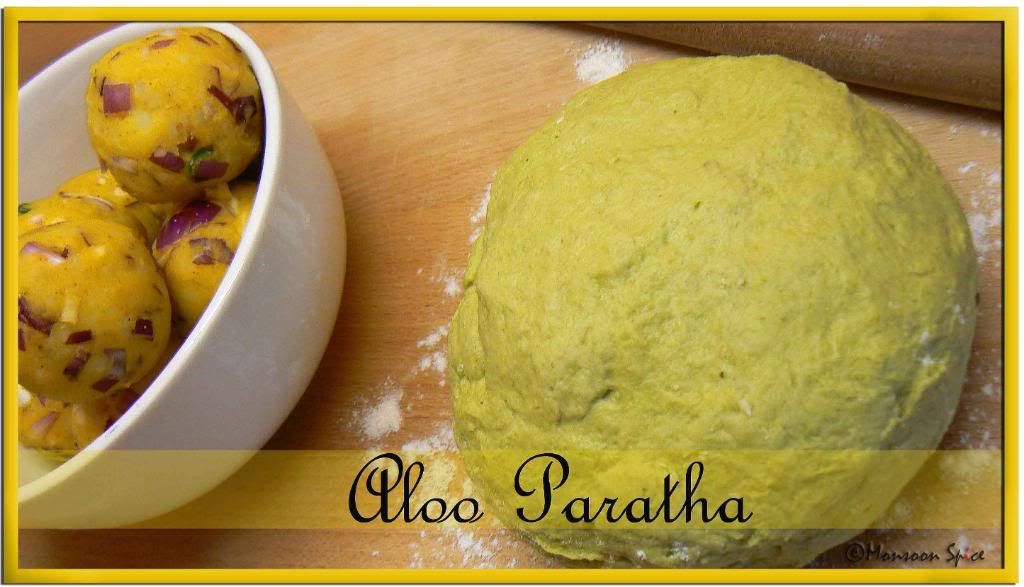
Grind fresh/frozen green peas with green chillies and mint leaves to smooth paste adding very little water.
Sift chapatti atta, salt to taste and make stiff dough by adding green peas puree and warm water as needed. Cover the dough with wet cheese cloth and keep it aside in a warm place for at least half an hour.

For the Stuffing:
Cook potato chunks with little salt and turmeric powder. Drain water, cool completely and mash it with a wooden masher without leaving any lumps.
Mean while heat oil and add jeera and kalonji. When they sizzle add finely chopped garlic, green chillies and onion and sauté for few seconds. Switch off the flame and mix jeera powder and amchur.
Transfer these contents to mashed potatoes and mix well. Make small lemon sized potato balls and keep aside.

Photobucket
Aloo Paratha- Work-in-Progress

To Make Stuffed Paratha:
Take dough and knead again for about minute and make big lime sized balls.
Dust it with wheat flour and roll it into thick poories of about 4 inch in diameter.
Place the Potato balls in center. Cover and seal the ends and roll again, dusting flour if necessary, into ½ cm thick roties using rolling pin.
Heat a griddle at high flame and lower it to low-medium flame.
Place Stuffed Paratha on griddle and cook on both the sides till its cooked and brown spots start to appear on top. Apply little ghee/oil if desired.
Serve hot Aloo Parathas immediately with any curry or with plain yogurt and pickle of your choice and enjoy.

Photobucket
Aloo Paratha


Note:
Before mashing the potatoes let them cool completely. This way the filling will remain dry and filling will not ooze out from covering.
Make sure that the potatoes are mashed without leaving any lumps. This helps in rolling the parathas with even surface.

15 February, 2008

With Love: Khandvi

Photobucket
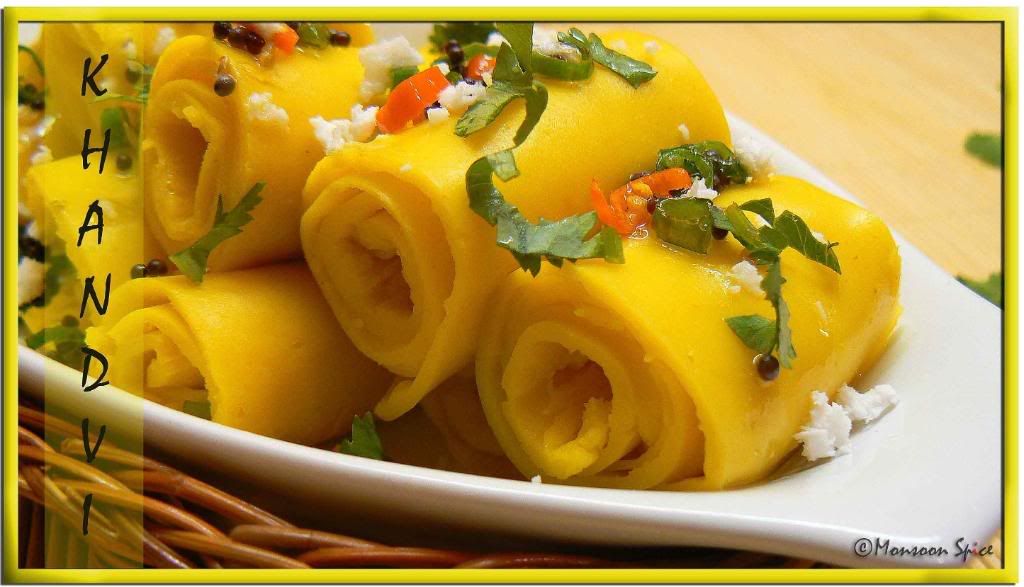
Microwave Khandvi

We meet hundreds and thousands of people all around the globe but there are only few who leave their foot prints in our heart. One such person is Trupti of The Spice Who Loved Me. We both started our food blogs together and I can’t remember who was the first one to leave a note in our blogs. With in few days we were exchanging mails and chatting for hours on internet. Her love and passion for Gujarati food was evident when ever she posted a recipe in her blog and it was her simple recipes with detailed descriptions which attracted hundreds of amateur cooks like me to try and create wonderful Gujarati fair. It was always her blog which helped me to cook and impress my Gujju friends. She is a very special friend of mine whom I am missing a lot while writing this post. Although she no more blogs due to some personal reasons, I wish her all the luck and happiness. Dear T, this is to you and our friendship which I treasure.

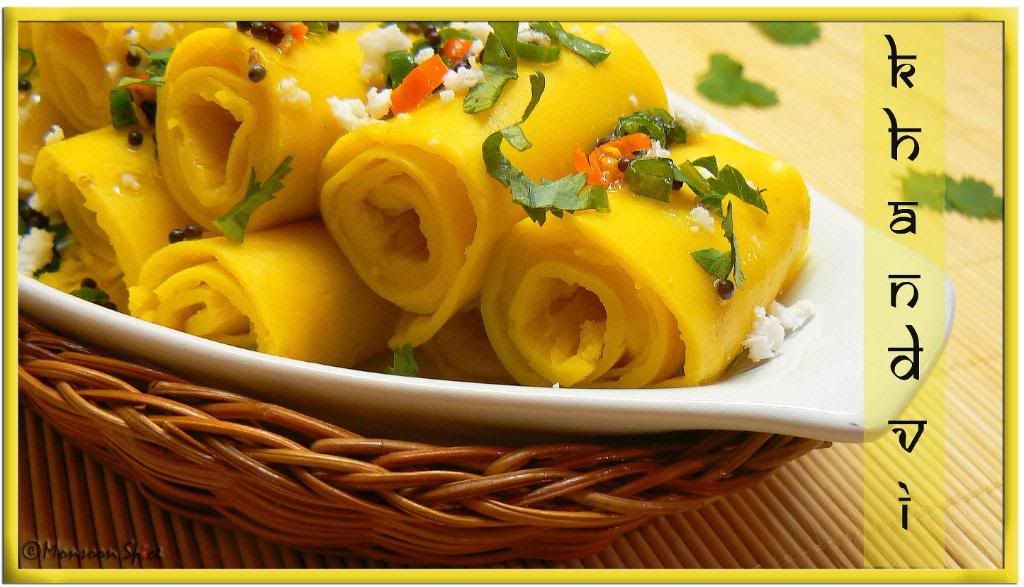
Khandvi is Gujarati delicacy made using Gram Flour/Chickpea Powder and flavoured with tempering of pungent mustard, spicy green chillies, sweet coconut grates and aromatic coriander leaves. Although I had tasted Khandvi made by my PG owner, I never ventured into making it at home thinking it’s far from my reach to get those seductive spirals. Then one day while browsing for recipes I came across this Microwave Khandvi and I could no more resist the temptation. The ingredients listed and the method sounded simple enough to give it a go. I gathered all the courage I could muster and prayed before venturing into making it. It was fun watching thin batter turn thick paste when cooked in microwave without wasting my elbow grease and then spread them thinly on my glass chopping board (I thanked my Amma at that moment for teaching me Dosa making skill;). The best part was to cut them into thin stripes and roll them without much fuss!!! Yes, I did it and I feel like I am on top of the world (Oh, all you Khandvi experts can stop making faces and rolling their eyes :P). Here I proudly present fluffy, soft, melt in mouth and sinfully delicious Microwave Khandvi which goes to RCI-Gujarat hosted by lovely Mythili of Vindu.

Microwave Khandvi
Prep Time: 10 mins
Cooking Time: 15-20 mins
Makes: About 20 pieces

Ingredients:
For Batter:
1 cup Besan/Gram Flour
3 cups Sour Butter Milk/1 cup Sour Yogurt+2 cups Water
1-2 Green Chillies, ground to paste
½ inch Ginger, ground to paste
A big pinch of Hing/Asafoetida
A big pinch of Turmeric Powder
Salt to taste


For Tempering:
1 tsp Mustard Seeds
2-3 Green Chillies, finely chopped
1 tbsp Fresh Coconut grates
1-2 tbsp Coriander Leaves, finely chopped
1 tbsp Oil
Photobucket
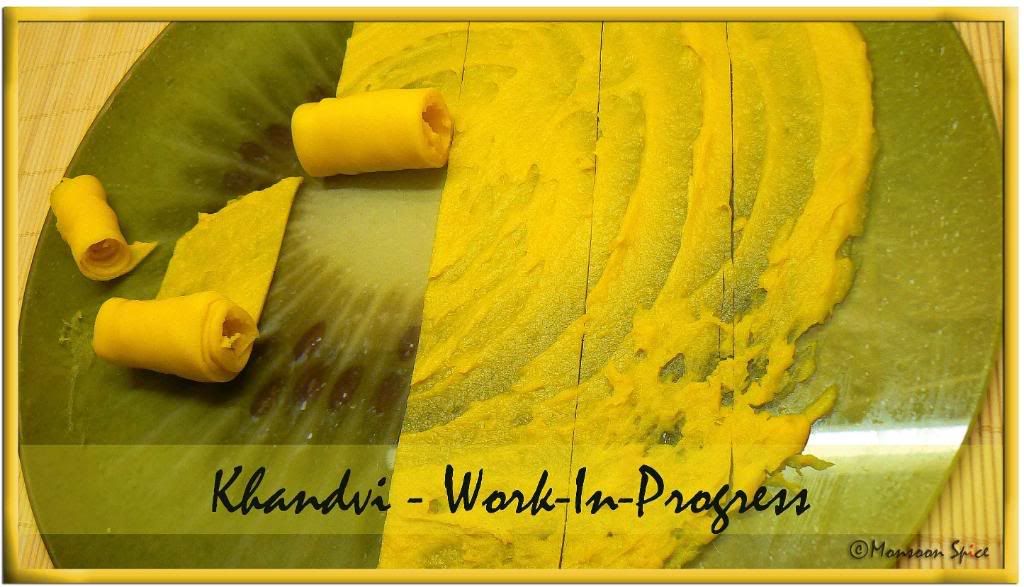
Khandvi - Work-in-Progress

Method:
Take gram flour, turmeric powder, chilli and ginger paste, hing and salt to taste in a microwave safe bowl and mix well. Add butter milk to the mixture and mix well with a egg beater or spatula taking care that no lumps is formed. The batter should be thin and flowing without any lumps.
Place the bowl in a microwave and cook at high speed for 5 mins. Remove the bowl and mix the contents well.
Mean while, keep ready 2-3 steel plates or glass chopping board as I have used and a spatula to spread the batter. Don’t grease them with oil.
Place again in a microwave and cook uncovered for another 5 mins. Mix well and check if you can spread them thinly on the back of steel plates or glass chopping board. If the mixture is still runny, place it again in microwave and cook for another 2-4 mins.
Spread the thick batter quickly on the back of steel plates or glass chopping bowl. Spread it as thinly as possible.
Let it cool for 2-3 minutes. Then slice them with knife into 2 inch long stripes and roll each stripe neatly. Place each rolls in a serving dish.
For tempering, heat oil in a skillet and add mustard seeds to it. When mustard starts to pop and splutter, add chopped green chillies and sauté it for few seconds.
Spread them evenly over rolled Khandvi. Serve them immediately garnished with coconut grates and chopped coriander leaves and enjoy.

Photobucket
Microwave Khandvi


Note:
Few things worth remembering when making Khandvi are
While preparing the batter make it lump free as it will help you to evenly spread.
Keep at least 3 steel plates or smooth surfaced utensils ready before you spread the batter as it is important to spread the batter before it cools down and it is difficult to spread cooled batter thinly and evenly.
Other Popular Gujarathi Recipes in Monsoon Spice

13 February, 2008

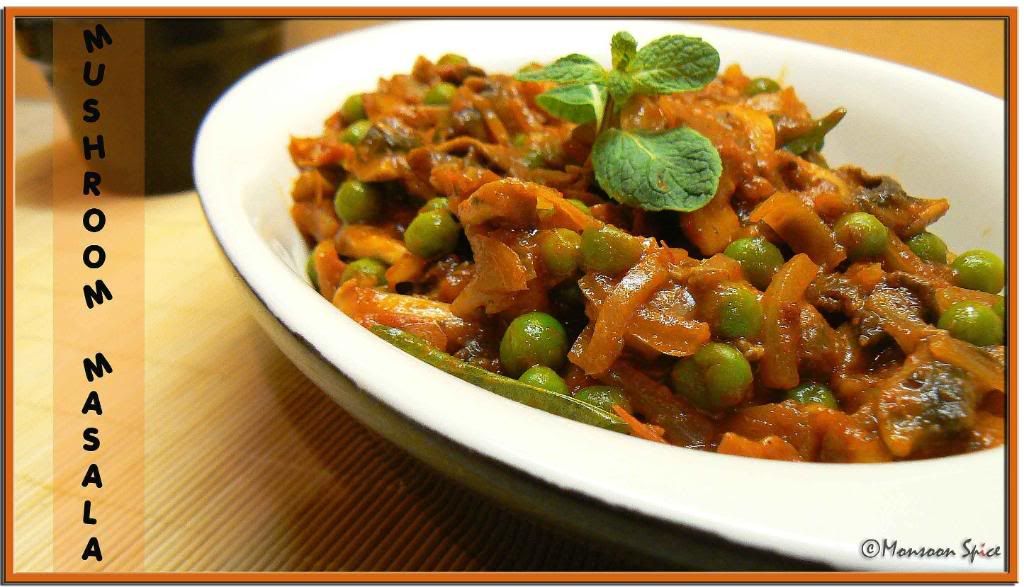
A Self Proclaimed Foodie: Spicy Peas-Mushroom Masala

Photobucket
Spicy Peas-Mushroom Masala

What are you?
A foodie, or the gourmet, or the gourmand?
gour•met
noun
- A connoisseur of fine food and drink; epicure
adjective
- Of or characteristic of a gourmet, esp. in involving or purporting to involve high-quality or exotic ingredients and skilled preparation: gourmet meals; gourmet cooking.
- Elaborately equipped for the preparation of fancy, specialized, or exotic meals: a gourmet kitchen.

gour•mand
noun
- A person who is fond of good eating, often indiscriminatingly and to excess.
- A gourmet; epicure.

food•ie
noun Slang
- A person keenly interested in food, esp. in eating or cooking.
- A person devoted to refined sensuous enjoyment (especially good food and drink)
What would you call yourself, a foodie or the gourmet or gourmand? Well, I never would have thought about it until few months back when I was asked the same question by my colleague and then dear blog friend. All I knew was I loved food, both cooking and eating it. I would rather have a big plate of food which makes me feel good and content than sampling few tea spoons of fancy food. I would rather go for a double cheese burger or pizza with bunch of my friends’ right in front of the TV than eat three course meals at some quiet fancy restaurant. I would rather drink a bowl of hot ‘n spicy Rasam than sip some fine wine and I would gladly eat Curd rice with pickle than taste samples of fine cuisine. It means my love for food is not restricted to fine gourmet cuisine although I do love to indulge myself sometimes.

Whenever I think of food, I crave for some homemade simple foods than fancy eye candies. It’s the simple, comfort food that makes me happy and warm when I am hungry. So I can happily say that I am a foodie through and through. Well, what else would you call a person who talks about food, daydreams of food and loves to cook food? A foodie right? And to top it all my blog is dedicated to foodie’s food :) So what would you call yourself? A foodie or the gourmet or the gourmand?

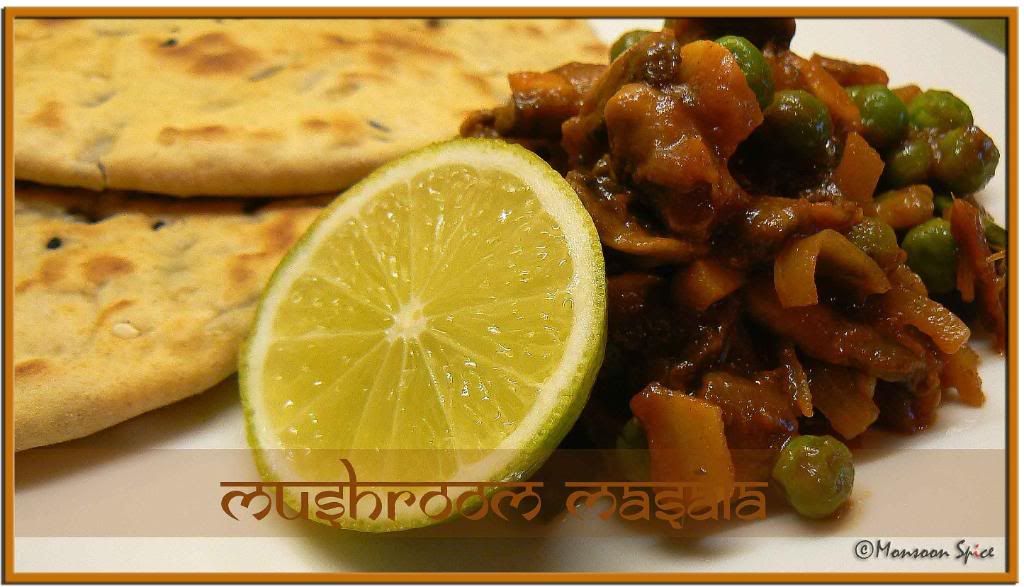
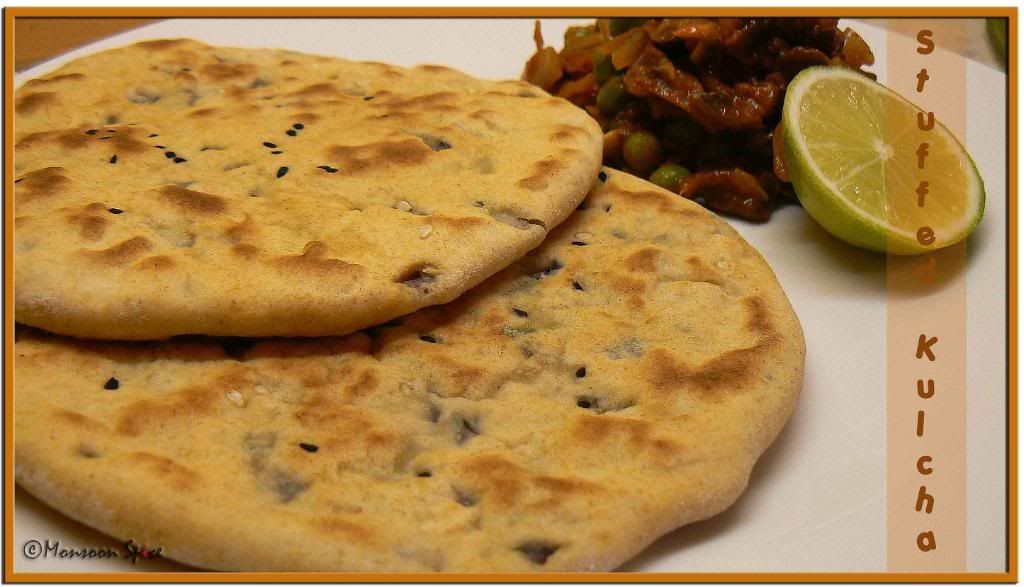
Life’s been hectic since couple of weeks and Krish and I are spending very little time in kitchen during weekdays. When life gets hectic and you don’t have enough time to itch your a$$, all you want to cook and eat is something which is quick yet tasty. Spending little time in kitchen doesn’t mean that we are hogging some burgers and wedges or frozen pizzas (I am on diet remember?). Far from that we are eating some healthy food. Again, healthy food is not restricted to green salad or fruits tossed in our bowl but some sinfully delicious food with a touch of exotic spices. I had a big batch of frozen Tofu Stuffed Kulchas in freezer and it was begging to be eaten with some spicy curry. All I was left in fridge was a box of button mushrooms and tomatoes. With quick brainstorming session, Krish and I ended up making this Spicy Peas-Mushroom Masala which tasted great with Kulchas. The crisp onions and tangy tomatoes were well balanced with chewy mushrooms and exotic spices. Do give it a try if you love mushrooms and peas like me and I can guarantee that you won’t be disappointed.

Photobucket Print This Recipe
Spicy Peas-Mushroom Masala
Prep Time: 5 mins
Cooking Time: 15 mins
Serves: 3-4

Ingredients:
1 box Mushroom (approx 4-5 cups), quartered
½ cup Green Peas, fresh/frozen
1 large Onion, sliced thinly
2 large Tomatoes, finely chopped
2-3 Green Chillies, finely chopped
½ inch Ginger, finely chopped or ½ tsp Ginger Paste
1 tbsp Garlic, finely chopped or ½ tsp Garlic Paste
1-2 tbsp Tomato Paste
1 tsp Kashmiri Chilli Powder
¼ tsp Turmeric Powder
½ tsp Black Pepper Powder
½ tsp Garam Masala
½ tsp Kitchen King Masala
½ Lime Juice/ ½ tsp Amchur Powder
1 tbsp Kasuri Methi (Optional)
1-2 tbsp Coriander Leaves
Few Curry Leaves (Optional)
1 tsp Jeera/Cumin Seeds
½ tbsp Oil
Salt to Taste
Photobucket
Spicy Peas-Mushroom Masala with Tofu Stuffed Kulcha

Method:
Heat oil in a pan and add cumin seeds and curry leaves to it. Add sliced onion and chopped garlic when cumin seeds start to sizzle and sauté it on medium flame till onion turns translucent.
Add chopped green chillies and ginger and sauté it for about 30 secs. Mix in quartered mushrooms and sauté on medium flame for 2-3 minutes till the mushrooms are wilted and wrinkled.
Mix in green peas, chopped tomatoes, tomato paste and salt to taste and cook for about 2 minutes on medium flame till tomatoes get pulpy and releases its juice.
Add chilli powder, turmeric powder, black pepper powder, garam masala and kitchen king masala and mix well. Cook for another 4-5 minutes till all the flavours blend well.
Add kasuri methi and juice of half a lime and mix well. Cook for another two minutes on a reduced flame.
Serve hot Spicy Mushroom Curry garnished with chopped coriander leaves with Roti/Kulcha of your choice.

09 February, 2008

Weekend Musings: Eating Dirt!

Location: Port-Au-Prince, Haiti
It is lunch time in Haiti’s slums. You can see round swirls of dough which are arranged in rows and columns, baked in the hot sun. From distance they might look quite appetizing to you. As you move closer to the spot you'll suddenly realise your appetite has died down when you learn the ingredients used to make these cookies. These cookies are made of butter, salt, water and one main ingredient. No, the main ingredient used is not flour but clay/dirt!!! Sometimes crumbled foil-wrapped cube of bouillon are added into the mixture, which they stir, shape into discs the size of a saucer and leave to bake in the Caribbean sun. With food prices rising, Haiti’s poorest can’t afford even a daily plate of rice, and some take desperate measures to fill their bellies by eating these clay cookies.


Photobucket
Yolen Jeunky, 45, collects dried mud cookies to sell in Cite Soleil in Port-au-Prince.
Img Source: MSNBC

Haiti is the poorest country in the western hemisphere. More than 76% of the Haiti population lives on less than $2.25 a day. Each and every day the number of people eating these mud biscuits for survival is increasing at a steady pace. To make these mud cookies the mud, which comes from Haiti's central plateau region, is first strained and then shaped into biscuits which are then left in the sun to bake.

It is not just recently that these pale brown biscuits known by locals as "terre", have been consumed by the local people. Before the food price hiked in Carribean countries, these mud cookies have traditionally been eaten by pregnant Haitians and children as an antacid and source of calcium. But in recent years, many Haitians unable to afford even a plate of rice, ‘terre’ has become their staple diet. A reporter who sampled these cookies found it had smooth consistency and they suck out the moisture from the mouth when they touch the tongue, leaving unpleasant earthy aftertaste that lingers for hours.


"The Food and Agriculture Organisation recently declared a state of emergency in Haiti. According to the U.N. agency, food prices have gone up by almost 40 per cent in the wake of floods and crop damage caused by hurricanes."


Also food prices around the world have spiked because of higher oil prices which is needed for transportation, fertilizers and irrigation. Even prices for basic ingredients like corn and wheat are also sharply risen which in turn is pressuring global food market.

At Caribbean countries, this hike in food price is clearly visible as these island nations depend on imports. At the markets in Haiti’s slum, two cups of rice is being sold at the price of 60 US cent, already hiked by 10 cents since December and 50% from a year ago. Other staples like beans, milk and fruit have shot up at a similar rate and shockingly even the price of the clay used in making these mud cookies has increased! Dirt to make these mud cookies now costs $5 and these cookies are sold at about 5 cents a piece which is a bargain for many Haitians when compared with staples.

In a world where the rich spend millions on ways to avoid carbohydrates and calories, where obesity is declared as a global health treat, we are still unaware of these people who struggle each day just to get enough calories to survive. Next time, when you are about to throw food in waste bin, please think of these ‘dirt-eating’ people.

More Reads: Mud biscuits in Haiti

07 February, 2008

Bitter Love: Bitter Gourd Saaru & Chips

Photobucket
Bitter Gourd Marinated in Salt

Bitter gourd, either you love it or hate it. I have seen many people who initially hated this bitter, odd looking vegetable and lately fall in love with it. It takes many meals over years to develop a taste for Hagalakai, as we call it. But there are some who still don't seem to come in terms with this vegetable even after they have had upgraded their wardrobe from sneakers to tailor-made pants;) Unlike my siblings, who are still struggling to acquire taste for this vegetable, I have grown up appreciating its rich bitter and pungent flavour for some strange reasons which are unknown to me. I was always a picky eater as a kid and my love for this bitter vegetable was unsolved mystery to my parents. Every fortnight my Amma made it a point to cook some bitter vegetables and bitter gourd always topped the list. We always had bumper crop of bitter gourd growing in backyard and hence there was no chance of Appa pretending to have amnesia when asked to buy them. The vegetable is reported to be a blood purifier, digestion enhancer and stimulating agent of liver. And now when your read how good Bitter Gourd is for your health, all grown-up and mature ME (!!!???) can’t ignore it right? No fat chance!

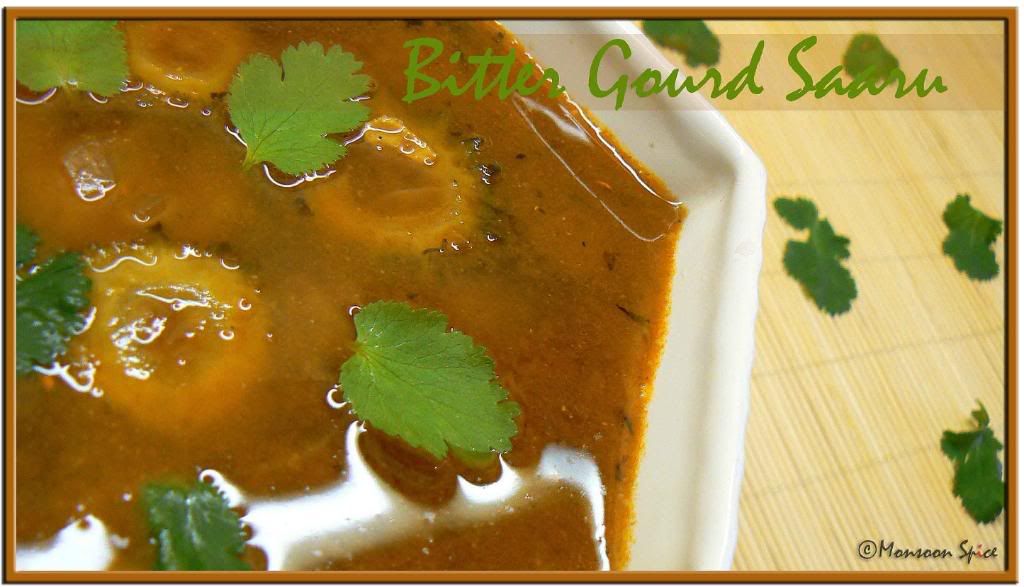
When my sister and brother would run a mile at the bare mention of this vegetable, I would happily lick my plate clean whenever Amma made Bitter Gourd dish. One such recipe from my mother’s large collection is Hagalakai Saaru, roughly translated as Bitter Gourd Rasam where bitter taste of Bitter Gourd is lightly concealed with the sweet Jaggary, sour Tamarind and spicy blend of spices. This mixture of five flavours- bitter, sweet, sour, salty and spicy defines the taste of life in a bowl. I love to eat this lightly bitter, spicy, tangy, sweet Saaru with aromatic Basmati rice with a dollop of Ghee and Tender Mango Pickle.

Photobucket Print This Recipe
Bitter Gourd Saaru
Prep Time: 10 mins
Cooking Time: 20-25 mins
Serves: 4-5
Ingredients:
2 medium Bitter Gourd
1 medium Onion, finely chopped
½ tbsp Garlic, finely chopped (Optional)
2 Green Chilli, slit
½ inch Ginger, crushed and chopped
1 small Lime sized Tamarind
1-2 tbsp Jaggery (Adjust acc to taste)
½ - 1 tbsp Rasam Powder
¼ tsp Turmeric Powder
¼ tsp Chilli Powder (Optional)
1 tbsp Coriander Leaves, chopped
Salt to taste

For Tempering:
1 tsp Mustard Seeds
1 Dry Red Chilli
A big pinch of Hing/Asafoetida
Few Curry Leaves
1 tbsp Oil
Photobucket
Bitter Gourd Saaru

Method:
Cut thin round slices of bitter gourd, about 1 packed cup, and add little salt to it. Mix well and keep it aside for at least 30 mins. This way the bitter taste of bitter gourd will be released from them.
After 30 minutes or so squeeze as much of water as possible from these bitter gourd slices. Wash them with cold water and drain and keep aside.
Mean while, soak tamarind in hot water for about 10 minutes and extract its juice and keep it aside.
Heat oil in a pan and add mustard seeds to it. When mustard starts to pop and splutter, add halved dry red chilli, hing and curry leaves. Sauté it for few seconds.
Mix chopped onion, garlic and sauté on medium flame till they leave raw smell and lightly browned.
Add slit green chillies, bitter gourd slices, ginger and mix well. Keep sautéing for about 5 minutes till bitter gourd turns light brown.
Mix in tamarind juice, about 1 cup of water, jaggery, turmeric powder and salt to taste. Bring the mixture to gentle boil at medium flame.
If required add more water and add rasam powder and red chilli powder. Check for the seasoning and make changes according to taste. Cook on a low to medium flame for another 5 minutes and bring it to boil.
Switch off the flame and add chopped coriander leaves. Cover and let it sit for about 10 mins for the flavours to blend well. Serve hot with steaming bowl of rice and pickle and enjoy this bitter goodness.

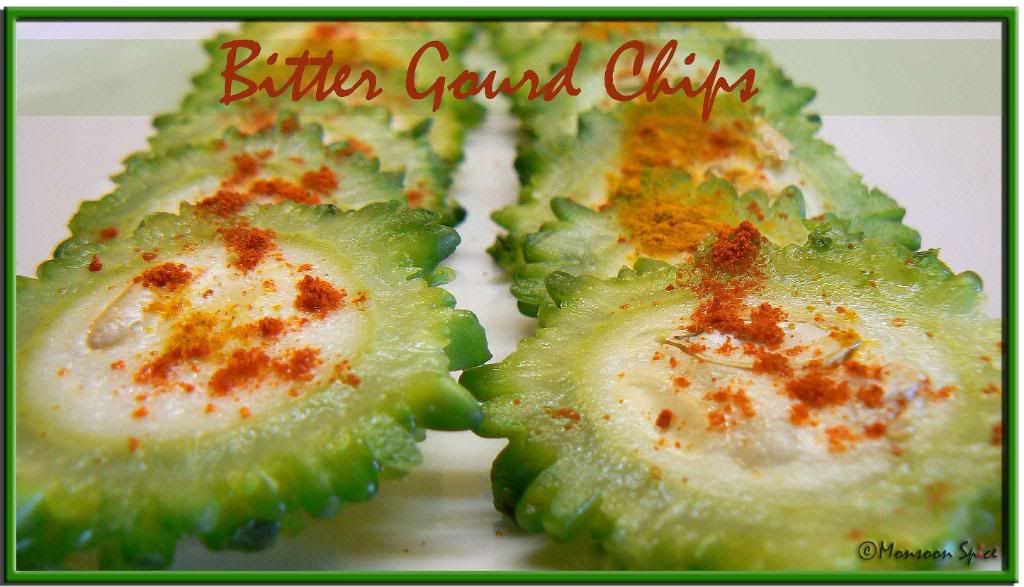
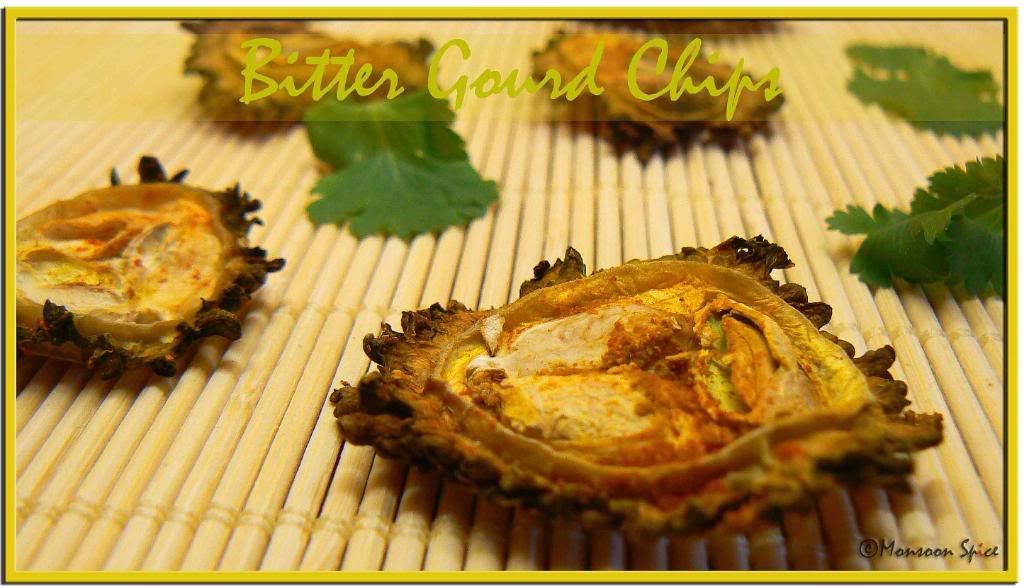
Another recipe I tried over weekend was Kay’s No Fry Bitter Gourd Chips. Being a bitter gourd fanatic I couldn’t resist trying this recipe which is not just simple to make but also uses very less oil and not much work is involved. I made little changes to the ingredients used and simply followed her recipe. Thank you Kay for this wonderful recipe. Try them to see how good they are.

Photobucket
Bitter Gourd Slices Marinated with Spices

Photobucket Print This Recipe
No Fry Bitter Gourd Chips
Prep Time: 5 mins
Cooking Time: 15 mins
Serves: 3-4
Ingredients:
2 Bitter Gourds
1-2 tbsp Oil
1 tsp Red Chilli Powder (adjust acc to taste)
½ tsp Turmeric Powder
¼ tsp Amchur/Dry Mango Powder (Optional)
Salt to taste
Photobucket
No Fry Bitter Gourd Chips

Method:
Slice bitter gourd to thin round slices using mandolin or knife.
Mix in oil, chilli powder, turmeric powder, amchur and salt and marinate for at least half an hour.
Pre-heat the oven at 375 F. Arrange the slices neatly in rows, on a foil covered baking tray and bake it in a middle rack of the oven for about 10 mins. Place the tray on top rack for 3-5 mins so that chips becomes crisp and brown or else broil them. Watch them closely and make sure that they don’t get burned.
That’s it. Serve bitter gourd chips with Rice and Rasam and enjoy.

04 February, 2008

Bending the Rules: Tofu Stuffed Kulcha

Photobucket

Tofu Stuffed Kulcha

Me: What? You can't be serious!
He: Why not?
Me: I am not sure…
He: Common, no one will know…
Me: I am scared!
He: Trust me.
Me: What if someone comes to know?
He: I am sure we are not the only one who have done it.
Me: But it’s not right. Society will never accept it. Oh! It’s a sin.
He: Now, now… look at me. Do you want me to die without experiencing how it would have been?
Me: No!!! Please don’t say that…
He: I have got only 2 more days to live. Won’t you fulfill my last wish?
Me: Oh!!! Of course I want to…


And that’s how he left this world, just two dates before his expiry date. And oh!!! If you are wondering whether it’s some scene from Bollywood movie then you are wrong. I call him Mr. T with love who is known to rest of the world as Tofu. He left this world knowing he had left wonderful memories for me.


Tofu, also known as soybean curd and bean curd is made from curdled soy milk. This custard like white block is high in protein, low in salt and calories and has no cholesterol. By itself Tofu is quite bland and hence it readily picks up the flavour of other ingredients that are cooked with it making one pleasurable, guilt free indulgence.


After cooking Tofu with different techniques pairing it with different ingredients using different regional recipes, I wanted to try something new. Since couple of months back I am using Tofu in Indian cooking and it is pure pleasure to watch it beautifully blend with Indian spices and take us on a roller-coaster ride in taste department. It tastes great when used in Chinese and Thai recipes and it excels when blended with rich Indian spices. Initially I started experimenting by replacing Paneer, Indian cottage cheese, with Tofu. Slowly I started using it boldly with different traditional recipes which our ‘Purist’ cyber aunties would disapprove of and ban me from posting it.


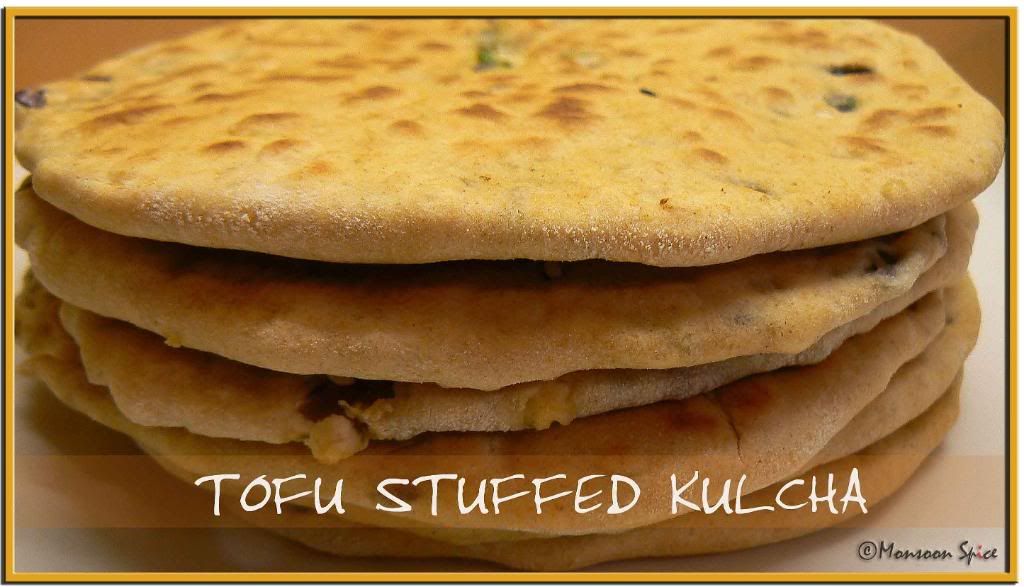
Soft, delicious and aromatic Tofu Stuffed Kulcha is a winner recipe. With much less calories and high in protein content, this recipe was created at nth moment. At spur of a moment I made these Kulchas as I was left with half a pack of left over Tofu which had less than two days of shelf life. And boy!!! Am I happy or not! Although I was little hesitant to use tofu this way the end result was much more than we could ask for. This recipe is a keeper for sure. Served with delicious and spicy Mushroom Curry (Recipe follows soon) it was one satisfying weekend meal.

Photobucket Print This Recipe

Tofu Stuffed Kulcha
Prep Time: 20 mins (Excluding resting time)
Cooking Time: 10-15 mins
Makes: 6-7 Medium Kulchas
Ingredients:
1 tsp Nigella Seeds
1 tsp Sesame Seeds
Little Ghee/Oil (Optional)

For Outer Covering/Dough:
1 cup Whole Wheat Flour
1 cup All Purpose Flour/Maida
2 tbsp Yogurt
¼ cup Warm Milk
½ tsp Cooking Soda
½ tsp Baking Soda
1 tsp Salt
Warm Water to knead
1 tsp Oil

For Stuffing:
1 packed cup Tofu, crumbled
1 small Red Onion, very finely chopped
¾ tbsp Garlic, very finely chopped
2-3 Green Chillies, finely chopped
1 tbsp Mint Leaves, finely chopped
1 tbsp Coriander Leaves, finely chopped
½ tsp Jeera/Cumin Powder
¼ tsp Amchur/Dry Mango Powder (Optional)
1 tsp White Pepper Powder (Optional, use any spices/masala of your choice)
Salt to taste
Photobucket
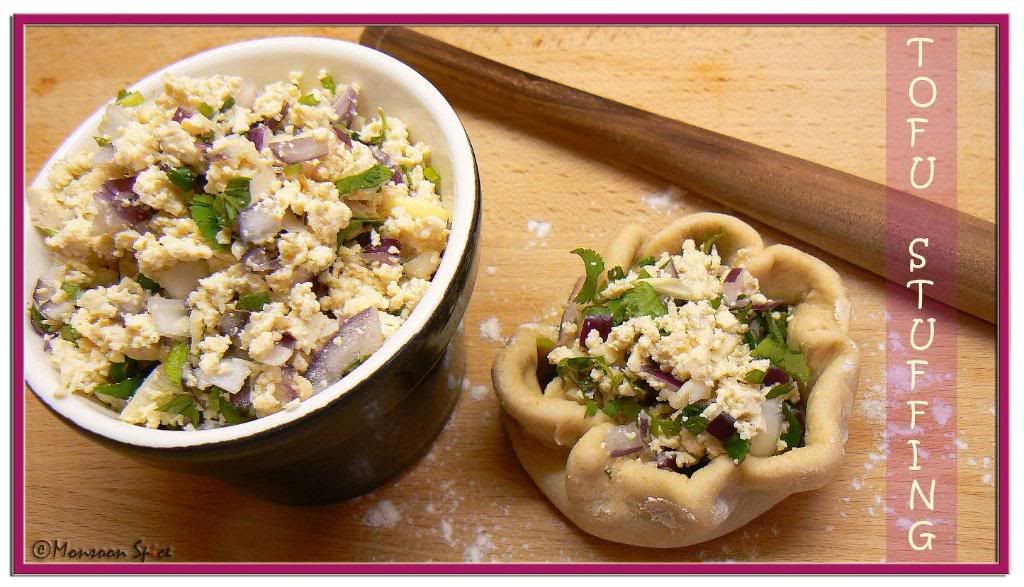
Tofu Stuffing

Method:
For Dough:
Sift wheat flour, maida, cooking soda, baking soda and salt.
Make a well in center and add yogurt and warm milk.
Knead the dough adding little water at a time to make soft pliable dough.
Apply oil on the surface of dough and keep it wrapped in cotton towel or cling film.
Let it rest for at least one hour.

For the Stuffing:
Squeeze as much of water as possible from tofu as the water content in tofu will make the kulcha go soggy.
Once it’s done, crumble the tofu with hands, and take about one packed cup of tofu crumble.
Take all the ingredients in a vessel and mix well. Remember to chop the vegetables very finely so that it becomes easier to stuff and roll.

To make Stuffed Kulcha:
Take dough and knead again for about minute and make big lime sized balls.
Dust it with wheat flour and roll it into thick poories of about 4 inch in diameter.
Place about tbsp of tofu mixture in center. Cover and seal the ends and roll again, dusting flour if necessary, into ½ cm thick roties using rolling pin.
Sprinkle little nigella seeds and sesame on top of roties and lightly press them using rolling pin.
Heat a griddle at high flame and lower it to low-medium flame.
Place Kulcha on griddle and cook on both the sides till it’s cooked and brown spots starts to appear on top. Apply little ghee/oil if desired.
Serve hot Tofu stuffed Kulchas immediately with any curry or your choice and enjoy.

Photobucket
Tofu Stuffed Kulcha


Note:
Keep the stuffing as dry as possible. If it has too much of moisture/water content then it becomes difficult to roll them as the moisture will make the Kulchas soggy and they might tear while rolling oozing the stuffing.
Keep the center of Kulcha little thicker than the ends before stuffing as when you cover and seal the ends you will get even thickness at both the sides.
Resting the dough for at least an hour makes soft Kulchas.
Usually an egg is added when making the dough but I usually avoid adding it.

03 February, 2008

Time Stands Still...

How strange that Nature does not knock, and yet does not intrude!
~Emily Dickinson

Photobucket
Location: Wayand, Kerala, India
Click Here to view enlarged image

How glorious a greeting the sun gives the mountains!
~John Muir

Photobucket
Location: Wayand, Kerala, India
Click Here to view enlarged image