27 May, 2008

Announcing MBP-June

Update:
With many requests pouring into my mail box, I am extending the deadline for MPB-Street Food to 30th June, 2008. So foodies, you still have got one more week to indulge yourself with all delicious Street Foods from fellow blogger’s blog. Please don’t forget to go through the guidelines and mail me the details.

Is your bookmark page is over-loaded with recipes to try? Mine is. Every day it’s the same old story. Blog hop and bookmark mouth watering recipes which has grabbed your full attention. With so many recipes bookmarked I always look forward to participating in Coffee’s Monthly Blog Patrolling a.k.a. MBP. Here is one event which encourages us to cook something from our fellow bloggers blog which you had meant to try for ages but had no time till date. This is one event which not only gives you a chance to explore the food blog world but also spreads link love. And I am proud to be guest hosting June edition of MBP and this month’s theme is Street Food.

The term "street food" best describes the casual, delicious and local cuisine sold in stalls, carts and open air markets around the world. Chats and Kebabs from India, hotdogs from New York, Mexico’s mango on a stick, stir-fries from china, caramel-filled stroopwafels at an Amsterdam stand—street food is convenient, finger licking delicious, cheap(no pun intended) and tantalizing. From full meals to simple snacks to fast refreshers, the street food has it all. Well, I am a die hard fan of Street Food and I know many of you out there share this love for Street Food. So my dear friends hop around the food blogsphere, cook your favourite Street Food from fellow blogger’s blog and post it on your blog. Chats, Dosas, Stir Fries, Pakodas, Kebabs, Hotdogs, Kulfi, anything your tummy begs and heart desires and spread link love. Please carefully go through the guidelines posted below and send in your entries.
Photobucket


Here are the Guidelines:
1. You have to cook something from the fellow bloggers (the “from” has to be a blogger and not any other cooking site!!) posted recipes.
2. Please link back to this announcement page and/or the logo below, and also to Coffee’s MBP announcement page.
3. Post a picture of the final recipe on your blog linking it to the blogger (whose recipe you made) and to this event. You can either post the full recipe or just the picture of final recipe; it’s entirely up to you to decide. But one final picture of the recipe and a link to the blogger whose recipe you made and this event is a must. Please highlight any changes made to the original recipe in your post.
4. Email the following details to sia[at]monsoonspice[dot]com with MBP-Street Food as the subject line by 30th June.
  • Your name
  • Your blog name
  • Name of the Recipe
  • Permalink of your post
  • Permalink of the original recipe
  • A photograph of the final dish (Any size is fine. Don’t worry about resizing the image.)
5. Please remember that the deadline for this event is 30th June, 2008 and no late entries will be entertained. I'll not include your entries in the round-up unless I get them through emails as it's not feasible for me to check individual blogs and pick your entries. I will post the final round-up in first week of July.
6. There is no limit to the number of entries that you might want to contribute. If you don’t have a blog but wish to participate in this event, send your entries with a picture, your name and recipe to sia[at]monsoonspice[dot]com before the deadline. I will post the recipes with your picture in my blog and include it in the round-up.

Simply copy and paste the below code to your post to use this logo.

MBP-Street Food:

Photobucket


So friends, don’t delay. Start little bit of blog patrolling and send in your entries. Thank you Coffee for this opportunity.

22 May, 2008

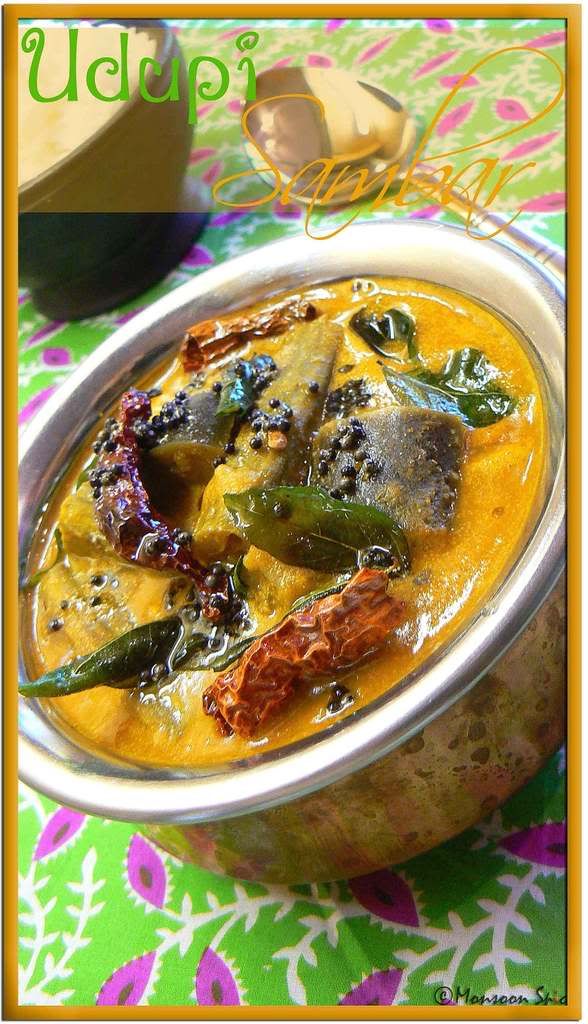
From the Temple Town: Udupi Sambar

Photobucket
Udupi Sambar

Tucked in between the majestic mountains of Western Ghats on the east and mighty Arabian Sea on the West, there is a beautiful small town called Udupi. There are not many places like Udupi that has rich history, colourful diversity, vibrant people, virgin beaches, incredibly charming buildings and simply irresistible cuisine. I remember visiting the Krishna Temple with my parents and grandmother once in every six months when we were small and a walk on a Ratha Maarga (Chariot Street) was one of my favourite parts of the trip. Dad would take us to small shops on Ratha Maarga looking for any unusual piece of art and craft for his antique collection and promise us to take to our favourite hotel on a way back home for sinfully delicious, crisp Masala Dosa. A lazy stroll along the streets of Ashta Matha (8 temples) with Ajji while she narrated an amazing story of Saint Kanakadasa and Lord Krishna is something I will always cherish. It’s been quite some years since I visited the temple but the memories are as fresh as morning dew on rose petal.

Another part of our trip to Udupi that is one of my wonderful childhood memories is the food served at Udupi, be it at Krishna Temple or at my favourite restaurants Diana and Kidiyoor. For a foodie like me Udupi is food paradise. Even simple every day food has magical feel to it. According to history, the Udupi Cuisine has its origin in Ashta Matha’s of Udupi founded by the Vaishnavite saint Shri Madhvacharya in the 13th century. Locally grown grains, beans, vegetables and fruits are the hallmark of this divine cuisine. The world famous Krishna Matha/Temple is believed to be the centre of Dasa Saahitya, a form of literature originated in Udupi. And this same temple serves free food, called as Annadana, for thousands of devotees every single day. The temple food is simple with no frills. Rice, one or two Palyas (vegetable stir Fries), Rasam (thin, spicy Tomato Soup), Papad/Happala, Sambar (South Indian vegetable curry), Majjige Neeru (Spiced Butter Milk) and Payasam (Indian pudding) to finish this divine meal. This is one meal that not only satisfies your stomach but also touches your soul.

One such recipe is Udupi Sambar usually made with no onion and garlic at Krishna Temple. The following recipe uses small pink Sambar/Pearl Onions. The vegetables used here Brinjal and Drumsticks are made for each other. The tang of tamarind and tomatoes, sweetness of jaggery and coconut and heat from roasted spices complements each other in this coconut-lentil medley. Back at my native we use Udupi Gulla Badane which has got big seeds compared to usual purple eggplants we get here. Nevertheless, you can use any vegetables of your choice like gourds or pumpkins as it is on slight sweet notes. The ingredient list might scare you but trust me when I say it’s really simple to make. Serve it with lacy and crisp Dosas or fluffy and soft Idlis or just plain steaming bowl of white Rice and Ghee to enjoy this divine food straight from Temple Town, Udupi.


Udupi Samabr (Vegetable Coconut-Lentil based Curry from Temple Town, Udupi)
Prep Time: 15 mins
Cooking Time: 20-25 mins
Serves: 5-6
Recipe Source: Pachakam & Amma

Ingredients:
1 large Brinjal/Eggplant, cut into 1 inch cubes (Thai Green Eggplant or Udupi Gulla Badane is preferred)
3-4 Drum Sticks, cut into 2 inch pieces
10-12 small Sambar Onions/Pearl Onions, peeled or 1 large Onion, thinly sliced
2 large Tomatoes, cubed
2-3 Green Chillies, slit
½-¾ cups Toor Dal/Split Pigeon Pea/Red Gram, washed, pressure cooked with pinch of Turmeric Powder and tsp of Oil and mashed well
1 tsp Tamarind Paste/1 small lime sized Tamarind Pulp, soaked in warm water and juice extracted
1 tsp Jaggery (Adjust acc to taste)
½ tsp Turmeric Powder
Small bunch of Coriander Leaves, finely chopped
1 tbsp Oil (Preferably Coconut Oil)
¼ tsp Hing/Asafoetida
Few Curry Leaves
Salt to taste

For Udupi Sambar Powder:
1 tbsp Urad Dal/Split Black Gram
½ tbsp Channa Dal/Spilt Bengal Gram
2 tsp Jeera/Cumin Seeds
1 tbsp Coriander Seeds
½ tsp Methi/Fenugreek Seeds
4-6 Dry Red Chilli (Preferably Byadagi, adjust acc to taste)
1 cup Grated fresh/frozen Coconut

For Tempering:
1 tsp Mustard Seeds
1 Dry Red Chilli, halved
¼ tsp Hing/Asafoetida
Few Curry Leaves
1 tbsp Oil, preferably Coconut Oil
Photobucket
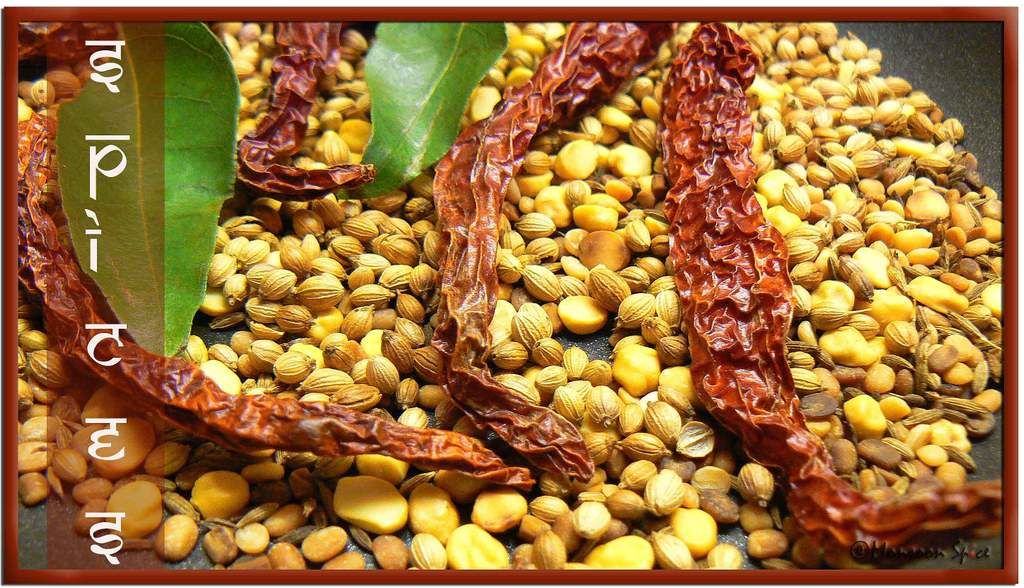
Roasted Spices for Udupi Sambar

Method:
Heat 1 tbsp of Coconut Oil in a pan and add sambar/pearl onions, hing and few curry leaves. Sauté it on medium flame for about 2-3 minutes till they turn glossy and translucent.
Add vegetables of your choice with cubed tomatoes and just enough water to cook the vegetables. Mix in turmeric powder, jaggery, tamarind puree/paste and salt to taste. Cover and cook for 10-15 minutes till the vegetables are cooked well.
While vegetables are cooking, heat the pan and dry roast all the ingredients listed from Urad Dal to Dry Red Chillies for about a minute. Mix in grated Coconut and roast it along the spices for another minute or so till it turns light golden and aromatic.
Cool and grind these roasted spices and coconut to a smooth paste by adding very little water at time.
Add this ground mixture and mashed toor dal to cooked vegetables and mix well. Adjust the seasoning and add water depending on the required consistency of Sambar. Make sure that the sambar is not too thick or thin. Simmer and bring the whole sambar to gentle boil (takes about 5-7 minutes).
Heat oil in a pan and add mustard seeds, dry red chilli, hing and curry leaves in that order. Transfer the tempering to Sambar when mustard starts to pop and splutter.
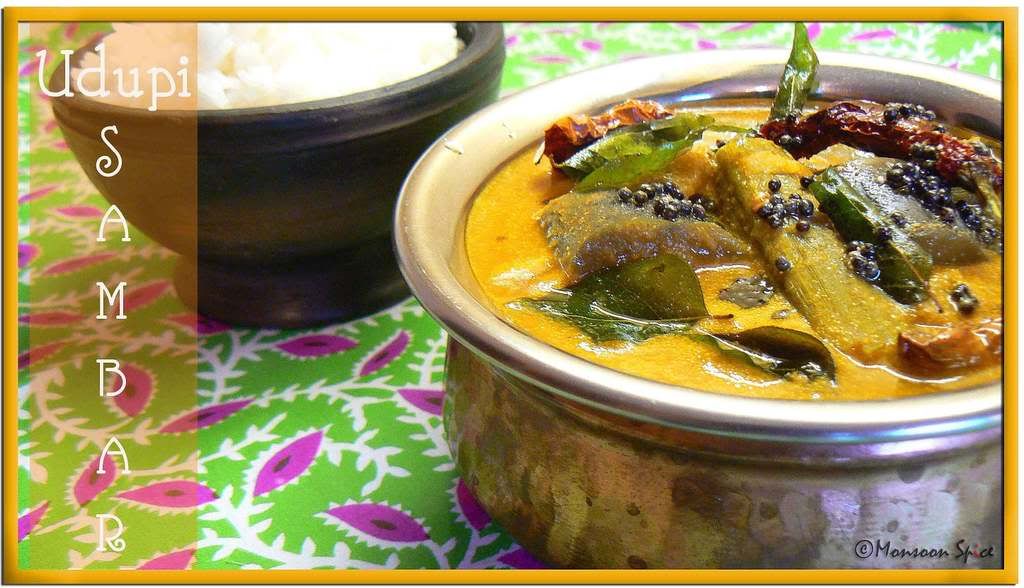
Mix in finely chopped coriander leaves and let it sit covered for about 10 mins for all the flavours to blend well. Serve this delicious Udupi Sambar with Idli, Dosas or plain steamed Rice and enjoy.

Photobucket
Udupi Sambar with Rice


Notes:
Prepare Udupi Sambar Masala (minus Coconut from the list) in bulk quantity and store it in an air tight jar for months. When needed dry roast coconut for a minute and grind to smooth paste with this Masala.
You can make Udupi Sambar with just onions by replacing other vegetables.
Make sure that you don’t boil the sambar for too long once ground coconut paste and cooked lentils are added. And also note that the sambar should not be very watery or thick while serving.

19 May, 2008

Blast from the Past: Bell Pepper Soups

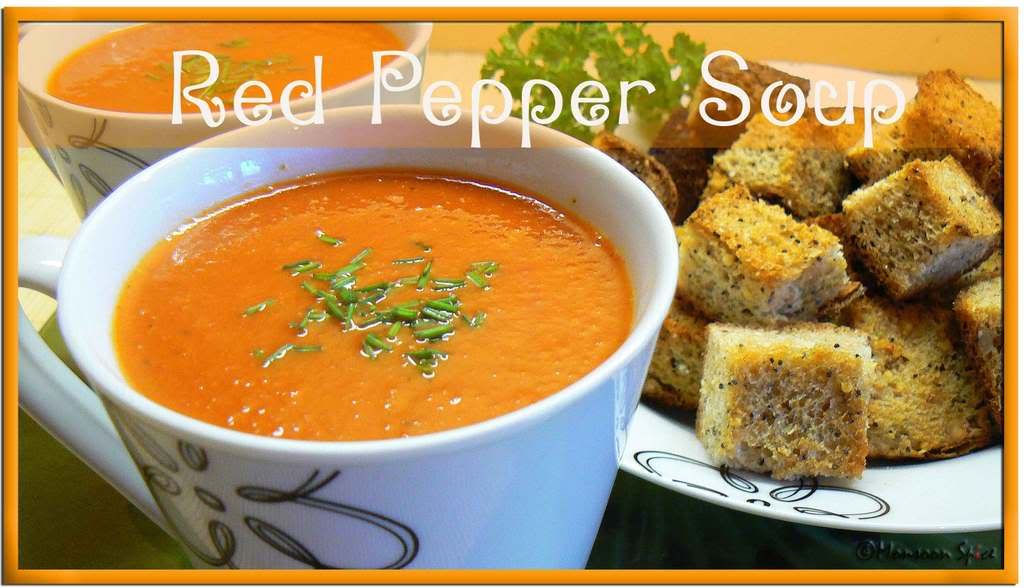
A soup has always been one of my favourite meals and my weakness. It being a typical weather where sunny uncle playing hide and seek in my part of the world, we get solace in slurping big bowls of delicious soups. This week it was all Peppers pepping us up in a form of Red Bell Pepper Soup and Creamy Green Pepper Soup. And they go to my dear buddy Pooja who is hosting two-in-one events JFI & VOV-Bell Peppers. Enjoy these blasts from the past.

Photobucket

Photobucket
Creamy Green Pepper Soup

15 May, 2008

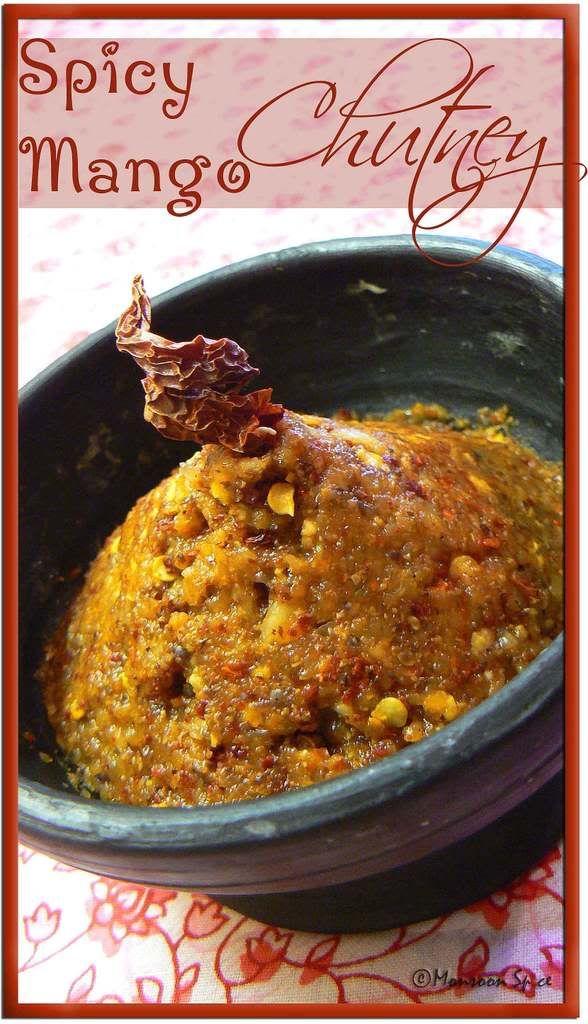
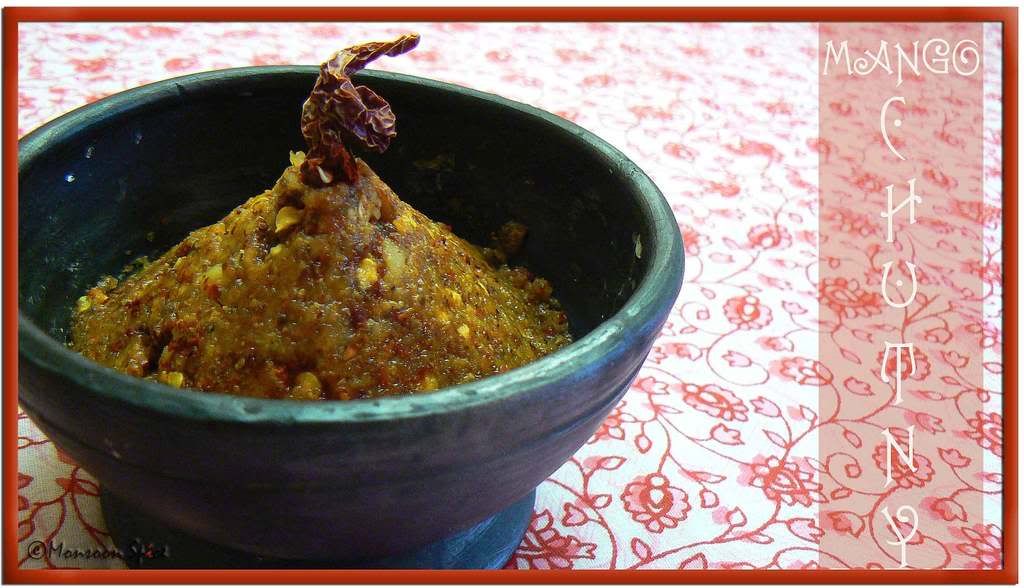
Mango Memories: Spicy Mango Chuteny/Pickle

Photobucket

Spicy Mango Chuteny/Instant Mango Pickle

Mangoes here, mangoes there, and mangoes every where!
There they are swinging along on a laden tree;
Here they are tightly packed in a wooden cartoon.
There they are neatly sliced and piled on a plate,
Here they are pickled and brined to perfection.
It’s a season of Mango Mania.
- By Yours Truly Sia Wordsworth ;)


It is and it will always be mangoes that rule my world and my childhood memories. Forget all exotic fruits- pineapple, peach, kiwi, plum, berries; nothing can ever come quite close to magnificent Mangifera Indica in flavour, taste or aroma. It’s a same story every year. Just one look at them and I start reminiscing about the Mango Season, the season of the king of fruits, back home in India.


Come summer and it meant only one thing for me and my sister, long vacation at Paternal Granny’s home. The memories of those sunny, glorious summer days of endless fun, pranks and digging our teeth into succulent mangoes warm my heart even today. Granny’s house was just like many other beautiful tiled-terraced houses (or more like mansion) in my native Mangalore. Surrounded by acres of greenery, the white house with red tiles stood tall and proud with wide porches running around the house. Polished to perfection red oxide floors would gleam with intricately carved round rosewood pillars supporting the roofs. The trees around the big house served as the compound walls and the beautiful water stream flowing right next to the house was its gate. Magnificent jackfruit, tamarind, coconut trees competed against each other for the title in the backyard.


Amidst them was this garden from heaven, Mango Orchard. No idea as since how long it’s been there. It was just like my great grand father knew that his numerous great grand children, like hungry flocks of birds, would come and attack the mangoes while they were still green, tender and sour. Just one look at those luscious gold and emerald coloured fruits hanging from green leafy trees was enough to get us all excited. Every summer it was the same story as if we were looking at the mangoes for the first time. There’s always something special about mangoes. It is like seeing the gold rush, precious to every kid and even grown up. Always trying to suppress the innate urge to monkey around but failing miserably, all we kids were seen hanging from the mango trees while the grownups snored through the hot summer afternoons. While older kids, especially the boys, climbed the higher branches we smaller kids would be seen hanging from the lower branches of the trees. And the ones who were scared of height were seen standing on the ground holding a big bath towel spread wide to collect the mangoes picked and thrown by the ones on the trees. Biting deep into raw sour mangoes and dipping those pieces into the spiced ground mixture of salt, pepper and red chillies wrapped in an old newspaper sheet was pure heaven. If that was not enough, each and every meal served during mango season had one or more mango dish to tingle our taste buds. Tender Mangoes ground with Sweet Coconut Chutney, Tender Mango Pickle, Mango Dal, Mango Burfee, Mango Palya, Mango Mosaru Gojju, Mango Rasayana, Mango Rice, Mango Lassi are few of them which were served with dollop of love everyday. While listening to stories of Devas (God) and Asuras (Demons) from Ajji, the intoxicating perfumes of the mango flowers wafting from backyard would sooth our senses and lulled us into deep sleep. Blissful childhood days and glorious mangoes!!!


This year during our short trip to India we did manage to gulp down few mangoes and recreate our childhood memories with little nephew and niece and half a dozen other kids from neighbourhood. And if you are wondering did I really climb the mango tree with them, then I am not going to disappoint you guys. Yes, I did climb the mango tree with my sister and brother just two days before my sister got married and managed to get scolding from our neighbour who happened to be the owner of that gorgeous mango tree. Well, something just can’t be changed! With all these I did manage to eat all delicious food cooked by my MIL (can’t believe I am one of those lucky people who have this generous, sweet soul as MIL). Out of few recipes I managed to learn from her during busy schedule was this delicious Spicy Mango Chutney or Instant Mango Pickle. Slightly sweet and sour Tothapuri Mango is grated and mixed with salt to remove excess juice and then ground with few spices to make this very fresh, aromatic and spicy pickle/chutney. If you don’t get Tothapuri Mangoes then you can easily substitute it with any other sour raw mango of your choice. I am dedicating this mango post to my gorgeous sister who was not only my trusted companion in stealing mangoes from our neighbours but also is celebrating her birthday today. S, this is for you my dearest. And straight away it goes to dear Arundathi who is guest hosting this month’s WBB-Mango Madness started by Nandita. While we are still talking of Mango Mania, don't forget to share your Mango memories with us.


Spicy Mango Chuteny/Instant Mango Pickle (Sour Mango ground with selected aromatic Spices)
Prep Time: 10 mins
Cooking Time: 3-5 mins
Makes: 1-1½ Cup
Recipe Source: My MIL

Ingredients:
1 medium Raw Mango, peeled and grated (Approx. 1 packed cup)
5-8 Dry Red Chilli, broken (I used Byadagi, adjust acc to taste)
½ tsp Methi/Fenugreek Seeds
1-1½ tbsp Black Mustard Seeds
1-1½ tbsp Sea Salt
¼ tsp Hing/Asafoetida
Photobucket
Ingredients for Spicy Mango Chuteny/Instant Mango Pickle

Method:
Mix sea salt with grated mangoes and keep it aside covered for about ½ and hour to hour time. The juice from mango will be released.
Squeeze the juice from grated mango and reserve it for later. Keep aside squeezed mango gratings.
Dry roast dry red chillies, fenugreek seeds, mustard seeds and hing in a pan on medium to low flame for about 2-3 minutes till fenugreek seeds turns light brown in colour and you get nice roasted aroma from spices.
Cool the spices and grind them coarsely with grated mango. Add reserved squeezed mango juice as and when required. This Pickle/Chutney should be quite thick in consistency and make sure that you don’t grind them to smooth paste.
Store them in a sterilised jar in refrigerator. It can be used up to a month’s time. Serve them with Dosa, Idli, toast or Curd Rice and enjoy.

Photobucket
Spicy Mango Chuteny/Instant Mango Pickle


Notes:
You can also add 1 tsp roasted Cumin Seeds/Jeera for little different flavour.
Make sure that you don’t grind it to smooth paste. It should be ground coarsely so that you can enjoy small chunks of spices and mango.
Tothapuri mangoes work best for this recipe. But if you don’t get them at your place then you can easily substitute it with any other sour, raw mango of your choice.

13 May, 2008

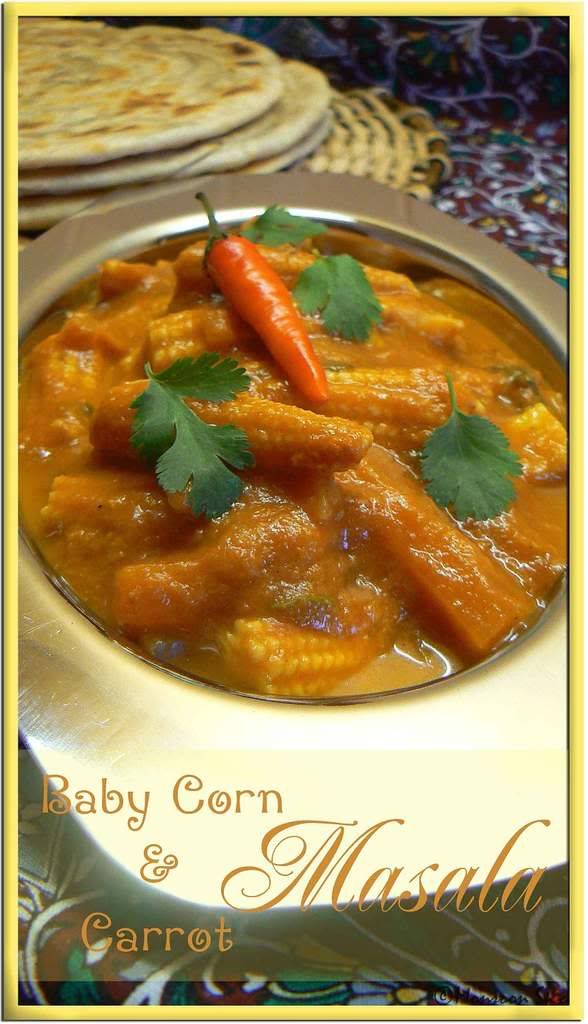
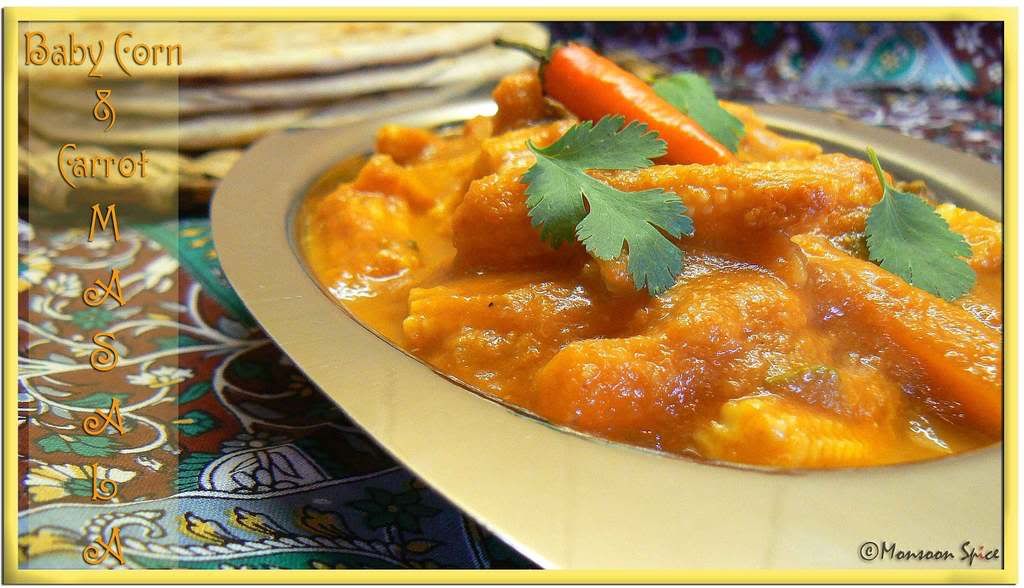
Cooking with Babies: Baby Corn & Carrot Masala

Photobucket
Baby Corn & Carrot Masala with Aloo Parathas

Every time I come back from India I kind of go under emotional roller coaster ride. There you are, surrounded by your loved ones at any odd time of the day or night sipping a cup of filter Kaapi and talking about everything under this sky and it feels like time just flies without you knowing. And here you are, with only your partner to talk to (that to when he is not busy giving bubble bath to love of his life Lajjo Rani (don’t fret, its our car I am referring to) or jumping up and down like crazy guy while stuck to idiot box watching football or cricket (I call it kiri-kiri meaning irritating)). There you are, eating all wonderful food cooked by every other person other than you and hardly required to move your big fat ass. Here you are, fretting over what to cook everyday and arguing whose turn to empty the waste bin. There you are, just required to walk few steps to eat your heart’s content and yet pay few pennies. Here you are, travel miles together to eat at reasonably good restaurant and end up lightening your wallet and half full stomach. Ah!!! Some pleasures of staying away from home!!!!!!

While still recovering from jet lag (I blame my Boss for making me go to office very next day we landed here and now you know why I’ve not been able to blog hop these days. Bhohoo) all we have been eating is Ganji with Ghee and Pickle or just plain Curd Rice. Well, I am not really complaining here. All we wanted after eating the food served on flight was just simple ones as our taste buds were not ready to volunteer as a guinea pig in anymore of laboratory testing. So it was only during weekend after sleeping till noon that we finally managed to eat something other than simple Comfort Food. With big batch of Aloo Parathas I had cooked and tucked in the freezer before leaving to India, we had to just worry about some simple curry to serve. Well, not exactly simple when it comes to taste department. This delicious Baby Corn-Carrot Masala in creamy gravy of onion, tomato and cashews is what we enjoyed with Aloo Parathas. Very tender Baby Corn and Baby Carrots from Farmer’s Market are the highlights of this yummilicious Curry which simply retains is crunchiness and sweet taste even when cooked with spices. And another addition to this gravy is my ever favourite Kitchen King Masala and Kasuri Methi (Dried Fenugreek Leaves) which enhances its taste. Do try this Curry of Tender Baby Corns and Baby Carrot fingers simmered in rich gravy of sweet onions, tangy tomatoes and flavourful cashews and well balanced spices which is sure to awaken all your senses.


Baby Corn & Carrot Masala (Veggies cooked in Creamy Gravy of Onion, Tomato and Cashew)
Prep Time: 10 mins
Cooking Time: 20 mins
Serves: 4-5

Ingredients:
15-20 tender Baby Corn, cut into fingers
10-12 Baby Carrots/ 2-3 medium Carrots
1 medium Onion, finely chopped
2-3 Green Chillies, slit (Adjust acc to taste)
1 tsp Jeera/Cumin Seeds
½ tbsp Kasuri Methi/Dried Fenugreek Leaves
1 tbsp Coriander Leaves, finely chopped
¼ tsp Turmeric Powder
½ tbsp Oil/Ghee

Photobucket
Baby Corn & Baby Carrots
For Ground Masala:
1 small Onion, quartered
3 large Tomatoes, blanched in hot water and peeled/1 canned Chopped Tomato
2-3 cloves of Garlic
¾ -1 inch Ginger, peeled and roughly chopped
2-3 Dry Red Chilli (I used Byadagi for Colour, adjust acc to taste)
¾ -1 tsp Garam Masala
½-1 tsp Kitchen King Masala
½ tsp Amchur/Dried Mango Powder (Optional)
½ tsp Jeera/Cumin Seeds
1 tsp Coriander Seeds
1 tsp Sugar
10-12 Cashews
Photobucket
Baby Corn & Carrot Masala

Method:
Grind all the ingredients listed above from onion to cashews to smooth paste without adding any water and keep it aside.
Cook Baby Corn and Baby Carrots with turmeric powder and salt to taste in enough water for about 5-6 minutes till they are fork tender. Drain and reserve the water.
Heat oil in a pan and add cumin seeds to it. When cumin starts to sizzle, add finely chopped onion and slit chillies and sauté on medium flame till it turns golden brown.
Now add ground paste, Kasuri Methi and sauté it continuously for about 2-3 minutes on medium to low flame till raw smell of masala disappears.
Mix cooked Baby Corn and Carrots. Add reserved water as and when required to get required gravy consistency. Simmer and cook for another ten minutes for all the flavours to blend well.
Mix finely chopped coriander leaves before serving it with Chapatti, Roti or Paratha of your choice and enjoy this creamy goodness.

09 May, 2008

One Stinking Flower: Cauliflower/Gobi Paratha

Photobucket
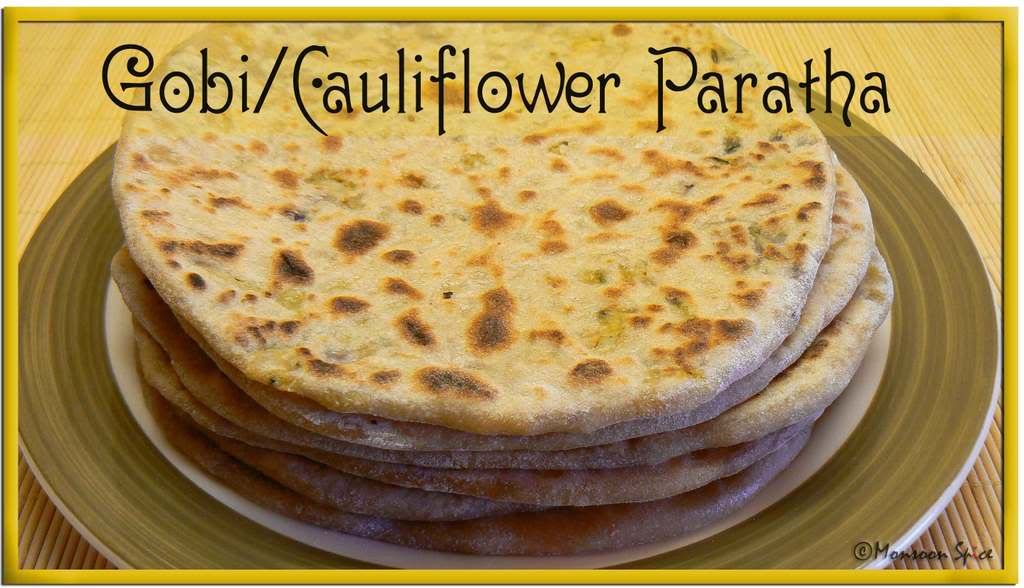
Cauliflower/Gobi Paratha

I was a typical headstrong, independent, strongly opinionated teenager who never hesitated to say “NO” for food cooked using particular vegetable or greens. With 90%+ vegetables and greens which belonged to my black list, it was not an easy task for my Amma to cook something which every family member loved. For me Green Leafy Vegetables were simply horrible to look at let alone taste it. Root Vegetables were loaded with little too much of carbohydrates for my taste. This strange piece of information I seemed to have picked from our Botany class taken by handsome lecturer with cute dimple on his left cheek whenever he smiled and I could see every girl in my college falling for!!! And there were not many vegetables which grew above ground level that caught my fancy. So what did I really eat as a teenager? If your answer is junk food containing lots of deep fried, greasy, spicy, bubbly, unhygienic food cooked every other place except home, then think again.

Like many millions caring, smart mothers all over the world who knows what to cook for their opinionated kids, my Amma too smartly belonged to that category. Amma always made it a point to sneak vegetables in our diet without giving us much choice other than eat it grudgingly. Grudgingly because I knew it contained the greens and vegetables which I simply hated but still the taste made it for everything else. Amma made Uttappas, Stuffed Parathas, low fat Veggie Burgers, grilled Vegetables which I couldn’t resist in spite of not being very fond of veggies and greens. Now when I think of it I cant help but wonder how Amma managed to hide her smile when she saw me stuffing all these goodies one after another with a typical teenager ‘don’t you dare to laugh at me or lecture me’ look on my face. Its not easy being a cool and bindas teenager in India I say!

One vegetable I loved to hate was Cauliflower. I was never fond of this stinking vegetable and always rolled my eyes at people who would go gaga over its shape, texture and taste. It was great unsolved puzzle for me to see people adoring this vegetable which smells (read stinks) and tastes like cabbage, yet another vegetable that topped my hate list. As usual all my theories of why we should ban Cauliflower dishes went to deaf ears of my Mommy dear and as if I really had any fat chance of making her change her mind. Right when I was grumbling as how bad it smells, Amma grated it while I covered my nose with a hanky. My entire lecture on ugly cauliflower, how stupid it was to look at and how I had rather eat cow dung in its place, went to deaf ears. She gave me knowing smile and went on adding a pinch of this and a dash of that and with in few minutes this stinky vegetables dressed with aromatic spices was stuffed in a whole wheat dough and rolled flat. Cooked to perfection with little bit of Ghee on both the sides it smelled almost heavenly to my utter disbelief. She placed this perfectly round, hot, delicious smelling Gobi ke Paranthe with a small bowl of Yogurt and my favourite Pickle in front of me and asked me to taste it if I wanted. I not only tasted it but reluctantly asked for more.

Since then I am completely hooked to this delicious Cauliflower/Gobi Parathas which is second best thing to Aloo/Potato Parathas for me. Served simply with a cup of thick home made Yogurt and spicy Pickle, it sure to win every Cauliflower haters hearts. Amma, this is to you if you are reading it by any chance :) This Cauliflower/Gobi Paratha also goes to my dear friend Srivalli who is hosting Roti Mela after hosting successful Dosa Mela. Valli, I am eagerly looking forward for yet another wonderful round-up.


Cauliflower/Gobi Paratha (Stuffed Indian Flat Bread with Spiced Cauliflower Gratings)
Prep Time: 20 mins
Cooking Time: 20-30 mins
Makes: 10 medium sized Parathas

Ingredients:
For the Dough:
3 cups Whole Wheat Flour/Atta (I use Pillsbury’s Chakki Atta)
¼ cup Yogurt
Warm Water for kneading
Salt to taste

For the Filling:
2-2½ cups Cauliflower Florets, grated
1 small Onion, very finely chopped
2-3 Green Chillies, finely chopped (Adjust acc to taste)
1 tsp Jeera/Cumin Seeds
½ tsp Roasted Jeera/Cumin Powder
½ tsp Turmeric Powder
½ tsp Amchur/Dry Mango Powder or 1 tbsp Lime/Lemon Juice
½ tsp Garam Masala
¼ tsp Kitchen King Masala (Optional)
½ tbsp Kasuri Methi
1 tbsp Fresh Coriander Leaves, finely chopped
1 tsp Oil (If cooking the Cauliflower)
Salt to taste

Other Ingredients Needed:
Oil/Ghee to brush while cooking the Paratha
Little Atta/flour for dusting
Photobucket
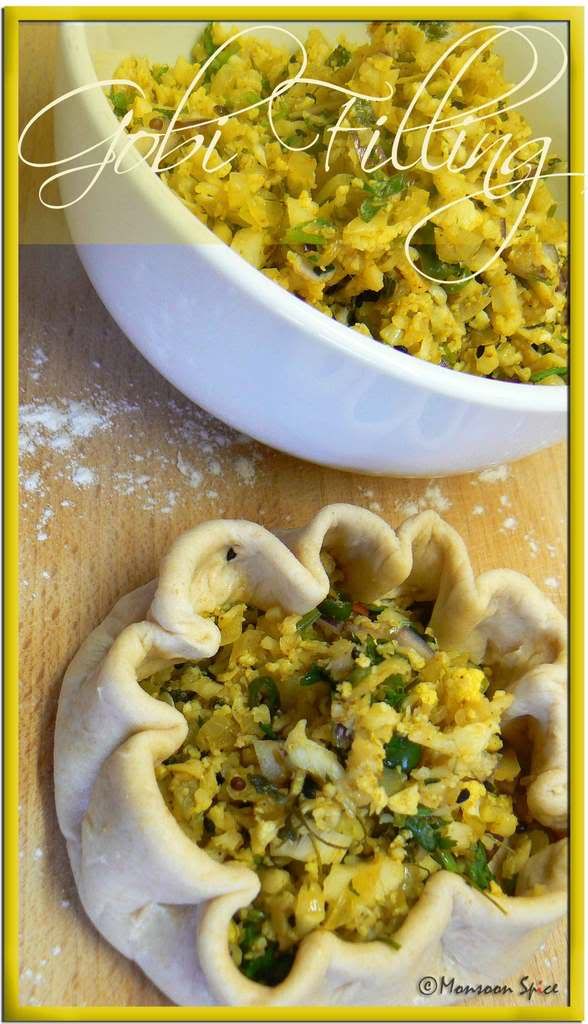
Cauliflower/Gobi Filling

Method:
For the Dough:
Sieve atta and mix in salt to taste and yogurt.
Slowly add warm water as and when required and make stiff dough.
Cover and keep it aside for at least half an hour.

For the Filling:
For the Paratha stuffing you can either cook Cauliflower for few minutes or just mix in all the ingredients with out cooking and then stuff the Parathas. If you prefer to cook it a little bit then follow the following steps.
Heat oil in a pan and add cumin seeds. When it starts to sizzle, add finely chopped onions, green chillies and sauté it on a medium heat for about 1-2 minutes till onions becomes translucent.
Now add roasted cumin powder, turmeric, dry mango powder, garam masala, kitchen king masala and sauté it for about 30 seconds.
Mix in grated cauliflower florets, salt to taste and kasuri methi and sauté it for about a minute till all the spices are mixed well.
Turn off the gas and mix in finely chopped coriander leaves and let the stuffing come to a room temperature. It is important to make sure that the filling is completely cooled before stuffing as it might ooze from parathas while rolling due to moisture content.

For the Paratha:
Knead the dough again for a minute and make equal lemon sized balls.
Roll this dough ball in flour and roll them using a rolling pin into thick poories of 4 inch in diameter.
Place about 1 tbsp of filling in the centre. Cover and seal the ends and roll again, dusting flour if necessary, into ½ cm thick roties using rolling pin.
Mean while, heat a griddle at high flame and lower it to low-medium flame.
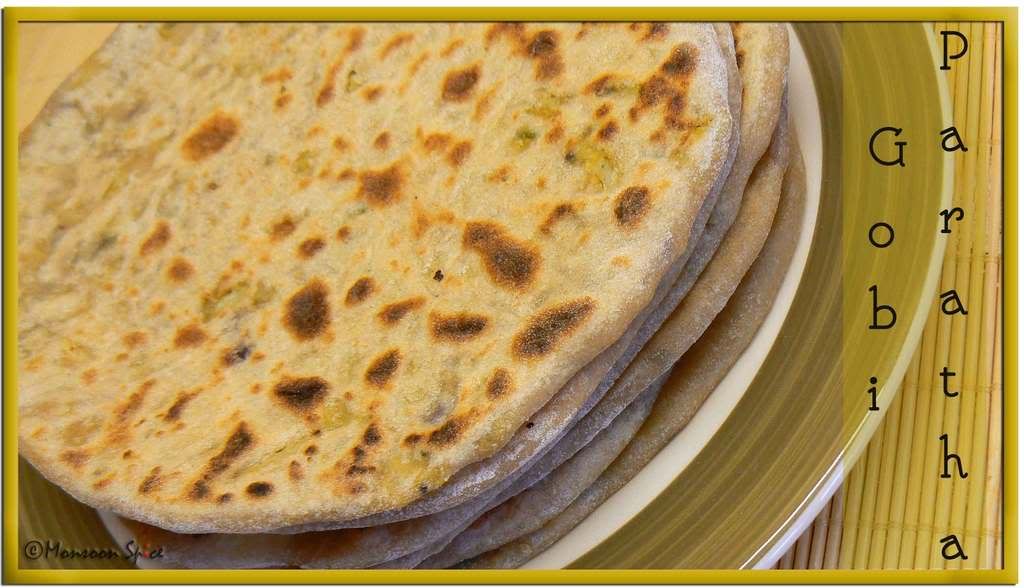
Gently dust off the excess flour and place Stuffed Paratha on griddle and cook on both the sides till its cooked and brown spots start to appear on top. Apply little ghee/oil if desired.
Serve hot Cauliflower/Gobi Parathas immediately with any curry or with plain yogurt and pickle of your choice and enjoy.

Photobucket
Cauliflower/Gobi Paratha


Notes:
Always make it a point to see that the stuffing is as dry as possible. If not there is a high chance of it oozing out while rolling the parathas due to moisture content.
If you are a beginner, start with small amount of stuffing/filling and roll into parathas. Once you learn the technic and are comfortable with the process, you can gradually increase the amount of filling.
Other Parathas posted in Monsoon Spice

My blog is Yummy!!!
"Yummy blog award is given to the blog with most yummy recipes/photos".

Photobucket

Thank you Swati and Dee for thinking of me and passing this award. I really appreciate your kind gesture. I pass this award to every food blogger as only we know how difficult it is to maintain and update your blog with new posts filled with yummilicious pictures and interesting recipes and articles. You all deserve a tight hug and pat on your back.

06 May, 2008

Simplicity at its Best: Sorekai Bolu Kodhel

Photobucket
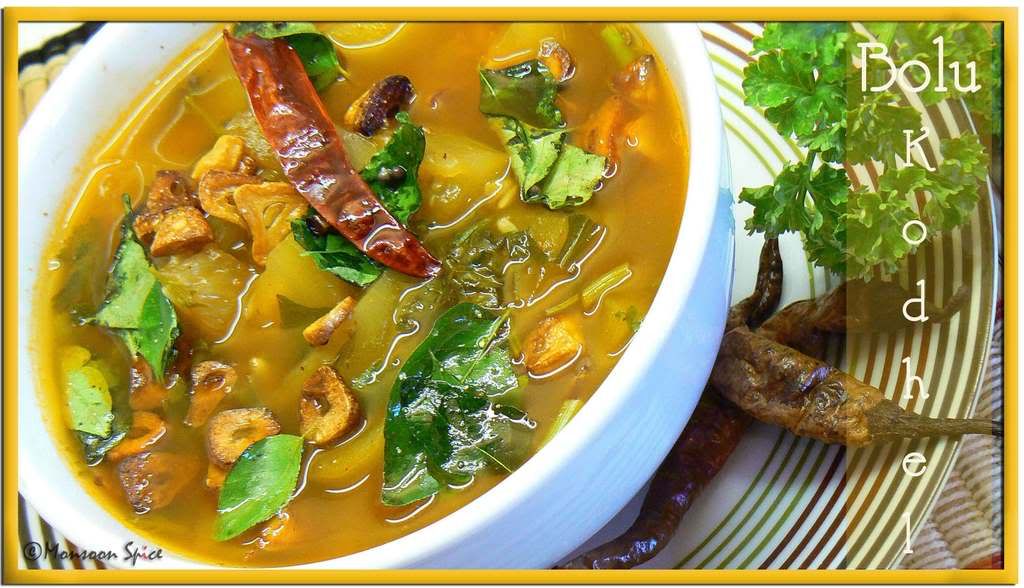
Sorekai/Bottle Gourd Bolu Kodhel

We are back from short yet wonderful vacation from India and already missing home! Here I am in my office, feeling sleepy and jetlagged and terribly homesick. Each and every minute of those 18 days were filled with excitement and fun and our ears are still buzzing. It feels strange to be here away from all buzz and excitement. The two big family weddings in two weeks of our vacation kept us on our toes all the time. Mehendi, shopping, facials, flower decorations, shopping for gifts, last minute purchases, travelling, houseful of guests, shopping (did I say shopping again?!), phone calls to friends… It was complete madness and we enjoyed each and every moment of it. It won’t be exaggeration if I had to say that we hardly got time to think about coming back (Will write about it more in my later posts). Surprisingly even the flights were on time and everything went smoothly.

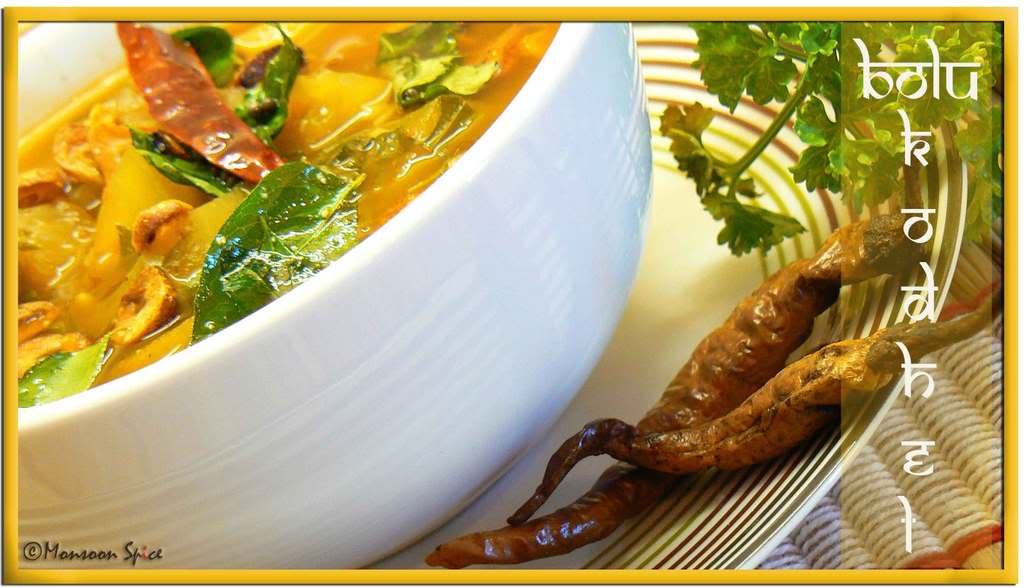
Can’t believe that we had been away for just few days and there is already change in weather. Thankfully the gloomy, cloudy weather is over and we were pleasantly welcomed by bright and sunny day. After 10+ hours of journey and forcefully eating the food served on flight all we craved for is some simple food, food which is also comforting. Ganji with Tender Mango Pickle and simple Bolu Kodhel is what comes to my mind whenever we fly back from India. Unlike other Coconut based Mangalorean Kodhels, this one uses very few ingredients sans much loved Coconut. Some things in life are better when they are simpler. How many times have we really tried to be simple but ended up complicating it more in that process? Keeping things simple is indeed complicated and it is very true when it comes to recipes. I am always impressed with the recipes which are traditional and handed down from one generation to the next. Most of them are uncomplicated, simple and yet the end result is always the winner. One such recipe which is handed down to me by my Amma, who in turn learnt it from her mom (my Ajji) is Bolu Kodhel. Bolu means plain and Kodehl means Curry from Mangalore. Bolu Kodhel is unfussy, comforting food for me that takes away all the ill-feelings after eating the food served on flights. Silky Bottle Gourd is cooked with spicy and aromatic Rasam/Sambar Powder and sweet Jaggery is the simplicity at its best. The simple tadka/tempering of Garlic and Hing gives it a touch of richness. Try it if you like simple food which tops the chart when it comes to taste and I can assure you that you won’t be disappointed with the end result. I am sending Sorekai/Bottle Gourd Bolu Kodhel to Laurie who is guest hosting WHB started by lovely Kalyn.


Bolu Kodhel (Plain Curry of Bottle Gourd from Mangalore with Rasam/Sambar Powder and Garlic Tadka)
Prep Time: 5-10 mins
Cooking Time: 20 mins
Serves: 4-5

Ingredients:
5 cups Bottle Gourd, peeled and diced into 1 inch cubes)
1- 1½ tbsp Rasam/Sambar Powder (Adjust acc to taste)
½ - 1 tbsp Jaggery (Adjust acc to taste)
1 big marble sized Tamarind
1-2 Green Chillies, slit (Optional, adjust acc to taste)
1 tbsp Coriander Leaves, finely chopped
Salt to taste

For Tempering:
½ tbsp Ghee + 1 tsp Oil
1 tsp Mustard Seeds
1 Dry Red Chilli, broken
A big Pinch of Hing/Asafoetida
Few Curry Leaves
½ bulb of Garlic Cloves, peeled and sliced
Photobucket
Sorekai Bolu Kodhel

Method:
Cook bottle gourd cubes with jaggery, salt to taste and tamarind in a pan with enough water (approx 5-7 cups of water) for about 5-10 minutes till they are half cooked.
Mix in Rasam/Sambar powder and slit green chillies. Adjust the seasonings and water as per your taste and cook on a medium to low flame for another 10 minutes till the water is reduced to 2/3rd and flavours are blended well.
For tadka, heat ghee and oil in a pan and add sliced garlic. Sauté till garlic turns golden yellow and add mustard seeds, broken red chilli, curry leaves and hing.
When mustard starts to pop and splutter transfer the tempering into the Kodhel and mix well.
Mix in chopped coriander leaves. Cover and let it sit for another 5-10 minutes for all the flavours blend well. Serve hot with steamed Rice and Papad and enjoy.

Photobucket
Sorekai Bolu Kodhel


Notes:
Slow cooking is the best method to make Bolu Kodhel.
Make sure that the water quantity is reduced to 2/3rd from original quantity. This way of cooking is known as ‘Battisuvudu’ in Kannada which is also used when making simple Rasams and Dals so that the flavours are blended well.
Other than Bottle Gourd, Okra is also cooked in a similar fashion with little bit of Toor Dal sans Garlic.