30 July, 2008

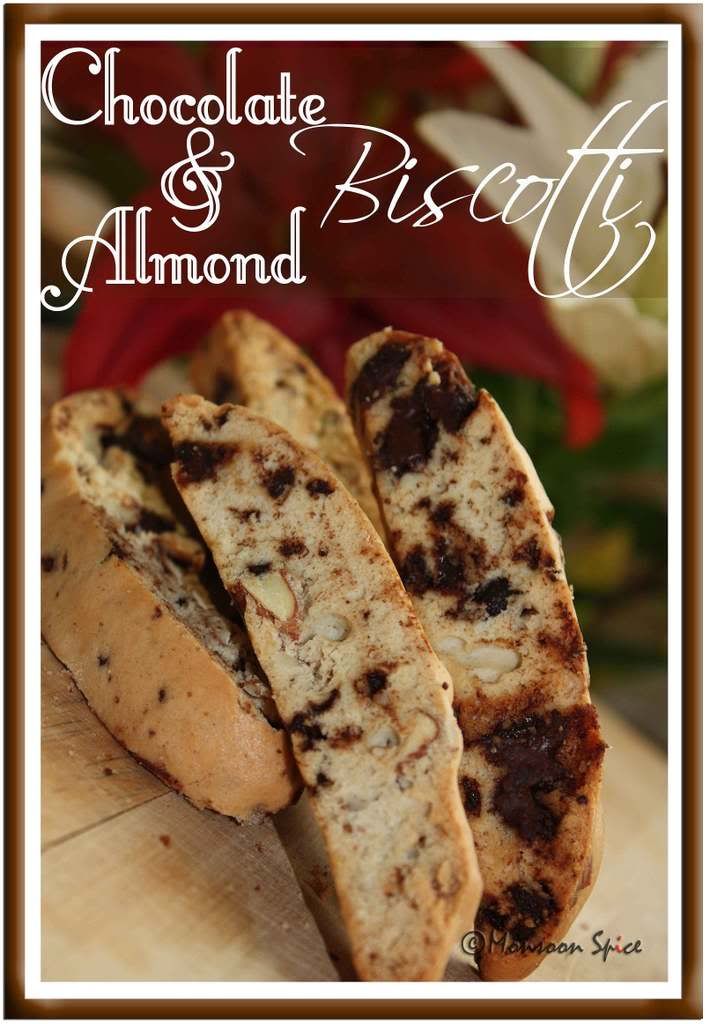
Chocolate-Almond Biscotti: Daring Baker...At Last

Photobucket

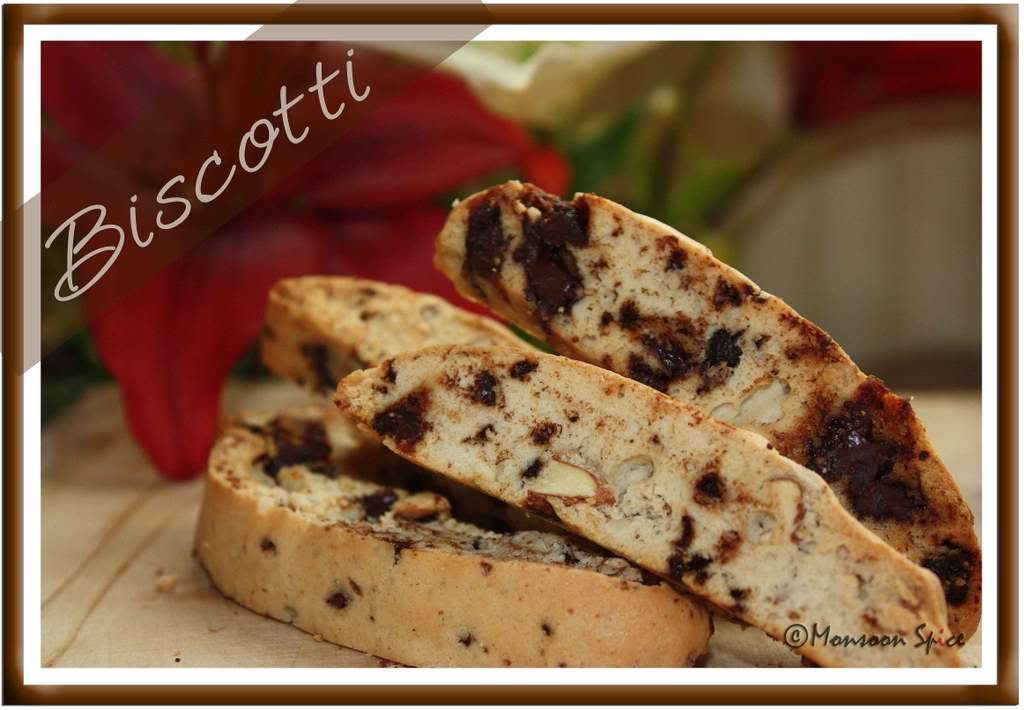
Chocolate-Almond Biscotti

Please don’t get confused with the title. I haven’t turned out to be a wonderful bakers like the ones in Daring Bakers overnight and I have no plans of joining that group for many more days (read years;) But still I am pleased to say that I did a daring thing during weekend and I actually baked!!!

The idea of baking used to scare the hell out of me! I always felt the oven staring at me icily (mmm… of course it feels cold when its ‘never’ used right;) as I walked back and forth past it. I did try my level best to ignore its threatening look. It demanded me not to use it as my extended kitchen cabinets to store few more vessels and Dabbas. It coughed and twisted its nose when we popped frozen pizzas and chips into it and turned itself into one agonising aunty when I used it to ‘ferment’ Dosa and Idli batter. It almost went into strike when I, err, used it to heat my kitchen when our central boiler conked off. Gosh, isn’t it easy and quicker to walk to a nearest bakery, buy and gorge that bread or baked goodies than actually measure that cup of self raising flour!!! Well, ahem, I do think so or rather used to think so that now I actually have baked and found some pleasure in it.


I always felt that I am not a person with enough patience when it came to baking. First, I never managed to follow the instructions to the word as I like changing and modifying ingredients to suit my taste and preference. Unfortunately it’s a big no-no in baking. You see the rebellious cook in me wouldn’t budge an inch and transform herself into a baking fairy. Well, you better follow the recipe step-by-step, cup-by-cup, spoon-by-spoon if you really don’t want to end up baking soggy cake, flat muffin or hard to bite cookies.


Next, I couldn’t simply stop myself from opening the oven door to take a quick peek to check if my cake is baking well or not. It took me sometime to realise it is another big no-no in baking world. Well, with my ancient gas burner with dark oven I have no option of actually seeing from outside if it’s baking well or not. And my hubby dear is not to ready to stick a bulb inside our oven which is plugged from out. Men, what more can you expect!!!


Other thing I had to keep in my mind is not to try to be too creative, especially when you are a newbie. Last time I used condensed milk in place of milk and egg thinking it will work beautifully and ended up one sad looking cake which stuck to my mouth top and was damn difficult to swallow. And no prizes for guessing that it ended up in waste bin. Well, I have come to terms with the bakers that there is a damn good reason as why milk and egg is used in baking.


Armed with all these tips from my previous failed attempts at baking, I decided to follow step-by-step instructions and used proper cups and spoons to measure each and every ingredient. The result is this wicked looking Chocolate & Almond Biscotti baked following the recipe posted at The Joy of Baking. This website has wonderful collection of baked goodies which are simple to follow and you actually end up baking something that look like the one photo posted there. I have already tried few recipes from this site and none of them have failed to impress me. I would highly suggest this site for any foodie, especially amateur like myself, who wants to try their hand at baking.
The Italians use the term biscotti to refer to any type of cookie. In North America, biscotti is used to describe a long, dry, hard twice-baked cookie with a curved top and flat bottom designed for dunking into wine or coffee. The name biscotti is derived from 'bis' meaning twice in Italian and 'cotto' meaning baked or cooked.
(Source: The Joy of Baking)
I chose Chocolate-Almond Biscotti to try first as it has two of my favourite ingredients, chocolate and almonds. There are two things I tweaked a bit. One I didn’t de-skin the almonds as I didn’t have patience to do so. I simply roasted them with skins and chopped them. Next I used half-half of chocolate chips and dark chocolate as I had these chocolate chips which I was reaching its expiry date. Initially, I was hesitant to make changes to the original recipe but went ahead with these modifications and it worked quite well ;) The end result was simply amazing and we have a big canister of these wonderfully ‘twice baked’ biscotti sitting proudly on our kitchen counter.

Photobucket Print This Recipe
Chocolate-Almond Biscotti
Prep Time: 20-30 mins
Baking Time: 60-90 mins (depends on Oven type)
Makes: 16-18 Biscotti
Recipe Source: The Joy of Baking

Ingredients:
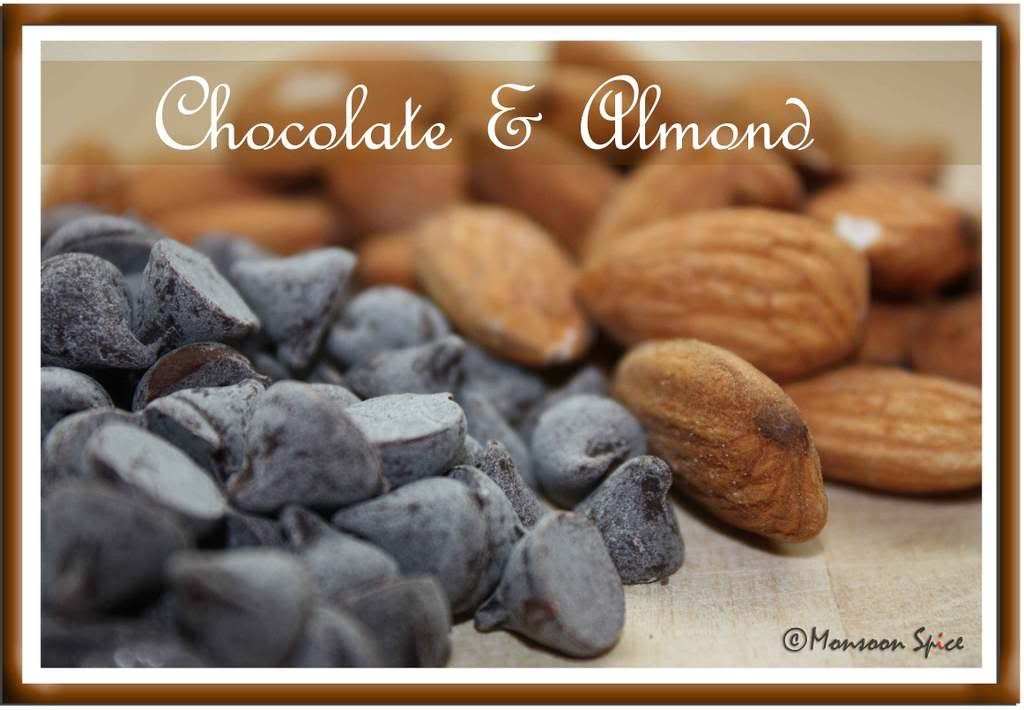
¾ cups (110 gms) blanched whole Almonds, toasted and chopped coarsely
4 ounces (110 gms) Semi-sweet or Bitter Chocolate, chopped in ½ inch pieces (I used semi-sweet Chocolate Chips and Dark Bitter Chocolate in equal quantity)
1¾ cups (245 gms) All Purpose Flour
2/3 cup (135 gms) Granulated White Sugar
2 large Eggs
1 tsp Vanilla Extract
¾ tsp Baking Powder
1/8 tsp Salt
Photobucket
Chocolate & Almonds

Method:

Preheat oven to 350 degrees F (180 degrees C). Line a baking sheet with parchment paper and set it aside.
Meanwhile, toast almonds for 8-10 minutes or until lightly browned and fragrant. Let them cool and then chop coarsely. Set aside.
In bowl of your electric mixer (or with a hand mixer), beat the sugar and eggs on high speed until thick, pale, and fluffy (about 5 minutes. With my hand mixer it took little longer). Make sure that when you slowly raise the beaters the batter will fall back into the bowl in slow ribbons. At this point beat in the vanilla extract so that it is blended well.
In a separate bowl, whisk together the flour, baking powder and salt. Add these dry ingredients to the egg mixture and beat until they are well combined. Next, gently fold in the chopped almonds and chocolate.
Transfer the dough to your parchment lined baking sheet and form into a log, about 12 inches (30 cm) long and 3½ inches (9 cm) wide. Dip your fingers in a cold water if you find it too sticky and difficult to manage.
Bake for 25-30 minutes, or until firm to the touch.
Once it’s baked, remove from oven and let cool on a wire rack for about 10 minutes. Transfer log to a cutting board and using a serrated knife, cut log into slices of 3/4 inch (2 cm) thickness on the diagonal.
Place these biscotti, cut side down, on the baking sheet. Bake 10 - 15 minutes, turn slices over, and bake another 10 - 15 minutes or until golden brown.
Remove from oven and let cool. Store in an airtight container. Serve them with hot cup of coffee and enjoy.
Photobucket
Chocolate-Almond Biscotti


Final Call for WBB-Summer Feast (Just one more day to go)

Friends,
If you have already posted an entry for WBB-Summer Feast and yet to mail me, please make sure you do it by tomorrow. This is a final call for all you lovely bloggers to participate in WBB-Summer Feast.

For this edition of WBB, your challenge is to cook anything with summer fruits and vegetables. Yes, the theme is WBB-Summer Feast. Go to your town/city’s Farmer’s Market and pick fresh season’s produce and make your favourite breakfast or brunch and join in the Summer Feast.

Deadline: 31st July, 2008

Please go through the guidelines and include all the required information in your post and mail when sending me your entry. Don't forget to add Your Name, Your Blog Name, Name of the Dish you cooked, Perm Link of the entry along with the gorgeous Photo of final dish.

Click Here or on the logo to find out more information on this event.


Reminder for JFI-Soya:
I invite you all to celebrate Jihva for Ingredients with this month’s theme JFI-Soya. Choice of Soya products, the recipe, ingredients, method etc is entirely left to you. I would greatly appreciate if you can send me any Vegan or Vegetarian recipes but I leave it to your choice. Soya foods include tofu, tempeh, textured vegetable protein (chunks, mince etc), miso, soya sauces, soya oil and margarine, and soya dairy alternatives.

Deadline: 31st August, 2008

Please go through the guidelines and include all the required information in your post and mail when sending me your entry. Don't forget to add Your Name, Your Blog Name, Name of the Dish, and Perm Link of the entry along with the gorgeous Photo of final dish.

Click Here or on the logo to find out more information on this event.

28 July, 2008

Announcing JFI-Aug '08

Jihva for Ingredients a.k.a. JFI is the brainchild of Indira of Mahanandi. Indira started this event to showcase the natural ingredients every month and undoubtedly it is one of the most popular food blogging events among the food bloggers. I am honored to host this month’s JFI edition on Monsoon Spice and I sincerely thank Indira for this wonderful opportunity. I invite you all to celebrate Jihva for Ingredients with this month’s theme JFI-Soya.

Photobucket
The soy bean (Glycine max) is a species of legume native to East Asia. The majority of Soya protein is a relatively heat-stable storage protein. This heat stability enables Soya food products requiring high temperature cooking, such as tofu, soymilk and textured vegetable protein (Soya flour) to be made.
Soya is an excellent source of high quality protein, is low in saturated fats and is cholesterol free. Recent research has indicated soya has several beneficial effects on health in addition to its nutritional benefits. Soya beans contain high concentrations of several compounds which have demonstrated anti-carcinogenic activity. These include isoflavonoids, protease inhibitors and phytic acid.
(Source: Wiki)
Choice of Soya products, the recipe, ingredients, method etc is entirely left to you. I would greatly appreciate if you can send me any Vegan or Vegetarian recipes but I leave it to your choice. Soya foods include tofu, tempeh, textured vegetable protein (chunks, mince etc), miso, soya sauces, soya oil and margarine, and soya dairy alternatives.
Textured Vegetable Protein: Textured vegetable protein is basically defatted soya flour which has been processed and dried to give a substance with a sponge-like texture which may be flavoured to resemble meat.
Tofu: Tofu is soya bean curd made from coagulated soya milk.
Tempeh: Tempeh is a fermented soya bean paste made by inoculating cooked soya beans with the mould Rhizopus oligosporous.
Miso: Miso is a fermented condiment made from soya beans, grain (rice or barley), salt and water.
Soya Sauce: True soya sauce, called shoyu, is made by fermenting soya beans with cracked roasted wheat, salt and water.
Soya Dairy Alternatives: Soya milk is an alternative to dairy milk and is widely available in supermarkets and health food stores. It is most commonly made by soaking soya beans in water which are then strained to remove the fibre.
Other Soya Products: Soya oil and margarine are widely used and are high in polyunsaturated fats and low in saturated fats. Other less easily available soya foods include soya sprouts, soya nuts (roasted and seasoned soya beans), natto (fermented soya beans made with a bacteria, Bacillus subtilis), yuba (the skin formed on heated soya milk), soya flakes, soya flour, and high protein soya isolates and concentrates
(Source: vegsoc.org)
So what are you waiting for? Prepare any dish using Soya Products and mail it to me. Put your imaginations to work and get creative. And most important thing to remember is have lots of fun. Cook, post and mail me your favourite Soya recipe. Don’t forget to go through the following guidelines. I will eagerly look forward to your creative contributions.

Some Guidelines to Follow:

1. Prepare a dish that features Soya or Soya Products as one of the main ingredients and post it in your blog in a month of August, 2008. It would be lovely if you can send me a Vegan or Vegetarian dish with Soya or Soya product featuring a central role.
2. If you already have appropriate entry archived, please make sure to repost it with a link back to this announcement page. But it will be great if you are to cook a special dish for this event.
3. Provide a link back to this announcement page and feel free to use the logo.
4. Email your entry to sia[at]monsoonspice[dot]com, with JFI-Soya in the subject line with following details
  • Your Name
  • Blog Name
  • Blog URL
  • Type of a Dish (For example, Snack, Starter, Main, Side Dish, Dessert etc)
  • Recipe Name
  • Recipe URL
  • Photograph of final dish.
5. The deadline for this event is August 31st, 2008. Please remember that no late entries will be entertained.
6. There is no limit to the number of entries. If you don’t have a blog but wish to participate in this event, send your entries with a picture, your name and recipe to sia[at]monsoonspice[dot]com before the deadline. I will post the recipes with your picture in my blog and include it in the round-up.

Simply copy and paste the below code to your post to use this logo.

JFI-Soya:
Photobucket

25 July, 2008

Is That My Green Thumb: Dabeli

Photobucket
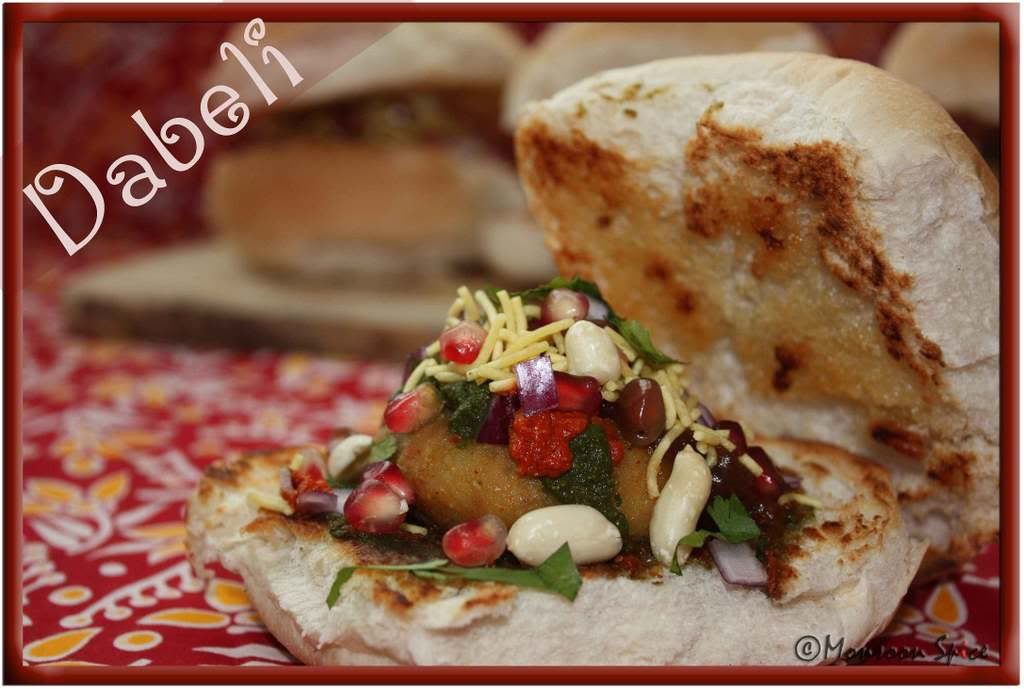
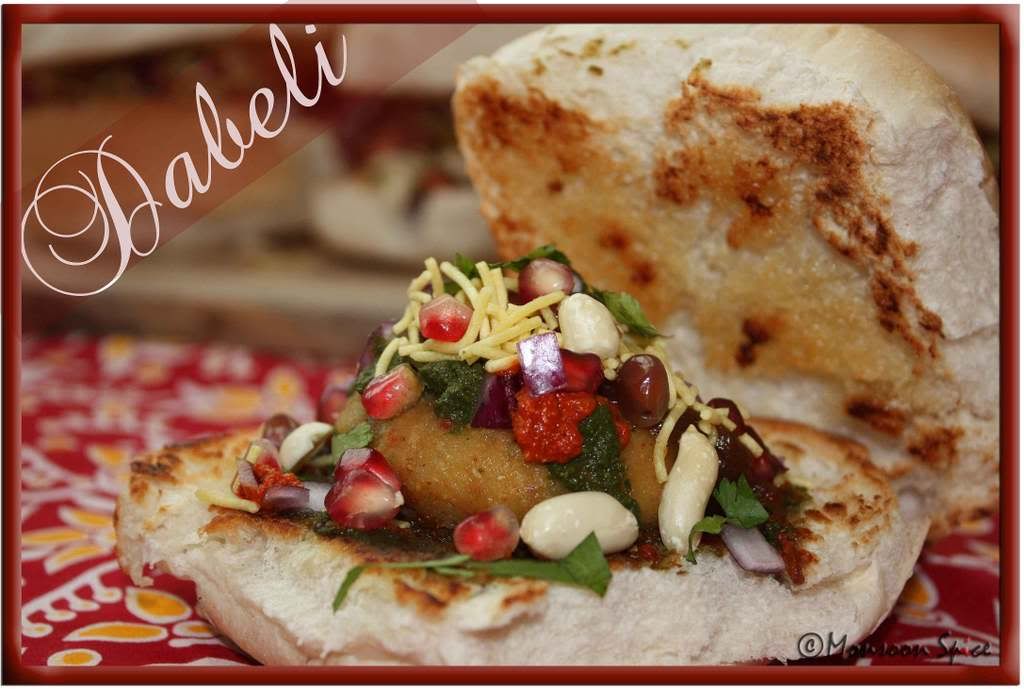
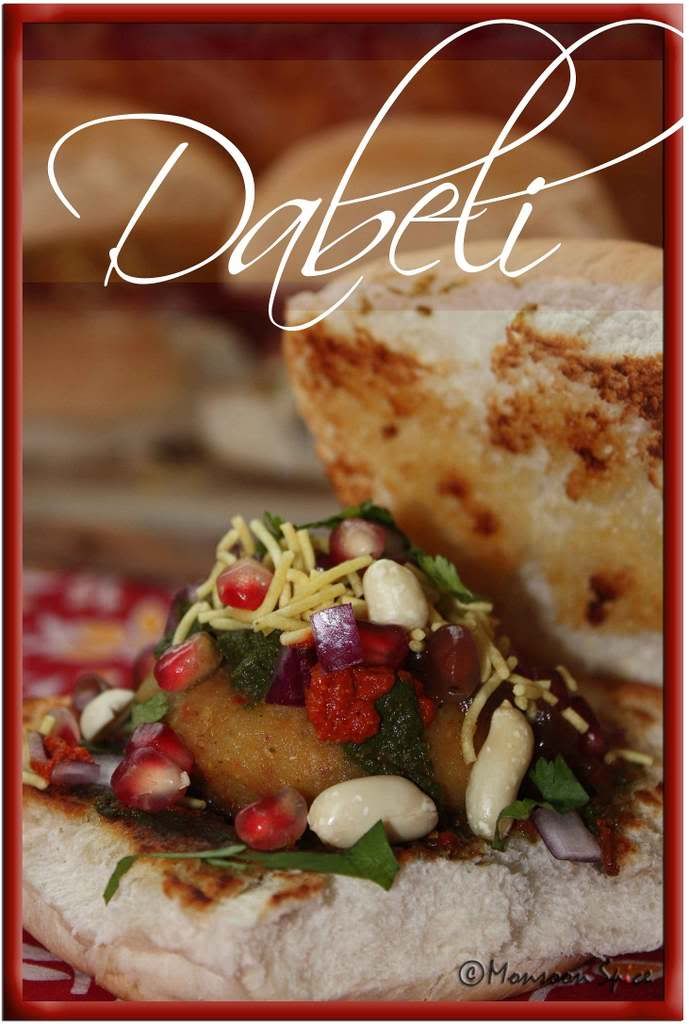
Dabeli

Grow Your Own a.k.a. GYO is a twice-a-month blogging event that celebrates the foods we grow ourselves and the dishes we make using our homegrown products is a brainchild of Andrea who blogs at Andrea’s Recipes. This fortnight it is being guest hosted by dynamic Jugalbandi’s Jai and Bee.

Here comes the problem. Well, it’s another food blog event and the rules are quite straightforward. You might ask me what exactly the problem is. For the last couple of weeks every blogger is showing off their gardening talents. Well, after all its summer and everyone seems to be growing something or the other in their vegetable patch resembling football stadium or snooker table and some even managed to grow in their small sized balconies and containers. I went through all these blogger’s posts with dozens of photographs of their summer bounty and admired their skills.

Then the realization hit me hard!!! All we had grown in a small patch of our backyard is few flowering plants and mind you they were not from seeds we had sown!! We just bought few plants from weekend farmer’s market and just planted them. Now its not that we are lazy (Ok, little bit). The reasons for not growing our own summer vegetable and fruits bounty are many. First and most important of all is the unpredictable weather. Just when we had cleaned our vegetable patch from all those wild weeds (my goodness, they have very strong and had deep roots), slugs and snails (they are so yuck!), it started to rain cats and dogs. After 2-3 weeks of these heavy summer rains the vegetable patch was filled with new bounty of weeds and snails and we didn’t fancy cooking those Dandelions in soups and stews and being a vegetarians eating those snails were unimaginable ;) So again we cleared our veggie patch and again it started to rain!!! We ended up planting few plants of Geranium, roses, lavenders. Second reason, our work schedule. Leaving to work at 7 in the morning and coming back at 7 in the evening doesn’t give much time to spend time in gardening during weekdays. Next reason is the visits to our vegetable patch by unwanted guests. You see some way or the other many cats in our neighborhood feel that it’s their birth right to come and empty their stomachs in our vegetable patch. We have 6 different cats coming and leaving behind their smelly trails. Sometimes we do wonder how roasted and grilled cats taste, just like Manisha. (Ok, I am kidding big time;)

Photobucket

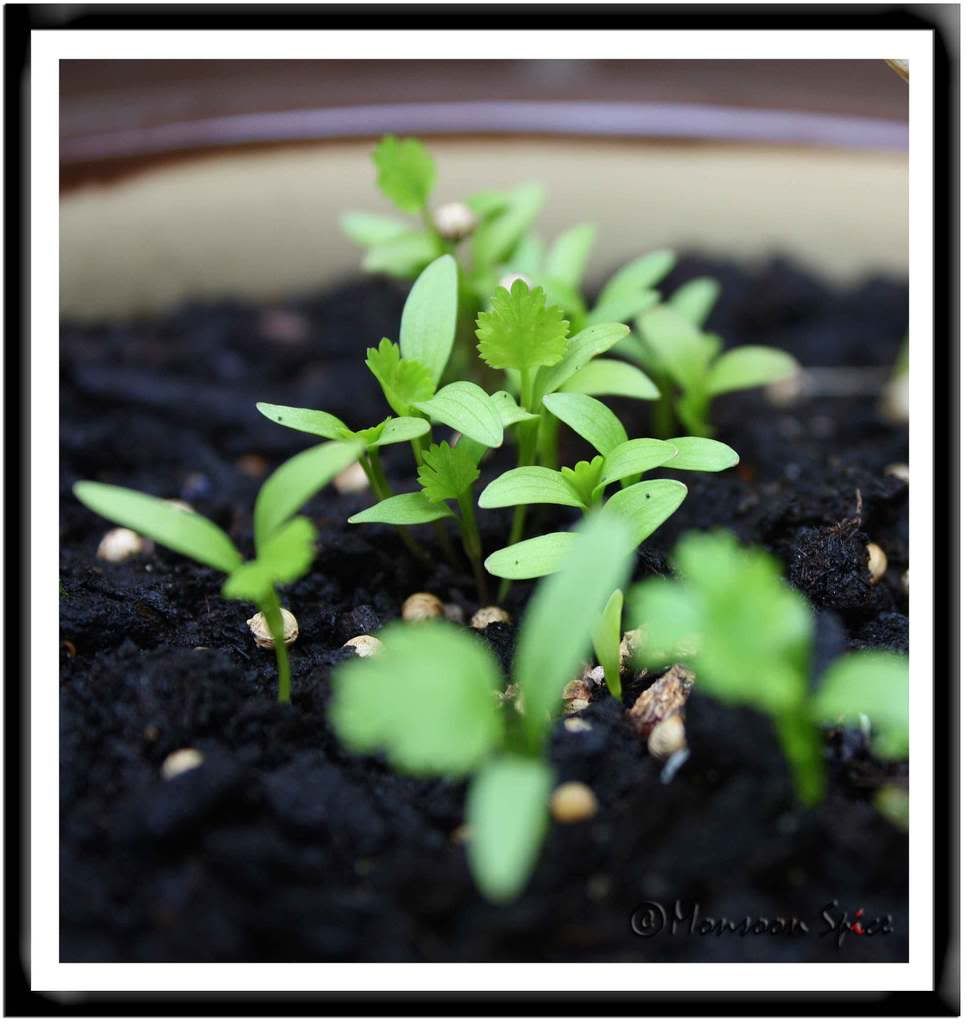
With all these problems, we did manage to grow few herbs in pots. Some mint leaves are growing wildly and we are making good use of it in summer drinks. We have two curry plants donated by our close friends. And we have successfully grown a big pot of coriander leaves. I have been using them in most of the curries as garnishes. And Bee did say coriander used as garnishes can make it to the event. Thank you Bee, my coriander garnish is what I am sending you for GYO. This time its Dabeli garnished with fresh corianders from our garden makes its grand entrance for Jugalbandi’s GYO event.


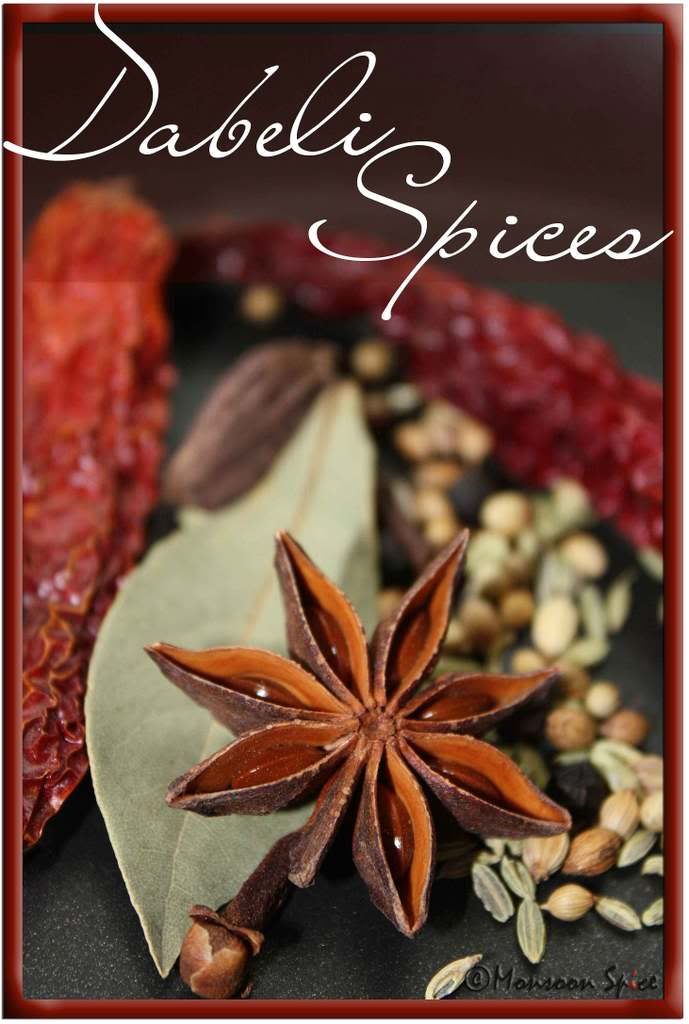
Dabeli or Katchi Dabeli or Double Roti is a street food mostly originated in Kutchi/Gujarat and very popular street food sold in Mumbai/Bombay. In my engineering days I survived eating these Dabeli for my lunch and sometimes for dinner from our campus Bakery. It is also known as Kutchi Dabeli or Double Roti and uses a special spice blend called Dabeli Masala. When I hosted MBP-Street Food, I had many Dabeli entries and I couldn’t wait to try my favorite street food. When I received Raghavan Iyer’s 660 Curries book for my birthday, I was rejoiced to see detailed recipe for Dabeli with its spice blend.
In Raghavan’s own words,
"Maharashtrian’s are very creative when it comes to combining multiple sources of carbohydrates in the same dish. This curry-in-a-bun is love at first bite-topped with luscious-red, juicy-tart pomegranate seeds. It’s really a cinch to make as a do-ahead dish. Just lay everything out in a bowls assembly-line style, in the same order as they go into the bun, and folks can help themselves by making their own. Those ho-hum taco parties will make a run for the border."
I made Dabeli Masala by strictly following Raghavan’s recipe and then assembled the Dabeli according to our taste. So without any delay, I made these wonderful street food and relived my college days:) Straight this goes to Jugalbandi’s for their GYO.

Photobucket
Kutchi Dabeli

Photobucket Print This Recipe
Dabeli (Spiced Potato & Pomegranate Sandwiches)
Prep Time: 10 mins
Cooking Time: 20 mins
Makes: 4-6
Recipe Source: 660 Curries
Ingredients:
For Dabeli Masala:
1 tsp Whole Clove (about 4-5)
½ tsp Fennel Seeds
½ tsp Black Peppers
½ tsp Coriander Seeds
4 dried Red Chilies (Thai or Cayenne), stems removed (I used Byadagi Chilies)
4 blades of Mace or ¼ tsp Ground Mace (I omitted it as I didn’t have any)
2-3 Whole Star Anie
1-2 Dried Bay Leaves
Seeds from 1-2 Black Cardamom Pods
½ tsp Ground Ginger (You will get them in any Asian stores)
Pinch of Turmeric Powder

For the Filling:
3 large Potatoes (Russet or Yukon Gold), peeled, boiled and mashed
1 small Onion, finely chopped (Optional)
1 tbsp Dabeli Masala
1 tsp Sugar Powder
½ tbsp Oil
Salt to taste

For the Sauces:
Recipe calls for just Sweet & Sour Date-Tamarind Chutney and Green Mint-Coriander Chutny but I also used Spicy Red Chutney.

For Sweet Tamarind-Date Chutney:
1 lemon sized Tamarind Pulp, soaked in water
6-8 Dates, pitted
½ tsp Red Chilli Powder
4-6 tbsp Jaggary (adjust acc to taste)
Salt to taste

For Green Mint Chutney:
1 packed cup Mint Leaves
½ packed cup Coriander Leaves
4-6 Green Chillies (adjust acc to taste)
1 tsp Jeera/Cumin Seeds
¼ tsp Tamarind Paste
Salt to taste

For Spicy Red Chutney:
10 Dry Red Chillies
2-3 Garlic flakes
1 small Tomato (Optional, it helps in grinding the chilies to smooth paste)
½ tsp Tamarind Paste
1 tsp Jeera/Cumin Seeds
Salt to taste

For Assembling the Sandwiches:
4-6 Ladi Pav/Burger Buns
Butter for Spreading
Seeds from 1 small Pomegranate
½ cup Spicy Roasted Peanuts (I used plain ones)
1 small Red Onion, finely chopped
½ cup Sev (Gram flour noodles, deep fried. You will find them in any Asian stores)
1-2 tbsp Coriander Leaves, finely chopped

Photobucket
Spices for Dabeli Masala

Method:
For Dabeli Masala:
The above ingredients make about 2 tbsp of Dabeli Masala. Place all the ingredients in a spice blender or coffee grinder and grind to fine powder. Store it in an air tight container till needed. I will last for 2 months.

For Potato Filling:
Combine mashed potatoes, dabeli masala, salt and sugar and mix well.
Heat oil in a pan and add finely chopped onion if using (adding onion is optional but I remember having it in the dabeli potato filling back in my campus bakery). Sauté it on medium heat till onions turn golden, about 2-3 mins.
Mix in spiced potato and cook, stirring occasionally, until the potatoes are warmed and the spices are cooked, 5-6 mins. Keep this potato mixture aside.

For Sweet Tamarind-Date Chutney:
Grind all ingredients listed to very smooth paste adding very little water at time. This paste should be little thick not runny.

For Green Mint Chutney:
Grind all the ingredients listed to smooth paste adding very little water at time. Adjust the number of green chilies according to taste. I personally like little hot. Make sure that the chutney is not very watery.

For Spicy Red Chutney:
Grind all the ingredients to very smooth paste adding very little water at time. If you find it difficult to grind, add small tomato (tip learnt from my favorite Chaatwalah).

To Assemble Dabeli:
Heat a griddle or skillet over a medium heat. Cut the ladi-pav or sandwich bun in centre and apply little butter on cut side. Place this bun, buttered side down, on a skillet and cook until they are browned, 1-2 mins. Remove the bunds from griddle and keep aside.
To make the sandwich, first spread a tsp each of date-tamarind sauce, mint-coriander chutney and spicy red chutney. You can adjust these chutneys depending on your taste.
Next, place 1/6th of Spiced Potato. You can make a medium lime sized potato balls and pat it a bit and place it on the bun.
Sprinkle a tbsp of juicy pomegranate seeds, followed by a tbsp of roasted peanuts, ½ tbsp finely chopped red onion and a tbsp of Sev.
Garnish with finely chopped coriander leaves on top and then cover it with the other half of bun and serve them.

Photobucket
Dabeli


Reminder: WBB-Summer Feast

For this edition of WBB, your challenge is to cook anything with summer fruits and vegetables. Yes, the theme is WBB-Summer Feast. Go to your town/city’s Farmer’s Market and pick fresh season’s produce and make your favourite breakfast or brunch and join in the Summer Feast.

Deadline: 31st July, 2008

Please go through the guidelines and include all the required information in your post and mail when sending me your entry. Don't forget to add Your Name, Your Blog Name, Name of the Dish you cooked, Perm Link of the entry along with the gorgeous Photo of final dish.

Click Here or on the logo to find out more information on this event.

20 July, 2008

Thank You & Congrats: Bri's Fundraiser

"One can pay back the loan of gold, but one dies forever in debt to those who are kind."
~Malayan Proverb

Photobucket

Thank you one and all who contributed to raise money for Bri’s out of pocket medical expense to treat her breast cancer. God bless you all for your unconditional love and good wishes. The love that shared through this fund raiser has been truly amazing. In my eyes each and every one who participated in Love-in-Action is a true winner. My heartfelt thanks to all the people who are part of this fund-raiser and I am sure all these positive vibes do a world of good for Bri. Bri you are in our prayers.

Congrats to all the raffle winners and congrats to Jennifer McMullen (Real Vegetarian Thai cookbook) and Madhushree (Buddha’s Table cookbook) who have won prices from me. Jennifer & Madhushree, please contact me at sia[at]monsoonspice[dot]com with your shipping address. I will ship your prizes as soon as I hear from you. I hope you enjoy reading, learning and cooking from these lovely cookbooks as much as I do.

Photobucket
The wonderful array of prizes donated by Bri’s friends and well wishers can be viewed here. You can see other raffles winners at Jugalbandi blog.

17 July, 2008

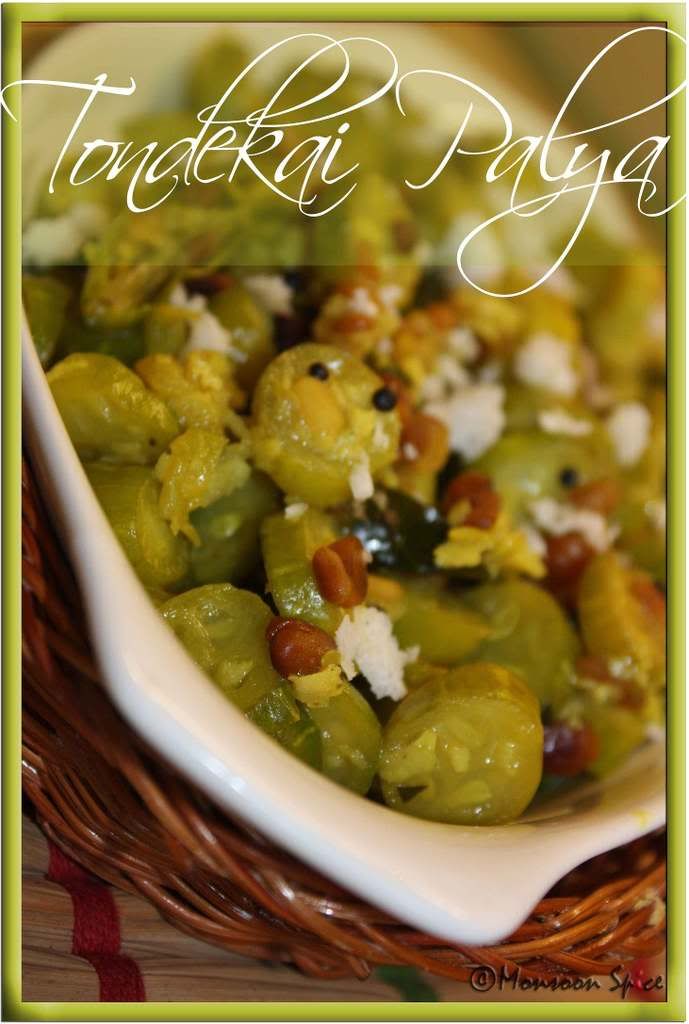
Another Milestone and Another Palya: Tondekai Palya

Photobucket

Tondekai Palya

Did I mention I am way too busy these days? If not, now you know;) I have been extremely busy these days. What with new project I started working on which takes most of my time and attention, it feels like I am walking on some tight rope balancing home in one hand and office in another! And strangely I am quite enjoying myself! Oh, I can be wild and crazy sometimes and I do surprise myself many a times.

14 July, 2008

One of 660 Curries: Bharwan Lauki

Photobucket
Bharwan Lauki

Other day I read this interview at Star Tribune which was forwarded to me by one of my good friend who reads my blog regularly. The interview was with Raghavan Iyer, the author of cookbook called “The Turmeric Trail: Recipes and Memories from an Indian Childhood”. There he was talking about his new cookbook with over 832 pages filled with curry recipes, “660 Curries: The Gateway to Indian Cooking”.

What is Curry?
In England and the rest of the world, "curry" describes anything Indian that is mottled with hot spices, with or without a sauce, and "curry powder" is the blend that delivers it. In keeping with my culture, I define a curry as any dish that consists of meat, fish, poultry, legumes, vegetables, or fruits, simmered in or covered with a sauce, gravy, or other liquid that is redolent of spices and/or herbs. (Page 3)
Raghavan clarifies that curry isn’t about the dish spiced from a jar labeled “curry powder” that most of the western world is familiar with, but gravy. His quote “No self-respecting Indian kitchen world would have curry powder” was enough to make me itch to have his book in my hands. Then I read raving review at Juglabandi’s (15 Dudhi/Bottle Gourds recipes is what got my full attention as I am a sucker for Dudhi). And surprise, surprise!!! 660 Curries is one of my birthday loot from my much-better-half :) I was thrilled to get hold of this book (and also other gifts which Krish bought me keeping my blog in mind;) and in last 3 days we have had tried 3 recipes from this book with outstanding results. Wonder of wonder, no two curries taste the same!!! No wonder we are addicted to this near-encyclopedic curry bible and we will be cooking and posting many more recipes here in Monsoon Spice.
“I wanted it to be as if a cooking teacher is talking, so there is more explanation, as if I'm there".
Other than over 700 recipes (701 to be precise, 660 curries and the remainder for what he calls cohorts), what we loved about this mammoth of a book is the way in which the author has given the recipe instruction. He not only gives substitutes for the ingredients which may not be available in non-Indian kitchens but also clear cut and precise recipe instruction which is very easy to follow even for the novice cooks and those who are unfamiliar with Indian cooking techniques. Well not every author gives you step-by-step instructions as how to clean the lentils before using!!! This book is a labour of love and it shows in each and every recipe given. No wonder he claims his 4 years journey to get this book written and published was like “giving birth to a horse”!!!

The book has neatly written glossary lists for almost every ingredient used in all 701 recipes and also clear metric conversion charts for quantities and temperature. And what more, the author also gives mail-order sources for particular ingredients which otherwise may not be available outside India. From “Appetizer Curries” to “Contemporary Curries”, this book has it all. About 25%-30% recipes are non-vegetarian and there is one whole chapter dedicated to “Paneer based Curries” for all you Paneer lovers.

In almost all the recipes Raghavan uses his background as a chemist to describe the process of “building” the recipes based on these elements he describes in his first chapter “The Curry Quest” which is a must read if you are practically new to Indian cooking. Raghavan’s quest for bringing the Indian subcontinent to the western kitchen has surely won our heart.
The downside of this book?
One, there are not many glossy photographs which are my weakness. Second, once you have chosen a recipe, you may need to refer to some other recipe for particular ingredient required. Third, it would have been better if author could have given approximate estimation of preparation and cooking time for every recipe which would give us rough idea as how long it will take to get the food on your table.
But when you think of it, it is not exactly the downside. First of all the book is so thick, adding more picture will only mean more weight. And no glossy photo means you can imagine the end-product and thus makes you eager to cook and taste it (and you won’t get complex when you compare the dish you cooked with those extra glossy, out of this world food photographs;). And as per the flipping the pages to and fro, most of the spice blends will be ready in hand in almost every Indian kitchen and it is not necessary to give recipe of Garam Masala which is used in almost 30% of recipes.
What I love about this book?
What? You sure are reading this post right? With all the things mentioned above, you can’t fail to notice that each and every recipe is well researched with detailed step-by-step instructions which sure to please both novice and expert cook. The recipes are both authentic and creative. Overall a must have book for every Indian food lovers.
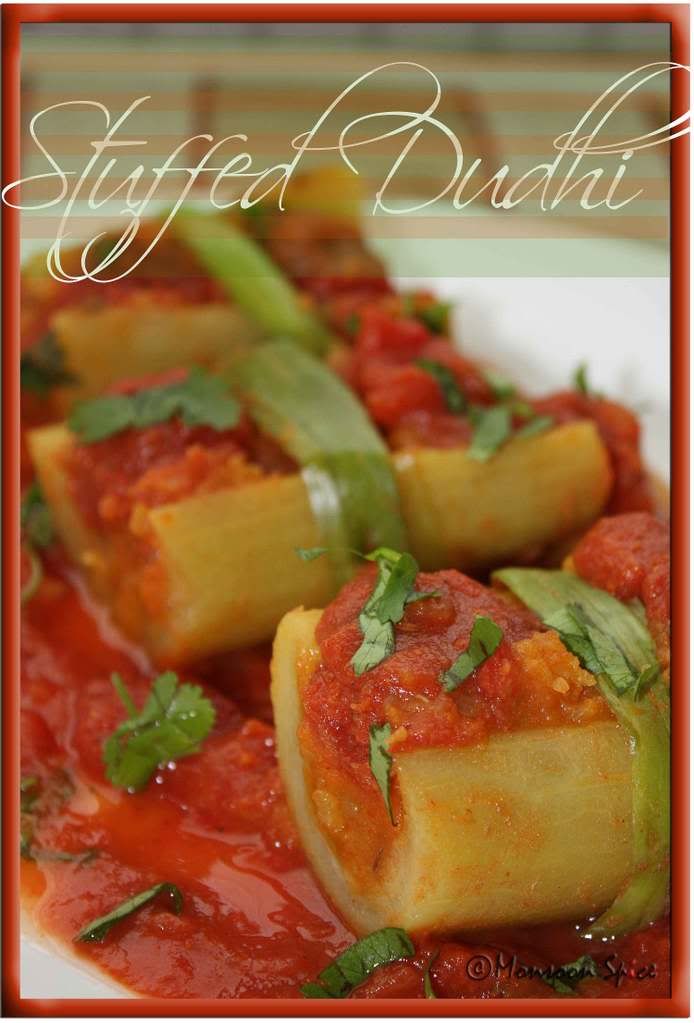
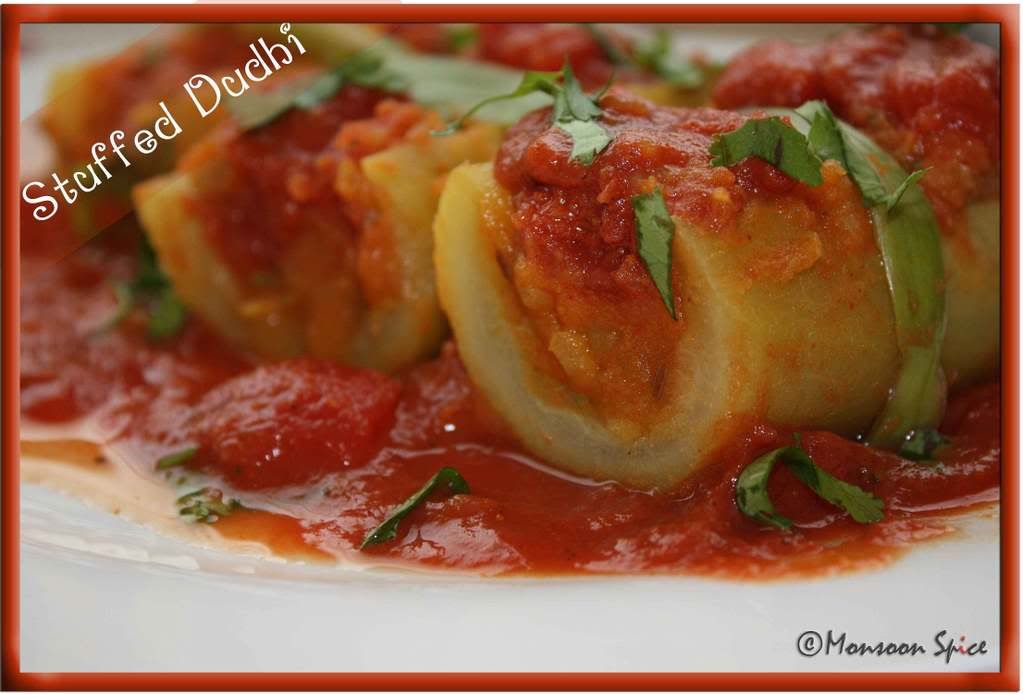
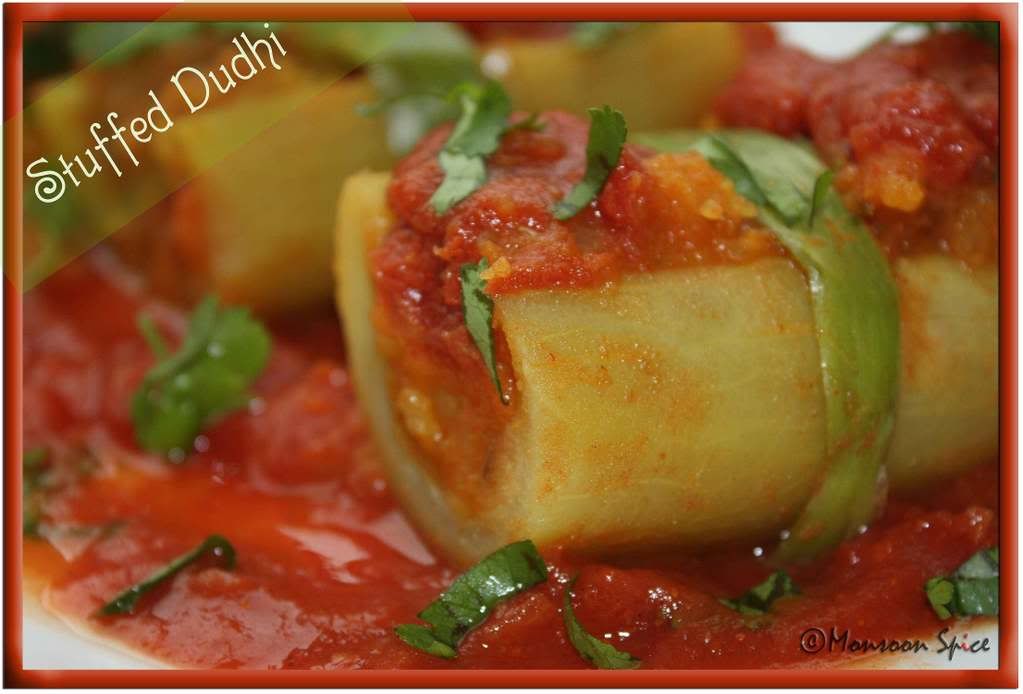
One of the curries I tried from this book is Bharwan Lauki or Potato Stuffed Dudhi/Bottle Gourd. Oh yes!! One of the main reasons for my quest to purchase this book was the fact that it has 15 bottle gourd recipes and I was not disappointed with the end result. Bottle gourd was never this sizzling hot before. Bottle gourd ‘boats’ stuffed with spiced mashed potatoes and cooked with chopped tomato masala. Just the title was enough to make me all excited as it was something which I have had never heard of and never tasted. It was delicious alright and it was one fancy looking dish too. These delicious Squash boats goes to dear Pooja’s VOW-Bottle Gourd and also to Valli's Curry Mela. Since it was cooked for brunch with fresh Summer Vegetables and served with Paratha, it is my entry for WBB-Summer Feast hosted by yours truely:)

Photobucket
Bharwan Lauki/Stuffed Squash

Photobucket Print This Recipe

Bharwan Lauki (Potato Stuffed Squash/Dudhi)
Prep Time: 20 mins
Cooking Time: 1 hr to 1 hr 30 mins
Serves: 5-6
Recipe Source: 660 Curries: The Gateway to Indian Cooking

Ingredients:
For Dudhi Boats:
1 medium Dudhi/Bottle Gourd
2 tbsp Coriander Leaves, finely chopped
Salt to taste

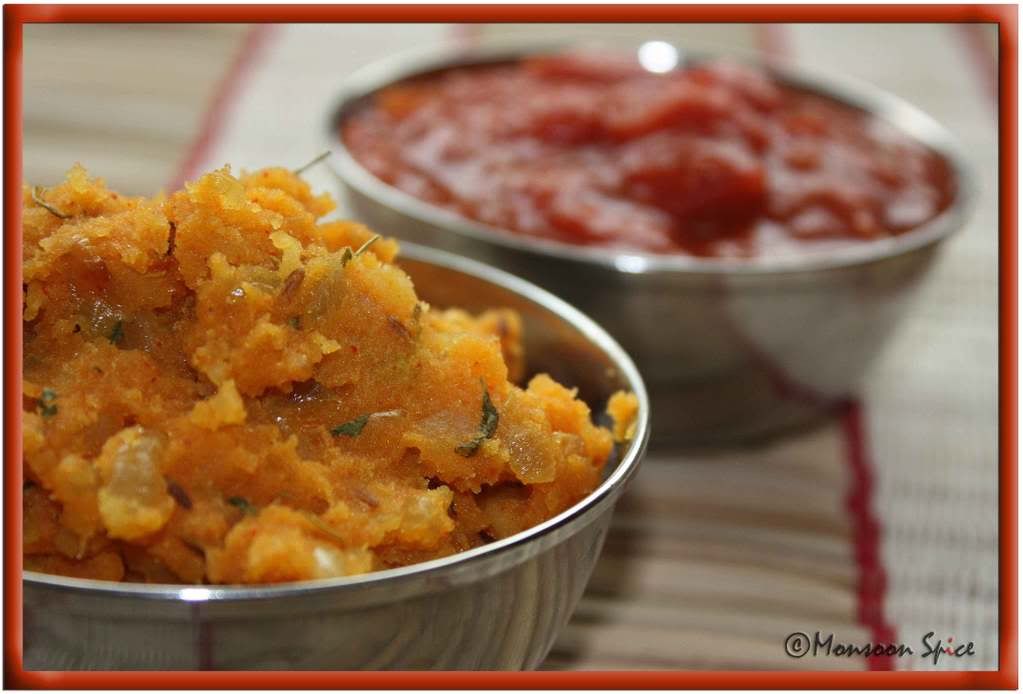
For Potato Stuffing:
2 medium Potatoes (Russet or Yukon Gold), peeled, diced, cooked, drained and roughly mashed
½ cup Reserved Water from Potato
1 small Red Onion, finely chopped
1 inch ginger, finely chopped
¼ tsp Turmeric Powder
½ tsp roasted Cumin Powder
½ tsp Coriander Powder
1 tsp Deggi Mirch or ½ tsp Cayenne (Ground Red Chilli) + ½ tsp smoked sweet Paprika (adjust acc to taste)
½ tsp Jeera/Cumin Seeds (optional)
½ tbsp Kasuri Methi/Dried Fenugreek Leaves (optional)
½ tsp Sugar (optional)
½ tbsp Oil
Salt to taste

For Tomato Sauce:
1 can chopped Tomatoes
1 tsp Garam Masala (original recipe calls for Maharastrian Garam Masala)
½ tsp Kitchen King Masala (optional)
Photobucket
Spiced Potato Stffing & Tomato Sauce

Method:
For the Dudhi Boats:
Trim the ends of dudhi and peel it with a vegetable peeler. Slit it length-wise in middle so that you are left with two long pieces. With a help of a spoon scoop out the seeds and the surrounding spongy mass carefully so that you are left with two dudhi ‘boats’.
Place this in a large sauce pan and add about a tsp of salt. Pour in water so that the dudhi is completely immersed and cover and cook for 5-7 mins till dudhi turns limp, little transparent and is tender. Remove it from a pan and gently place it in a large oven proof dish, scooped side facing up.

For the Potato Stuffing:
Mix in turmeric, jeera, coriander and deggi mirch powder with roughly mashed potatoes and keep aside.
Heat oil in pan and add cumin seeds. When it starts to sizzle, mix in finely chopped onion and ginger and kasuri methi if using. Sauté it on medium flame till onion turns light golden brown, around 2-3 mins.
Now mix in spiced potato and mix well. Add sugar and salt to taste. Cook for 4-6 mins till potato starts to stick to the bottom of pan forming a light thin brown layer.
Stir in ½ cup of reserved water and mix well. Cook for further 2-3 mins till all the water is absorbed and the flavours are blended.

For Tomato Sauce:
In a bowl, add garam masala and kitchen king masala with canned chopped tomatoes and mix well. Keep this aside.

For Assembling:
Preheat the oven at 350 F.
First stuff the potato filling in halved dudhis making sure to cover it well. Now pour in the tomato sauce covering the dudhi well, lifting them a little to allow the juices to run under and form a thin layer which will prevent the squash from drying out when baked.
Cover the dish with tin foil and bake it undisturbed for around one hour until the potatoes are warm and squash is tender and the tomatoes are softened.

To serve:
Cut each Potato stuffed Dudhi into 3 equal pieces and sprinkle chopped coriander laves before serving. I served it with simple Jeera Rice.

Photobucket
Bharwan Lauki


Note:
Other Dudhi recipes blogged so far

Other useful links:

Reminder: WBB-Summer Feast

For this edition of WBB, your challenge is to cook anything with summer fruits and vegetables. Yes, the theme is WBB-Summer Feast. Go to your town/city’s Farmer’s Market and pick fresh season’s produce and make your favourite breakfast or brunch and join in the Summer Feast.

Deadline: 31st July, 2008

Please go through the guidelines and include all the required information in your post and mail when sending me your entry. Don't forget to add Your Name, Your Blog Name, Name of the Dish you cooked, Perm Link of the entry along with the gorgeous Photo of final dish.

Click Here or on the logo to find out more information on this event.
12 July, 2008

Crabby Bites.... Her B'day Cake

Photobucket

Thank you friends for b'day wishes through emails, comments and messages. I really feel special and cherished. So here is slice of my b'day cake for you :) Enjoy this gooey, chocolate goodness;)

08 July, 2008

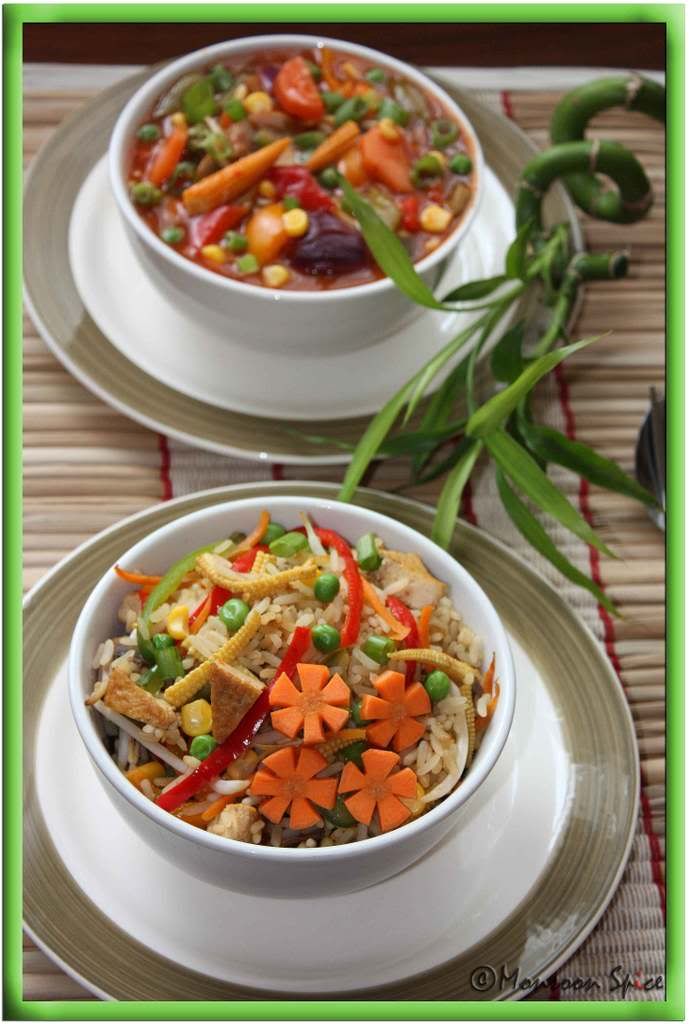
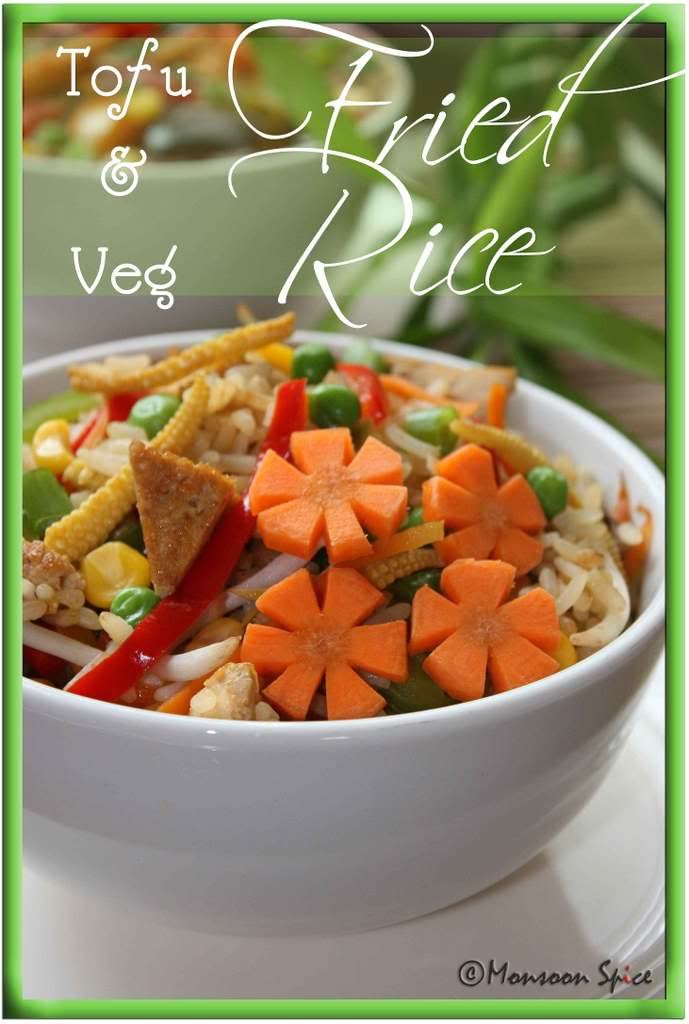
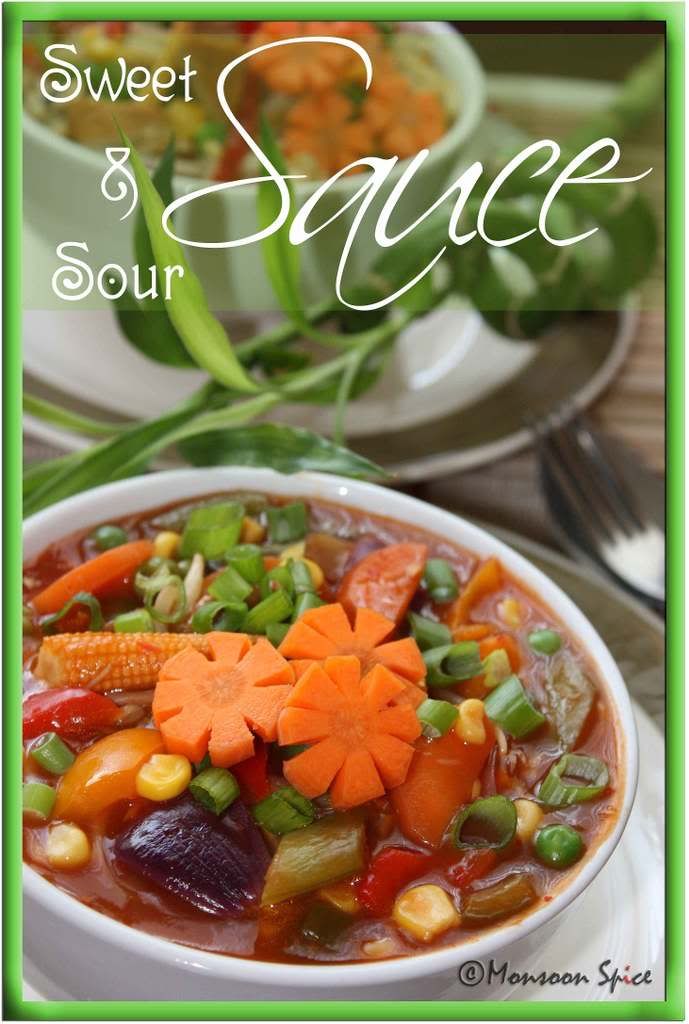
Cultural Remix: Tofu & Veg Fried Rice with Vegetables in Sweet & Sour Sauce

Photobucket
Tofu & Veg Fried Rice with Vegetables in Sweet & Sour Sauce

When the Chinese introduced their cuisine into India, little did they would have expected to see that the ever-adapting Indian would re-invent some of their most time-tested recipes to suit the sub-continental palate. Yes, I am talking of Indo-Chinese food. I can see the surprised look at my non-Indian blogger friends. What the heck is Indo-Chinese cuisine? Well my friends first let me give you a brief history lesson on Indo-Chinese food which is one of the most favoured type of cuisine in India.

Indo-Chinese cuisine is believed to have originated with the Chinese migrants who settled in one of the metropolitan cities of India, Calcutta or currently known as Kolkata. India has one Chinatown, Tangra in Calcutta and the Chinese have been living there for more than a century. It is believed that over a century the food is adapted to suit local ingredients and adjusting the flavours to reflect the local palate. So my friends, in simple words Indo-Chinese cuisine are adaptation of Chinese seasonings and cooking techniques to Indian taste and in my opinion one of the best cultural remix.

Indo-Chinese food sells like one hot potato in every nook and corner of any city and towns. Don’t be surprised to see small wooden push carts painted with funny looking dragons with fire coming out of their mouth or the bamboo trees selling Indo-Chinese food. You can never miss the irresistible smell of cooking garlic, onions and chillies which will grab your attention even from 500 meters distance and you will be drawn to these carts with sudden hunger pangs. Price-wise the food is dirt cheap for a plate of very filling and utterly delicious Indo-Chinese food. If you are backing away from eating this fusion food at roadside carts due to hygiene concern then fret not. Most of the small and big restaurant in India has Indo-Chinese food on their menu and even star hotels have their share. But in my opinion the best Indo-Chinese food I have ever tasted are from these roadside stalls which are not just tasty and cheap but real fun to eat.

And the best part is it is really quick and easy to cook. Now you really don’t have to make a trip to India just to eat this delicacy;) It requires very few ingredients and almost all these ingredients can be found in any grocery store or supermarkets. Indo-Chinese food is a bachelor friendly recipe as its super easy and super quick and super tasty. Today I am sharing two of my favourite Indo-Chinese food; Tofu & Vegetable Fried Rice with Vegetables in Sweet and Sour Sauce. Packed with colourful vegetables, these recipes are very easy to make as they are simply stir fried for few mins. This way they not just retain their crunch but also their nutrition. As you can see, you can use any type of vegetables of your choice and there is no way you can go wrong with these recipes. Off these two dishes go to DK’s AWED-Chinese and Mansi’s Healthy Cooking events. Mansi, you can’t deny the fact that these are really healthy ones. Well, look at the number of vegetables used and the way they are cooked ;) This is also my entry for WBB-Summer Feast hosted by me where I have used many Summer vegetables and it serves as the wonderful weekend brunch.

Photobucket
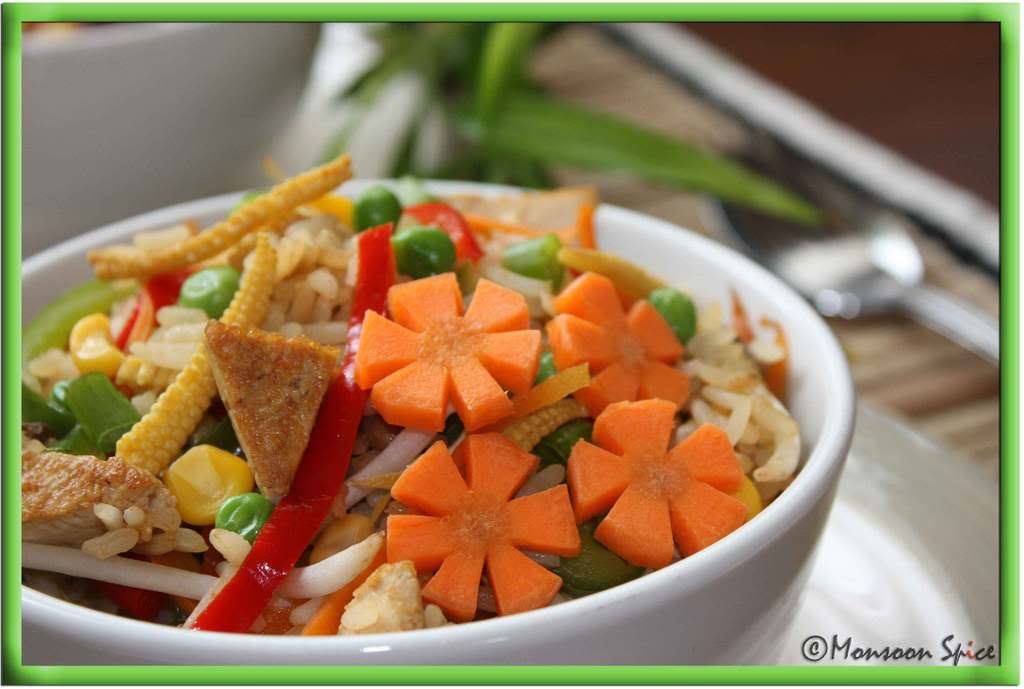
Tofu & Veg Fried Rice


Photobucket Print This Recipe
Tofu & Veg Fried Rice
Prep Time: 10 mins
Cooking Time: 10-15 mins
Serves: 3-5


Ingredients:
1 small Onion, chopped into bite size pieces
½ tbsp Garlic, finely chopped (adjust acc to preference)
1 tsp Ginger, finely chopped
¼ cup Spring Onion
½ cup Bean Sprouts (Optional)
2 Green Chillies, slit
1 cup firm Tofu, drained and cut into bite size pieces
2-2½ cups Mixed Vegetables of your choice, cut into match stick pieces
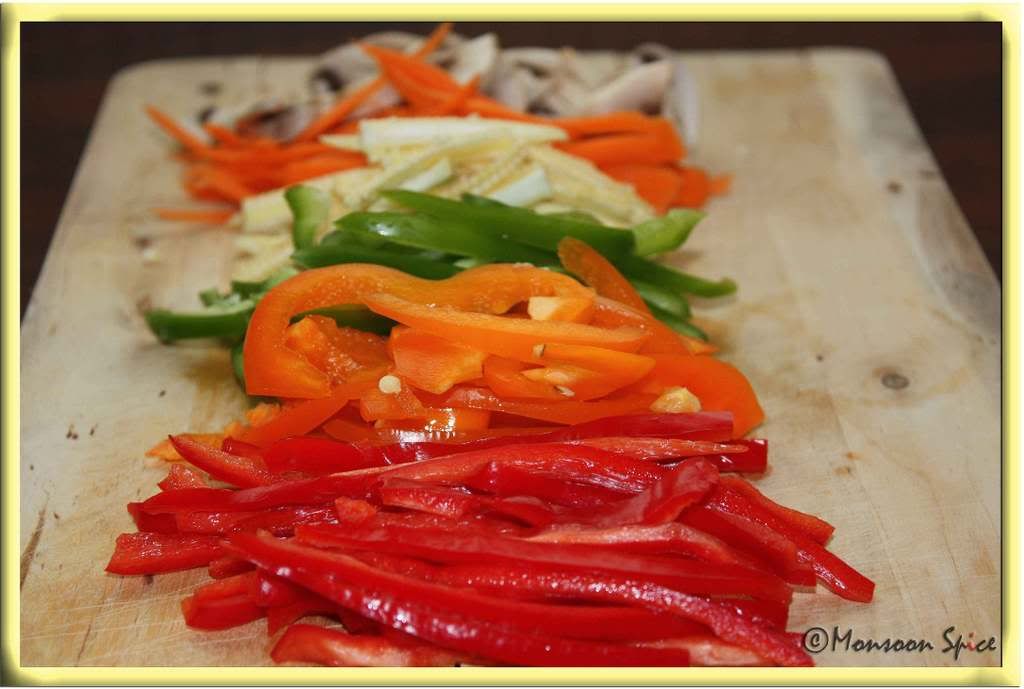
(I used Red, Green & Orange Bell Peppers, Button Mushrooms, Carrot, Baby Corn, Sweet Corn & Green Peas)
4-5 cups Cooked Rice, cooled completely and grains separated (any long grain rice is fine, I usually use left over basmati or frozen rice pack we get here)
2 tbsp Soya Sauce
¼ tsp Sugar
1 tbsp + 1 tbsp Oil, preferably Sesame Oil
Salt and White Pepper to taste

Photobucket
Vegetables used in Tofu & Veg Fried Rice

Method:
Heat 1 tbsp of Oil in a wok on medium to high heat. When hot add tofu and brown them from all sides. This way you have firm tofu which will not get crushing during frying process. Drain them and keep them aside. If not using Tofu you can omit this step.
Now heat another tbsp of oil at medium to high flame and add finely chopped garlic and ginger. Stir for around 15 seconds until fragrant. Add chopped onions and slit green chilli and sauté it for a minute or two till onions turns translucent.
Turn the heat to high and mix in vegetables, one type at a time, in order of what takes longest to cook. Add Soya sauce and sugar to bring out the flavour and keep sautéing for around 3-4 mins until the vegetables are half a way cooked but still retain their crunch.
Add cooked, cooled rice, salt and pepper to taste and tofu pieces and sauté it for a minute or two till each rice grain is heated through.
Sprinkle spring onions greens & bean sprouts before serving hot with Vegetable Sweet and Sour Sauce or Veg Balls in Garlic Sauce and enjoy.

Photobucket
Tofu & Veg Fried Rice

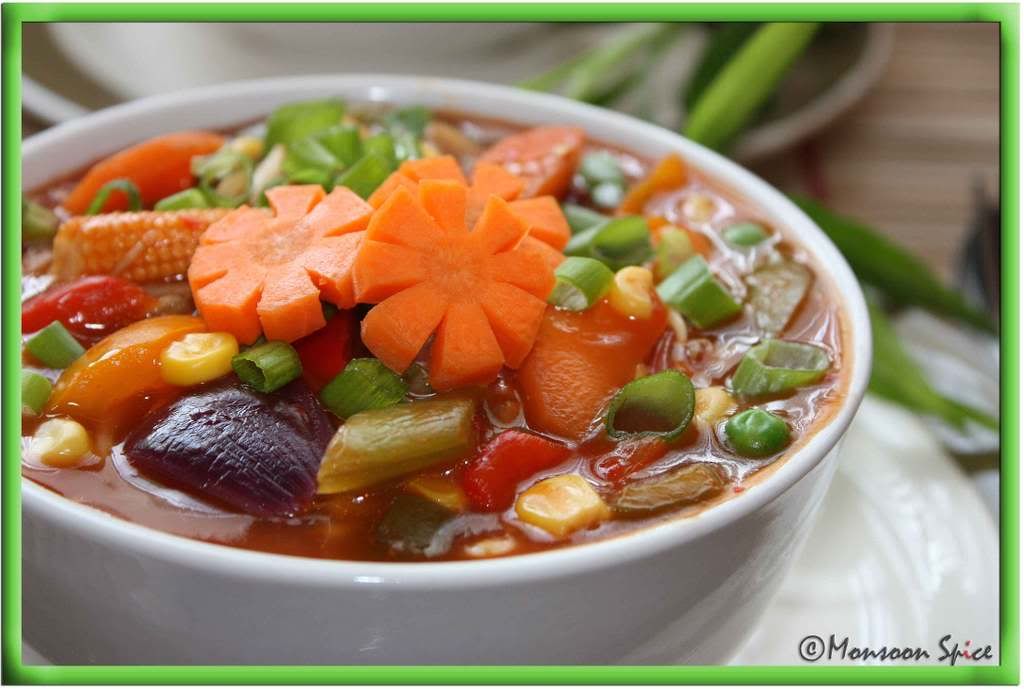
Colourful vegetables are stir fried and then cooked in thick sauce of garlic, red chilli paste and soya sauce with a hint of sweetness from brown sugar and pineapple pieces. This delicious mixed Vegetables in Sweet and Sour Sauce is sure to win your and your loved ones hearts. Serve it with simple Fried Rice or Noodles to make one delicious meal.

Photobucket
Vegetables in Sweet & Sour Sauce


Photobucket Print This Recipe

Vegetables in Sweet & Sour Sauce
Prep Time: 15 mins
Cooking Time: 15 mins
Serves: 4-6


Ingredients:
4-6 cups Mixed Vegetables of your choice, chopped into bite size pieces
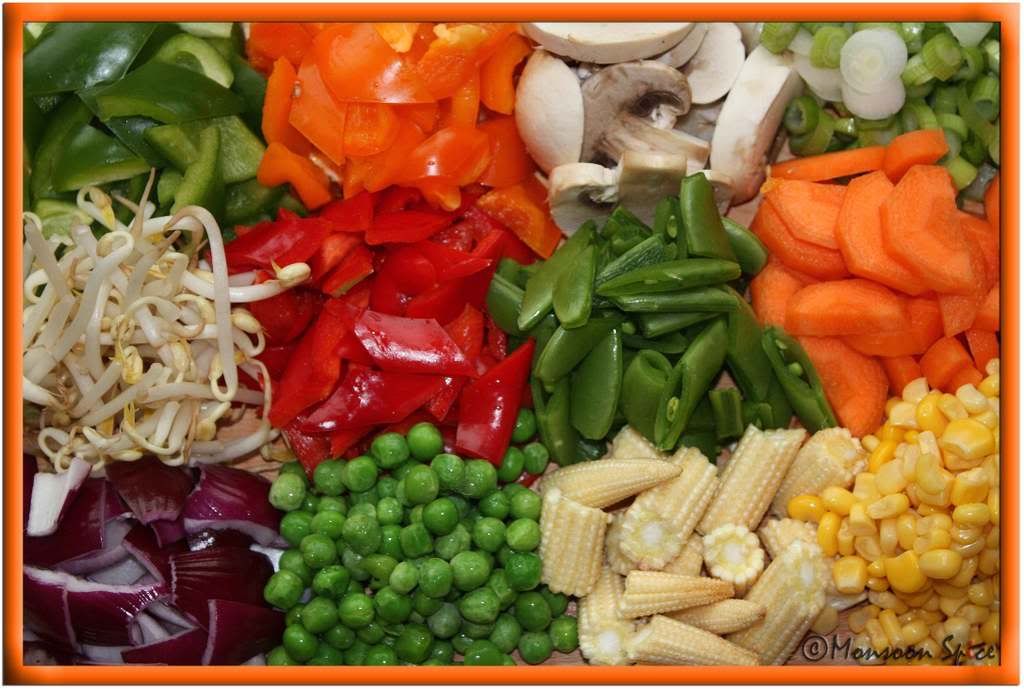
(I used Red, Green & Orange Bell Peppers, Carrots, Sugar Snaps, Mushrooms, Sweet Corn, Baby Corn & Green Peas)
1 cup Bean Sprouts
¼ cup Pineapple, cut into bite sized pieces (optional, but recommended)
½ cup Spring Onion Greens, finely chopped
1 medium Red Onion, chopped into bite size pieces
½ tbsp Garlic, finely chopped
1 tsp Ginger, finely chopped
1 Green Chilli, finely chopped (Optional)
2-3 tbsp Tomato Ketchup (adjust acc to taste)
2 tbsp Soya Sauce (adjust acc to taste)
1 tbsp Teriyaki Sauce (Optional)
½ tbsp Red Chilli Paste (adjust acc to taste)
1½-2 tbsp Corn Flour, mixed with ¼ cup of water to make lump free paste
½-1 tbsp Brown Sugar (adjust acc to taste)
4-6 cups Water (adjust)
1 tbsp Lime Juice
1 tbsp Oil, preferably Sesame Oil
Salt and White Pepper to taste

Photobucket
Vegetables used for Vegetables in Sweet & Sour Sauce

Method:
Heat oil in a wok at medium to high flame and when hot add chopped ginger and garlic. Sauté it for 15 seconds till fragrant and then add finely chopped green chilli and red onion and sauté it for a minute till onion turns translucent.
Increase the heat to high and start adding vegetables, one type at a time, in order of what takes longest to cook. Sauté it on high flame continuously for 3-4 mins till they are half a way cooked through. Mix in tomato ketchup, Soya sauce, teriyaki sauce, brown sugar and red chilli paste. Keep stirring for another 30 seconds or so.
Now add water till all the vegetables are just cover. Mix in pineapple pieces, salt and pepper to taste and cook for a minute or so. Slowly add corn flour paste to the pot, stirring continuously so that no lumps are formed. Keep stirring the sauce till it starts to thicken and reduce the heat to medium. Once the sauce is thick enough, switch off the flame and gently mixes in lime juice, bean sprouts and half of spring onion greens.
Serve this delicious Vegetable in Sweet and Sour Sauce garnished with remaining spring onion greens with Vegetable Fried Rice and enjoy.

Photobucket
Vegetables in Sweet & Sour Sauce


Note:
Other Indo-Chinese fusion recipes blogged so far


Reminder: WBB-Summer Feast

For this edition of WBB, your challenge is to cook anything with summer fruits and vegetables. Yes, the theme is WBB-Summer Feast. Go to your town/city’s Farmer’s Market and pick fresh season’s produce and make your favourite breakfast or brunch and join in the Summer Feast.

Deadline: 31st July, 2008

Please go through the guidelines and include all the required information in your post and mail when sending me your entry. Don't forget to add Your Name, Your Blog Name, Name of the Dish you cooked, Perm Link of the entry, Perm Link of original recipe along with the gorgeous Photo of final dish.

Click Here or on the logo to find out more information on this event.
03 July, 2008

The Wait is Over! Presenting MBP-Street Food Round-up

Statutory Warning:
This post might lead to some serious side effects in human behaviour and please read through the disclaimer before you proceed. Strictly no cursing and blaming and pointing finger at any person living or dead (especially at the blog owner) for your serious cravings and hunger pangs caused by this delicious spread! This post might be injurious to your diet plan, so please get your doctor or nutritionist’s advice before indulging. Proceed with caution.

Pani Puri, Dahi Puri, Sev Puri, Bhel Puri…
Manchurians, Hakka Noodles, Summer Rolls…
Pav Bhaji, Ragda Patties, Dabeli, Kachori…
Kottu Parotta, Kati Rolls, Roti John…
Samosa, Fritters, Dhoklas, Vadas…
Bajjis, Bondas, Pakodas, Puries…
Frankie, Sandwiches, Chats, Pot Stickers…

You name it and I have them all… Yes, each and every thing that makes you go hungry just by thinking. Wait, there is more to it. Along with wonderful recipes I have killer photos of each and every street food listed above.

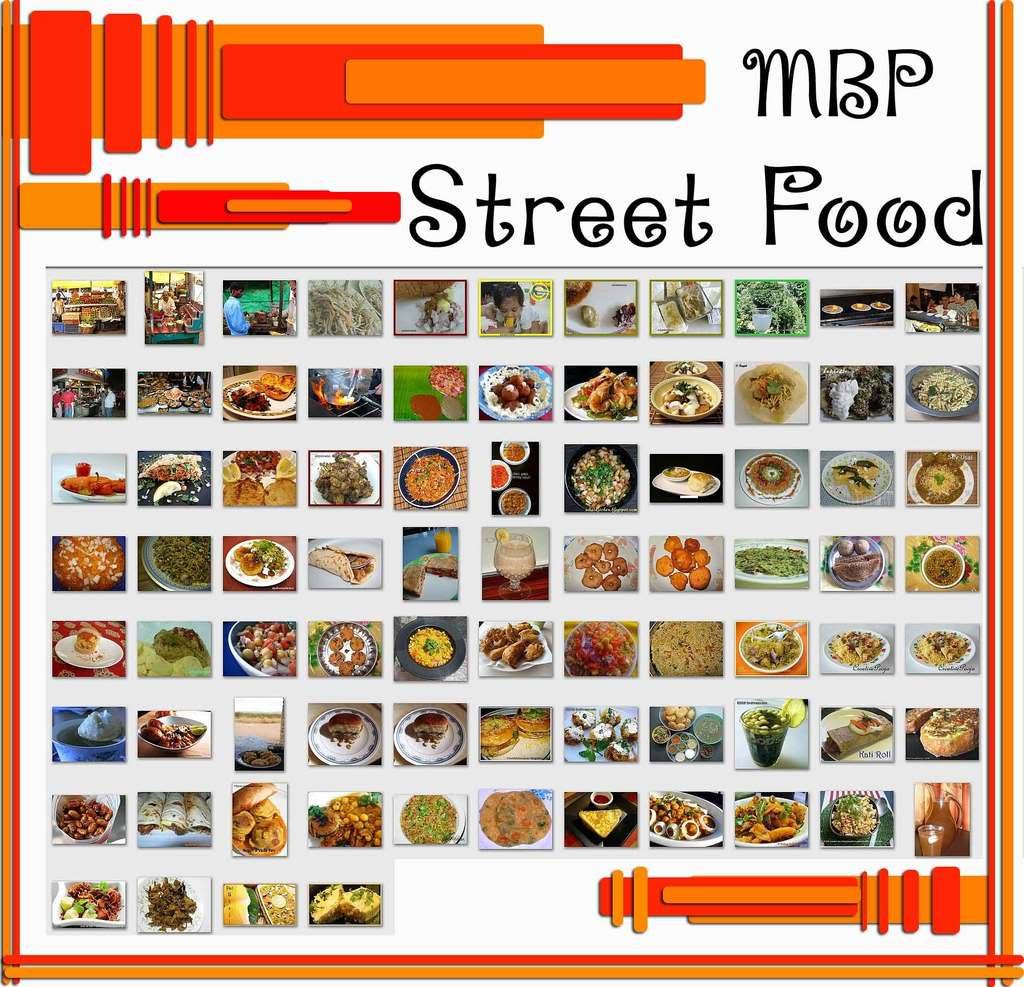
Welcome to the round-up of MBP-Street Food. Hey Coffee dear, thank you for giving me this wonderful opportunity to host MBP with my favourite theme. Thank you one and all for your delicious contributions and making it a very successful event. It’s because of you all lovely bloggers now we have One-Stop-Shop for Street Food. Here is what you have been looking forward to… Presenting you MBP-Street Food Round-up…

Don’t wait for too long or else you will be really sorry. Go and grab your plates and feast on your favourite Street Food. I am sure you will be spoilt for choices ;)


Photobucket
Click on the collage or click here to take you to the MBP-Street Food photo gallery

And last but not the least, dear friend Arun shares few drool-worthy pictures with beautiful write-ups of Shanbhag Fastfood at Hospet in Karnataka, Murugan Idli House in Chennai, Alaskan Killer Shrimps, Salzburg Seafood, Kebabs at Bademiya: Colaba's Culinary Firmament, Paanwallah in Mumbai and Butta: Roasted Corn. His photo eaasay of Kailash Parbat, Colaba on How to eat a Paani Puri left me with bulging eyes and drool.

I have posted the entries in the order I received them. I have tried not to miss any of your entries and please leave a comment or mail me if there are any errors or omissions and I will make the correction accordingly. MBP-Street Food logo/link posted in the side bar of Monsoon Spice will bring you to this event round-up page for future reference.

Thank you once again for participating in MBP-Street Food. I greatly appreciate each and every one of you and some of you who chose to participate in blog events for the first time. Thank you one and all… Have a wonderful weekend.

02 July, 2008

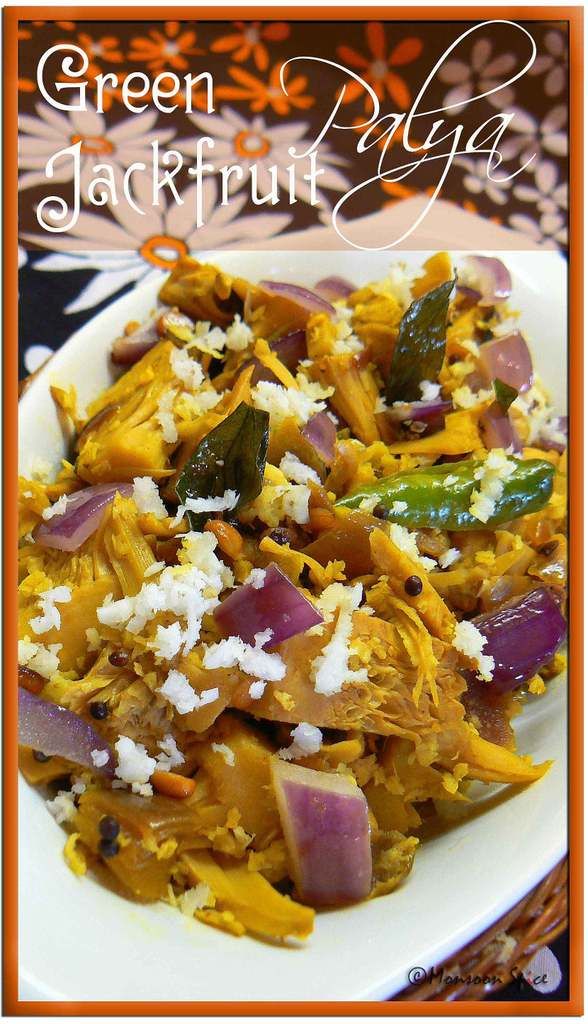
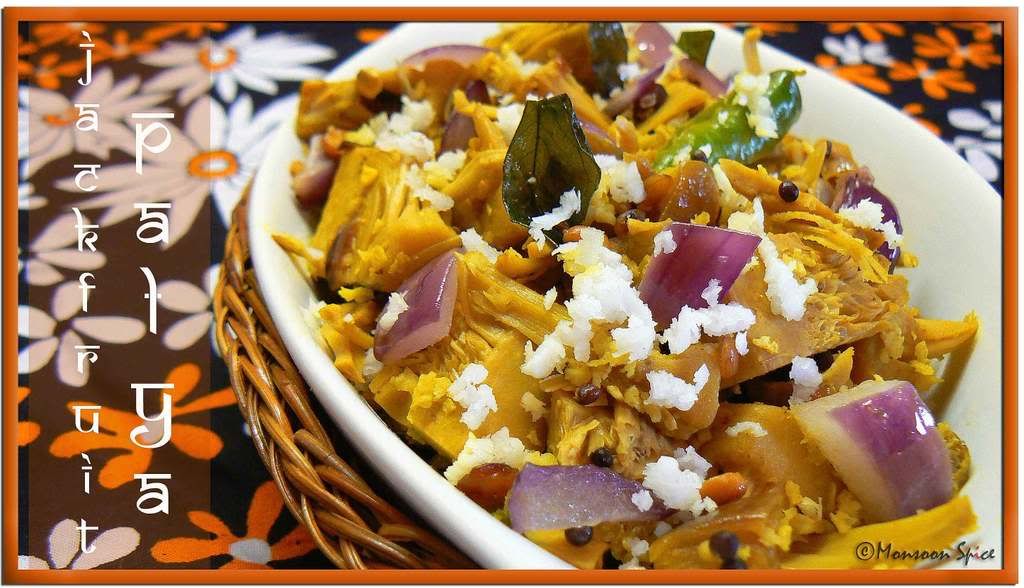
A Block & A Palya: Tender Jackfruit Palya

Photobucket
Gujje Palya

There are times when I come back from work and wonder “What will I blog about today?” Suddenly I feel I have nothing left to write and panic strikes me. Just the thought of running out of blog contents is one horrifying experience for me.

But usually everything turns out all right when I reach home and read the comments on my current and previous posts (yeah, yeah… I do read my archived posts and comments), I get ideas and often inspiration to write my next post. But today here I am sitting cross legged with my lappy on my lap and staring blankly at one of the photos I took last week and I have nothing write about it!!! I have lot to share about this particular recipe which takes me down the memory lane whenever I cook it but I just can’t seem to put it into words. I can think about it but I simply can’t seem to write about it.


Yeah, this is one of those days where I don’t see any ‘bloggable’ (hell, that’s not even a word!!!) thoughts to share with you all. This is one of those days where I would like you to write to me about your thoughts about my blog. While going through all those comments I couldn’t help but wonder why people visit my blog? Is it because of all that lengthy prefaces (I seriously can’t imagine people reading my rants), or recipes (hmm…most likely as I am still getting few recipe requests), or photos (really?), or god knows what (that will be really interesting thing to know)!!! I would love to know why you visit Monsoon Spice, what makes you spend your precious time going through my posts? What is it that makes you come back again and go though my posts (hopefully if you are not put off by my rants and lengthy posts). So tell me whatever you want to say… I am all ears ;)


Here is the recipe for Gujje Palya/Tender Jackfruit Stir Fry which is one of my childhood favourites. Gujje is a Tulu word for Tender Jackfruit which is often used in South Canara in cooking savoury dishes. My all time favourite is Gujje Kodhel and Gujje Palya. Me and my siblings would always end up having competition as who got highest number of ‘eyes’ which are nothing but tender jackfruit seeds. This stir fry is one of best example of delicious Udupi-Mangalorean cuisine as very ingredients are used to bring out the true taste of this sticky vegetable/fruit. This almost bland tasting tender jackfruit transforms into delicious side dish or simple snack when cooked with crunchy red onion with enough heat from green chillies. I used canned tender Jackfruits here which tasted really good but it tastes best when cooked with fresh ones.

Gujje Palya (Tender Jackfruit Stir Fry)
Prep Time: 5 mins (When using canned ones)
Cooking Time: 15 mins
Serves: 2-4

Ingredients:
3-4 cups fresh or 1 can Tender Jackfruit, drained and rinsed

1 medium Red Onion, finely chopped
1 large gooseberry sized Tamarind Pulp (Adjust as per taste. Use only if you are using fresh tender jack fruit)
2-3 Green Chillies, slit (adjust acc to taste)
½ tsp Turmeric Powder
½ tbsp Jaggery (adjust acc to taste)
¼ cup fresh/frozen Coconut
Salt to taste


For Tempering:
1 tsp Black Mustard Seeds

1 tsp Urad Dal
2 tsp Channa Dal
¼ tsp Hing/Asafoetida
1-2 Dry Red Chillies, halved
Few Curry Leaves
1 tbsp Oil, preferably Coconut Oil

Photobucket

Gujje Palya

Method:

Chop washed canned young jackfruit pieces into small pieces (about ½ cm slices) and keep them aside. If using fresh ones, then cut them into big chunks and cook them covered with little salt , turmeic powder, tamarind pulp, jaggery and 1-1½ cup of water till tender. It will take around 10-15 mins if using pressure cooker and little longer if cooking in a vessel. Once they are cooked and cool enough to handle, cut them into ½ cm slices and keep aside.
Heat oil in a pan and add mustard seeds. When they start to pop and splutter, add channa dal, urad dal, broken red chillies and hing. Sauté it till dals turn golden brown.
Now add chopped onions, curry leaves and slit green chillies. Sauté it for a minute or two till onion turn transluscent.
Now add chopped tender jackfruit, turmeric powder, jaggery and salt to taste and mix well. Add ½ cup of water and cover and cook for about 10-12 mins till all the flavours blend well and jack fruit is cooked properly. Make sure to check in between so that the Palya doesn’t stick to the bottom of pan.
Cook uncovered for another 2-3 minutes till all the water is evaporated. Switch off the gas and mix in fresh/frozen coconut. Serve it hot with Rosematta Rice or any rice of your choice or Chapatti or simply serve it as a snack and enjoy.


Photobucket
Gujje Palya


Reminder: WBB-Summer Feast

For this edition of WBB, your challenge is to cook anything with summer fruits and vegetables. Yes, the theme is WBB-Summer Feast. Go to your town/city’s Farmer’s Market and pick fresh season’s produce and make your favourite breakfast or brunch and join in the Summer Feast.

Deadline: 31st July, 2008

Please go through the guidelines and include all the required information in your post and mail when sending me your entry. Don't forget to add Your Name, Your Blog Name, Name of the Dish you cooked, Perm Link of the entry, Perm Link of original recipe along with the gorgeous Photo of final dish.

Click Here or on the logo to find out more information on this event.