26 September, 2008

Akki Rotti with Dill-Coconut Chutney: Dill Se...

Photobucket

Akki Rotti with Dill-Coconut Chutney

Pretty to look at with vibrating green colours, herbs add lot of flavour, aroma and colour to any food. Few pretty green leaves floating on soups and carefully placed on top of salad or curries, they do brighten up even the simplest food. But does that mean their sole purpose it to serve as a garnish which you can pick and keep aside while eating?


Ayurveda, an ancient science of healthy living, has always emphasised on using fresh herbs everyday. Knowingly or unknowingly, we have been following this ancient wisdom on day to day basis. Any Indian kitchen is incomplete without herbs stored safely in a refrigerator or pots of fresh herbs sitting pretty on kitchen windowsill. Herbs are indispensable in my kitchen and I usually end up adding extra handful of herbs in almost all the food I cook.


When I thought about different herbs used in everyday dish, I realised there are just few which make regular appearance. Curry leaves, coriander, mint and fenugreek are the most important ones that are used in almost all the recipes and basil, chives, rosemary and thyme makes few guest appearances now and then. Given my love for herbs I felt I am yet to discover the true potential of every herb which is easily available throughout the year. So here I am, on my way to taste and discover more herbs used in day to day cooking.


My first stop was at our regualr Asian grocery store to buy fresh bunch of Dill. Dill is more commonly known as Dill Weed and has feathery appearance. The fresh dill leaves has fragrant lemon and anise aroma and it tastes like mixture of parsley and anise. High in iron content, dill is available as fresh, dry and in seeds form. Dill is also one of the main herbs used in Karnataka in many recipes. So it was a safe bet to start my journey of rediscovering herbs. One the most loved food which features dill as the main ingredient is Akki Rotti, pan fried Indian bread made using rice flour. I have posted my mother’s recipe of Masala Akki Rotti sometime back and it was one of the most loved and referred recipes on Monsoon Spice. It is gluten free and also vegan and more importantly very healthy and delicious breakfast idea. First time I tasted Akki Rotti made using Dill and Avare KaLu/Surti Papdi Lilva was when I was doing my post graduation in Bangalore. Bangaloreans love Avare KaLu and use them in many recipes. Palya, Saaru, Sambar are the few to name but Akki Rotti with Avare KaLu tops my list of favourites. Coconut, avare kaLu, green chillies, onion and dill mixed with rice flour and directly patted on hot griddle was instant hit with me from day one. Crisp Akki Rotties with little note of sweetness from coconut and lilva, crunch from onions, citrus-y flavour from dill and touch of spiciness from fresh green chillies is one tasty affair which is hard not to notice. Served with just a dollop of freshly churned Butter or Coconut Chuteny/Brinjal Palya/Gojju, this is one meal that is hard to resist. Serve this to anyone who is not fond of dill and see them falling in love with it.

Photobucket
Ingredients for Akki Rotti

Photobucket Print This Recipe
Akki Rotti with Dill & Surti Papdi Lilva (Rice Flat Bread flavoured with Dill and Surti Papdi Lilva)
Prep Time: 5-10 mins
Cooking Time: 20-30 mins
Makes: 6-7 medium Rotties

Ingredients:
2-2½ cups Rice Flour
¼ cup grated Coconut, fresh/frozen (Optional but recommended)
½ - ¾ cups Surti Papdi Lilva/Avare KaaLu (I used canned ones. If using fresh or frozen boil them in salted water for around 5 minutes and drain or use as it is)
¼ cup Dill, finely chopped
1 medium Onion, finely chopped
2-4 Green Chillies, finely sliced (Adjust acc to taste)
1½ tsp Jeera/Cumin Seeds
1-2 tbsp Oil
Salt to taste
Warm water for kneading
Photobucket
Akki Rotti

Method:
Add finely chopped onion, green chillies, dill, fresh/frozen coconut, surti papdi, cumin seeds, oil and salt to taste to rice flour and mix well. Now add warm water, little at a time, and mix well to form dough. This dough should smooth and easy to pat directly on tawa/griddle. Alternatively, bring 2½-3 cups of water to boil and add mixed dry contents to it. Give it a gentle stir. Switch off the flame and cover the vessel. When covered, the steam from hot water helps in getting smooth dough. When dough is cool enough to handle, add oil to it and kneed the dough for few minutes.
The best way to make these rotties is to pat them directly on hot tawa/griddle. Trust me, its much easier than it sounds.
Take large lemon sized balls and place them in a centre of tawa. Pat them with fingers to form a ½ cm thick circle. Place that tawa on flame. Add little oil or ghee to the edges of rotti. Cover and cook the rotties for about 3-4 minutes on medium heat till brown spots start to appear on its surface. Flip it around and cook for another minute or two.
Invert the tawa/griddle and place it under cold running water for few seconds to cook it off slightly before you continue to proceed with patting the dough. Dip fingers in cold water to help in patting thin roties.
Serve these rotties with any Coconut Chutney or Gojju or Playa or Badane Ennegai and enjoy.
Photobucket
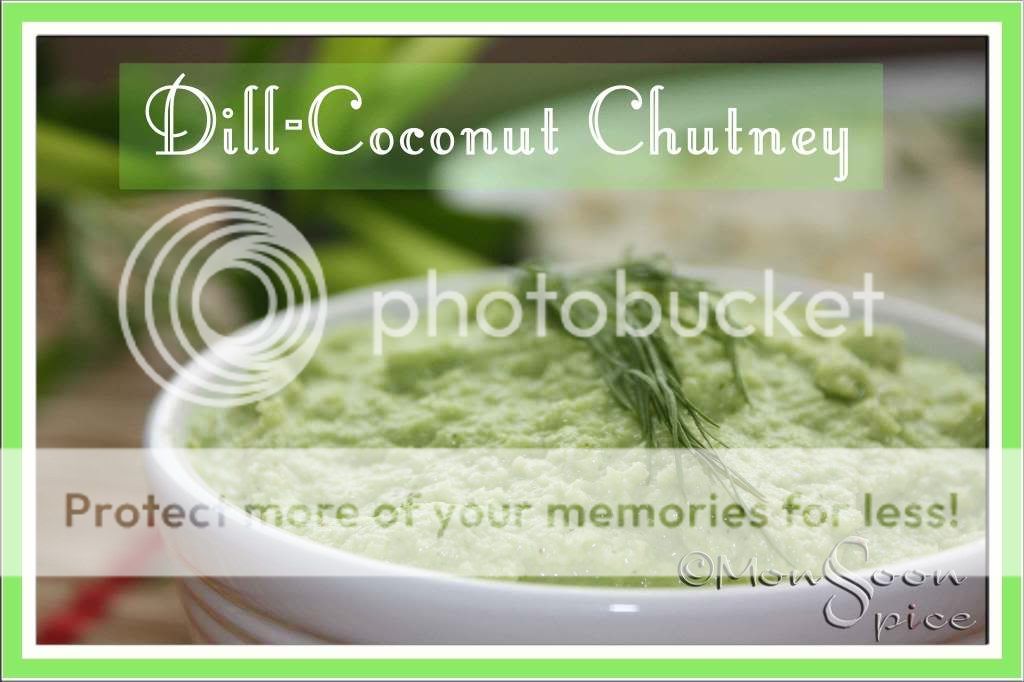
Akki Rotti with Dill-Coconut Chutney

I served my Akki Rotti with Dill & Coconut Chutney which I learnt from my Amma. Surprisingly Dill in this chutney tastes little bit like Mango chutney. Don’t you believe me? Then try this for yourself and see. This is my entry for FIC-Green, a unique event by Sunshinemom.

Photobucket Print This Recipe
Dill-Coconut Chutney
Prep Time: 5 mins
Cooking Time: -
Serves: 3-5
Recipe Source: Amma
Ingredients:
2-3 tbsp Dill weed, chopped
1 cup grated Coconut, fresh/frozen
2-3 Green Chillies (adjust acc to taste)
½ inch Ginger, peeled
1 small marble sized Tamarind Pulp
Salt to taste
Photobucket
Dill-Coconut Chutney

Method:
Place all the ingredients in a mixer jar or food processor and grind to smooth paste adding little water at time.
Serve with Dosa, Idli or Rotti and enjoy.


Note:
Not too fond of Dill? Replace it with coriander leaves in both the recipes for different flavour.
Keep a bowl of cold water next to you while patting the roties on tawa. This helps in even patting.


23 September, 2008

Paneer Makhani/Paneer Butter Masala for Second Blog Anniversary Celebration

Photobucket

Paneer Makhani/Paneer Butter Masala

Yes, tomorrow it will be 2 years since I created this blog and I did pinch myself to make sure I was not dreaming. For someone who loves changes and new adventures in life I have impressed and surprised myself by sticking to this blog for last 2 years. What a fabulous journey it had been…


Were you aware of the fact that I created this blog out of boredom?! Yup, that’s me; totally unpredictable and bit wacky ;) Moving to complete new and different country with new challenges to face upon, I had no idea what I wanted to do. From being a centre of attention among family and friends, I was pushed to face the new world filled with strangers on one of the peak winter days and for a tough shelled Cancerian it was not really an exciting prospect. I hid myself in a tough shell to protect myself from bitter cold days and I would have been hibernating there for very long time if not for this golden sunshine in the form of Blog world. That was when I started my personal blog Crabby Bites, expressing each and every emotions of daily life. It was just few weeks later I started writing few recipes learnt from my Amma, Ajji, Atte and aunts, a personal copy of recipes which served as reference while cooking. Soon I realised I needed new space dedicated to recipes and hence Spice Corner, now known as Monsoon Spice, was born.


It was my space, my corner where I started posting recipes for myself. Few days after that I received a very first comment from someone I didn’t know. That is when I realised there was someone out there who didn’t know me, but still they were moved enough to reach out and leave their trail. Today, even after 2 years of blogging whenever someone leaves their small notes I can’t help but get the same thrill I got it for the first time. Strange world we live in! I feel connected with most of you whom I have never seen or met before. Through blogging I have met hundreds of thousands of wonderful people- bloggers, bakers, food photographers, writes, chefs, readers, and even virtual world strangers who have become real world friends. So thank you, thank you and thank you to all you wonderful people (both friends and strangers) who have left their mark in my small world. It was truly an amazing journey with you people who have injected more spice into my already spiced life ;) Once again, a heartfelt thank you to everyone who have left your trail here on Monsoon Spice!


Photobucket
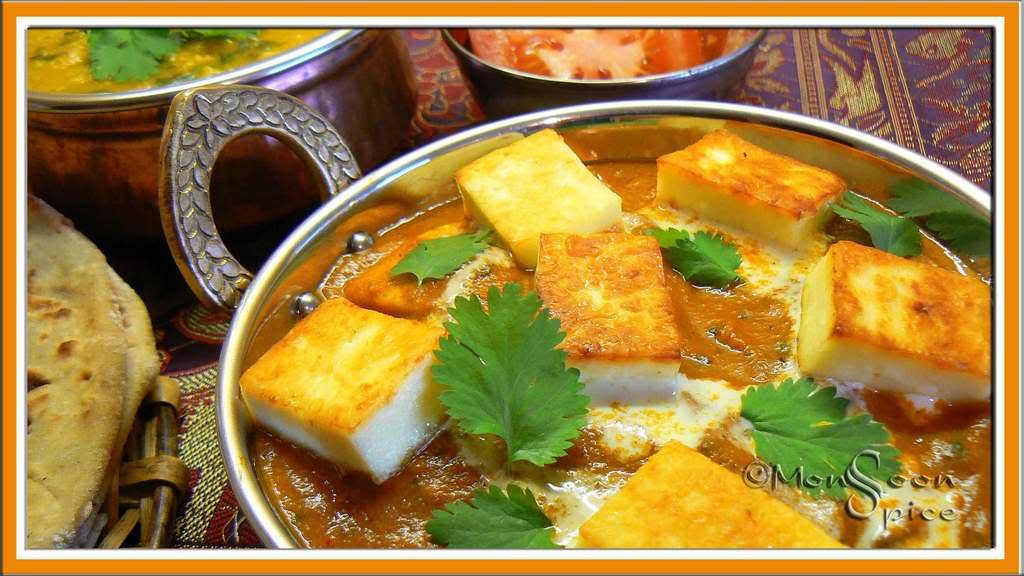
Paneer Makhani/Paneer Butter Masala

A birthday celebration is not complete without delicious food. Being a spice lover I couldn’t convince myself to make any sweets or dessert and yup, opted for something which my darling guinea pig/lab rat loves ;) What he loves, he always gets and he loves Paneer Makhani or Paneer Butter Masala. This was my way of saying big Thank you to my much better half who patiently waits till I finish cooking and clicking without any complaints :) We rarely use Paneer in our kitchen but whenever we use it we make sure that it gets full credit. Paneer Makhani or Paneer Butter Masala is one such dish which is very rich and flavoursome. Use of cashews, poppy seeds and fresh cream makes this quite fattening but remember, this is once in a while indulgence. My recipe is very simple and straight forward. I use two different, flavourful pastes made using onions and tomatoes ground with few spices. Addition of Kasuri Methi and fresh cream simply jazzes up this already creamy delight. Make this curry when you want to celebrate some special occasions or indulge when you want to uplift your moods and I can guarantee that it will be one meal to that everyone will remember for very long time. Off this goes to Ruth who is guest hosting this month's MM-Sensational Sides, started by gorgeous Meeta.

Photobucket
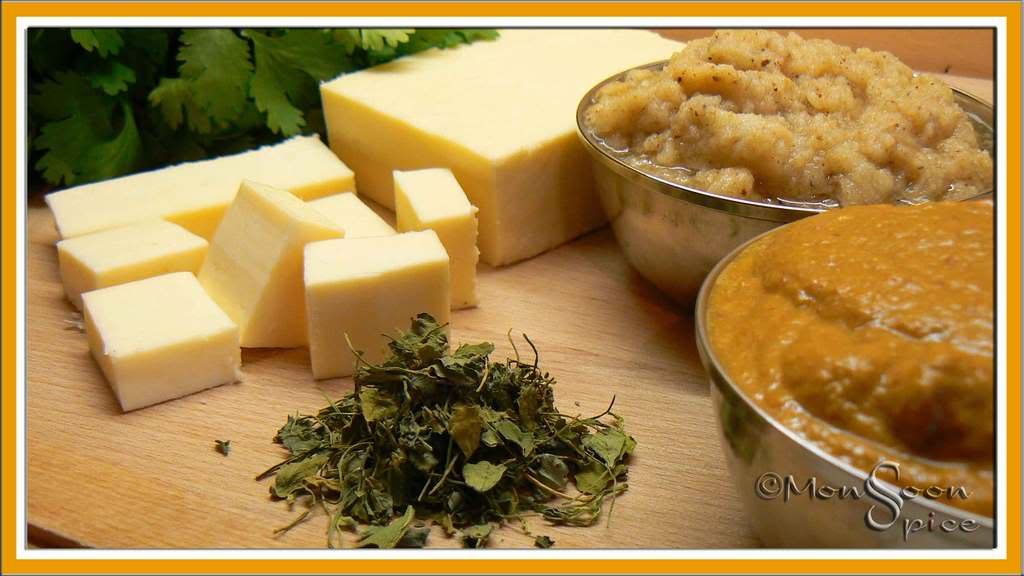
Ingredients for Paneer Makhani/Paneer Butter Masala: Paneer, Kasuri Methi, Onion & Tomato Paste

Photobucket Print This Recipe
Paneer Makhani/Paneer Butter Masala (Fried Indian Cottage Cheese in a delicious Onion-Tomato Gravy)
Prep Time: 10 mins
Cooking Time: 25-30 mins
Serves: 4-5
Ingredients:
1 block Paneer, cut into 1 inch cubes (approx 2-3 cups, I used store bought)
2-3 tbsp fresh Cream (I used single cream)
1 tsp Sugar (Optional but recommended)
1 tbsp Kasuri Methi/Dried Fenugreek Leaves
1 tbsp+1 tbsp Oil/Ghee
2 tbsp Coriander Leaves, finely chopped
Salt to taste

Ground to Fine Paste:
For Onion Paste:
1 large or 2 medium Onions
½ tsp Jeera/Cumin Seeds
1 inch Cinnamon
3 Cloves
3 Green Cardamoms
1 Bay Leaf
½ tbsp Khus-Khus/White Poppy Seeds
3 cloves of Garlic
1 inch Ginger

For Tomato Paste:
1 can chopped Tomato/3 Large Juicy Tomatoes
10 Cashews
1 tsp Garam Masala
1 tsp Kitchen King Masala (Optional but recommended)
¼-½ tsp Amchur/Dry Mango Powder (Adjust acc to taste)
½ Turmeric Powder
½ -1 tsp Kashmiri/Deghi Chilli Powder (gives lovely bright red colour)
Photobucket
Paneer Makhani/Paneer Butter Masala

Method:
Heat 1 tbsp oil or ghee in a pan and add paneer blocks. Fry these pieces on both the sides till they turn golden, about 3-5 mins, and place them in a bowl of water for about 15 mins. It’s best to fry them in batches if you can’t fit them in a pan in single layer.
Grind onion and tomato paste with all the ingredients listed above to smooth consistency separately and keep it aside till required.
Heat another tbsp of oil in a same pan and add cumin seeds. When it starts to sizzle and turn light brown in colour, mix in onion paste. Keep stirring at medium heat till onion paste turns light brown in colour and becomes little dry, about 6-8 minutes. This is an important step as if the paste is not fried well it will make the gravy bitter. Make sure that you continously stir the paste and it doesn’t stick to the pan.
Now add kasuri methi and sugar and stir for another minute.
Mix tomato paste and stir well. Simmer the heat and let it cook for 4-5 minutes, stirring in between to make sure it doesn’t stick to the pan.
Increase the heat to medium and add a cup of water, salt to taste and mix well. Cover and cook for another 5 minutes. Open the lid and adjust the seasonings.
If you find the gravy too thick, add about another ¼-½ cup of water. Drain water and mix in fried paneer pieces and cream. Simmer the gravy and let it cook uncovered for another 5-7 minutes.
Switch off the flame and mix finely chopped coriander leaves. Serve it hot with any Roti or Jeera/Saffron Rice and enjoy. It tastes better the next day.


Other Paneer recipes blogged so far,

19 September, 2008

Chitranna or Lemon Rice with Drenched Monsoon Memories!!!

Photobucket
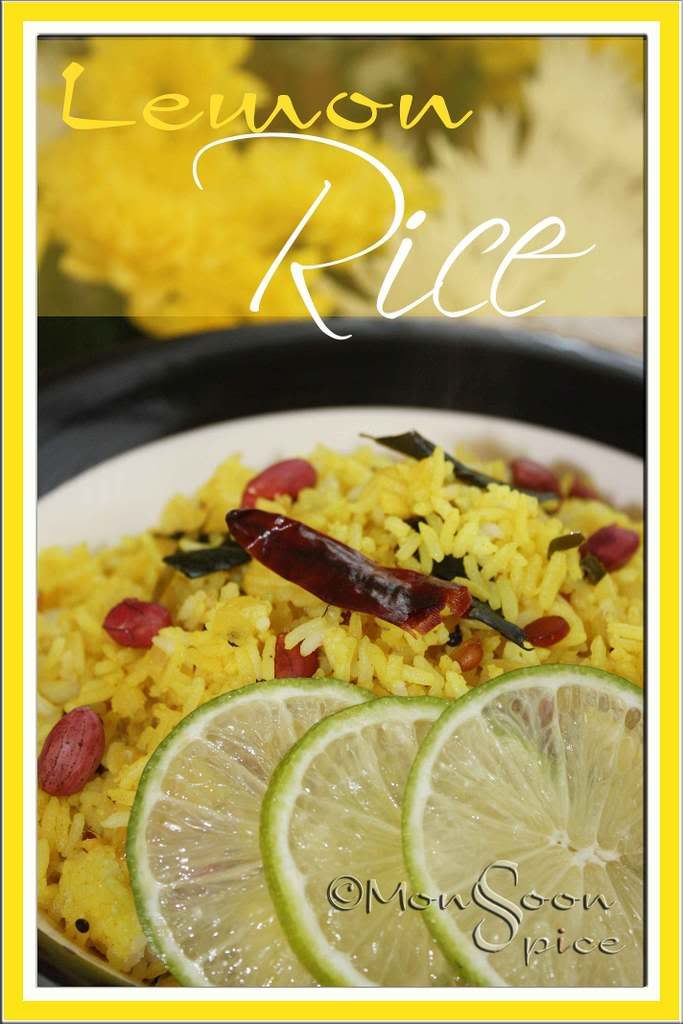
Chitanna/Lemon Rice

It was first of June in early 90’s, one of the worst days for many school kids. It was the day when schools would reopen after two months of adventurous summer holidays. Dressed in new uniform with shining new boots and socks and cart load of new text books and notes on our bags, we kids would drag ourselves to school half heartedly. The thought of no more sleeping late at night and getting late in the morning, no more picnic lunches in mango groves and climbing the mango trees, no more sling shots and biting into raw or juicy stolen mangoes was enough to dampen our spirits. To top it all on every first day to school it would rain like it never rained before.

It was one of those Monsoon Days, when heaven opens its door to the heated earth to bring down the high mercury level, giving it new lease of life. Although these heavy pours would cut down our out door play time, we kids loved playing in the rain and getting drenched from head to toe. Many a times we would ‘forget’ to carry our umbrella and come back home with slush mud covered boots and bucket full of water dripping from our uniforms. Sometime Amma would scold us and most of the times she would shake her head knowingly and rush us into bathroom. After leisure warm bath where half the time spent on splashing the water at each other and screaming at top of our voice, me and my sister would scrub ourselves dry with warm towel and snuggle into fresh cloths. Once dressed we would run to kitchen and sit on the long two wooden stools facing the kitchen counter and chatter non-stop telling our Amma everything that had happened at school. Amma would smile at us and make our evening snacks while listening to who got punishment for being naughty at school and how much we scored in our surprise tests. With in few minutes she would place two big steel bowls filled with evening snacks and steaming cup of coffee/Bournvita filled to the rim of steel glasses.

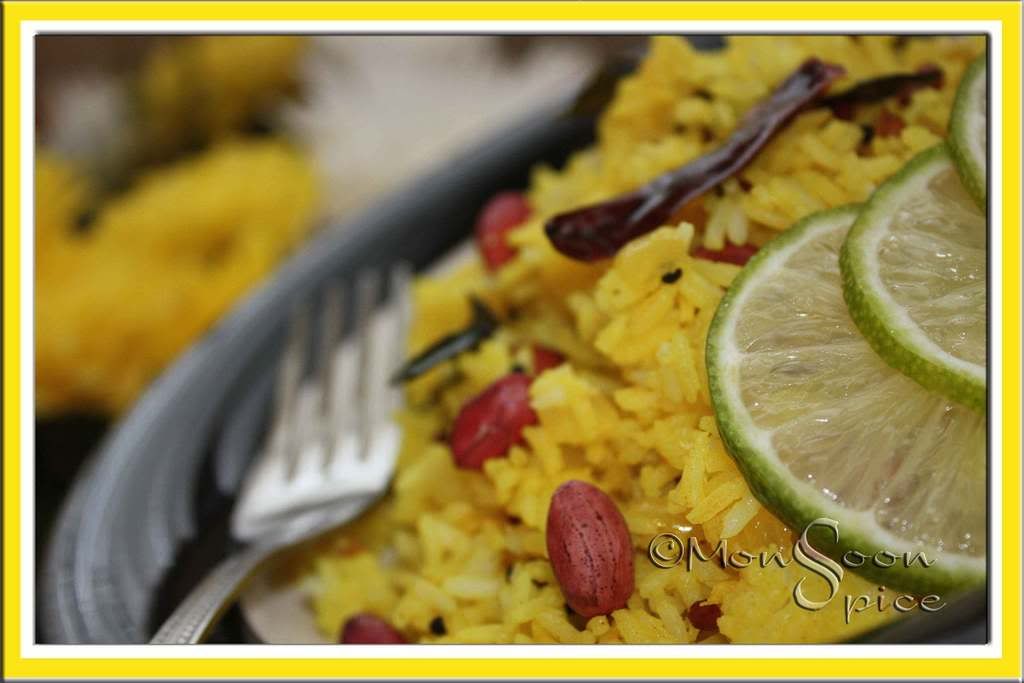
One of my favourite evening snacks was Chitranna or Lemon Rice. It’s a simple rice dish more commonly made using left over rice from afternoon lunch or dinner. Sometime Amma would add few vegetables to make it healthier and colourful and usually she would add finely chopped onions to give it a nice crunch and sweet note. This delicately lemon flavoured rice was instant hit with me because of roasted peanuts tossed into it. I would hold the hot steel bowl containing lemon rice and let the steam rising from it tickle my nose. Aromatic curry leaves and crunchy dals in tadka is what makes it flavourful and the lime juice adds nice zing to it. And that gorgeous yellow colour from turmeric would well compliment the green colour from chilli and red roasted peanut with skins. This was one dish which added little sunshine to those monsoon days and proved once again that simple food is what comforts me the most during rainy days.

Today while eating it from ceramic bowl instead of steel one and eating it with a fork in place of fingers, I can’t help but think of my childhood. The aroma, sight and flavour of this simple, down to earth Lemon Rice was enough to bring back a flood of drenched memory of monsoon days, my home and my Amma lovingly cooking it for two little girls in pig tails and big smile on their face. Amma, this is to you with all my love. And this is my entry for lovely Nags who is hosting Saas, Bahu Aur Sensex Contest to celebrate spirit of Indian women.

Photobucket
Chitanna/Lemon Rice

Photobucket Print This Recipe
Chitranna/Lemon Rice (Lemon Flavoured Rice with toasted Peanuts and Spice & Curry Leaves Tempering)
Prep Time: 5 mins
Cooking Time: 10 mins (If using leftover rice) & 30 mins (If using freshly cooked Rice)
Serves: 3-5
Recipe Source: Amma
Ingredients:
2 cups of Rice, washed, rinsed and cooked (or you can use 6-7 cups of cooked, left over rice)
1 large Onion, finely chopped (Optional but recommended)
2-3 Green Chillies, thinly sliced (Adjust acc to taste)
½ cup Roasted Peanuts
1 tsp Turmeric Powder
Juice of a fresh Lemon/Lime (Adjust acc to taste)
½ tbsp Sugar (Optional, but recommended)
Salt to taste

For Tadka/Tempering:
1 tsp Mustard Seeds
1 tbsp Channa Dal/Split Chickpeas
½ tbsp Urad Dal/Split Black Lentils
1-2 Dry Red Chillies, halved
Big pinch of Hing/Asafoetida
10-12 fresh Curry Leaves
1 tbsp Oil

Photobucket
Chitanna/Lemon Rice

Method:
Cook rice with enough water and fluff it with a help of a fork so that each grain is separated. Keep it aside to cool.
Heat oil in a pan and add mustard seeds to it. When mustard starts to pop and splutter, add channa dal, urad dal and halved dry red chillies. Sauté it on medium heat till dals turns light golden brown. Now add hing and curry leaves and saute it for few seconds.
Add finely chopped onion and sauté it on medium flame till onion turns translucent, about a minute or two. To this add green chillies, turmeric powder and sugar and mix well.
Add cooked rice, freshly squeezed lemon/lime juice and salt to taste and mix well till each grain of rice is heated through.
Switch off the flame and toss roasted peanuts and mix well. Adjust the seasoning before serving hot with chilled Raita and enjoy.

16 September, 2008

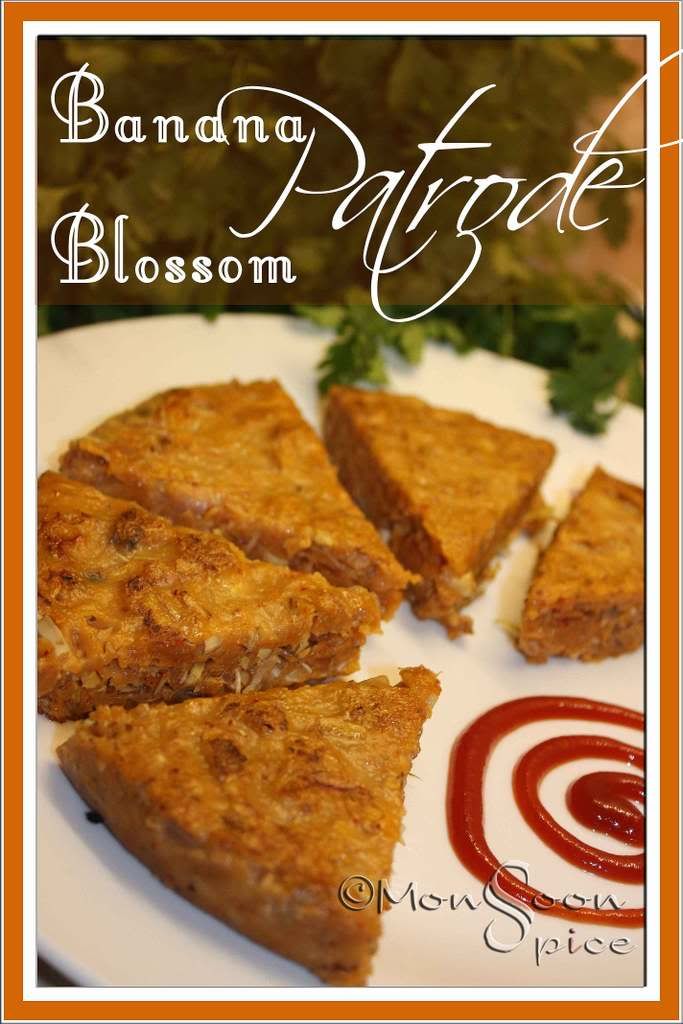
Banana Blossom Patrode: Try Something New and Delicious!

Photobucket
Banana Blossom Patrode

Mangaloreans love two things, one coconut and another curry leaves. Between these two there is another vegetable/fruit which is indispensable to us and it's plantain or banana. Most of the houses in South Canara, even with small garden, will have one coconut tree and a banana tree along with wildly grown Curry plant swinging to cool evening breeze. I grew up with three banana plants in the backyard and hundreds of them in our estate. So it is no surprise that I have tasted almost everything cooked from its stem, fruit and even its flower/blossom using banana leaves as organic and bio-degradable plates.

I have had tasted many recipes using Banana Blossoms ranging from simple stir-fries to delicious Chutneys cooked by my Amma, aunts and Ajji. Our recent summer trip to India I was first time introduced one very novel dish by my mother in law and that dish is Banana Blossom Patrode. Last year during casual chat with my MIL she mentioned about making Patrode/Patra using Banana Blossom and like any foodie I was totally intrigued and couldn’t wait to try it. In spite of being really busy with the last minute wedding preparation of my BIL’s, my Atte managed to cook this for me. And to my surprise it turned out to be one of the very best foods I have ever tasted. I have been craving for this Patrode ever since we came back from India but never got around to make this as Banana Blossom is not easily available at my neck of woods and I was not very sure if I will be able to manage chop them in a right way and cook without any problem.

During our recent trip to down under (nope, not Aussie ;) I couldn’t resist from buying two banana blossoms in hope of making patrode. And boy, did I manage to cook it beautifully or what!!! Traditionally Patrode is made using Taro/Colacasia Leaves by spreading spicy paste on their surface, rolling and then cooked to perfection using a steamer. Same spicy batter is used here but banana blossom is used in place of taro leaves and no rolling is involved. This was the first time I have ever used Banana Blossom in cooking without any help from my mother or MIL and I was really proud with the end result. Except for laborious cleaning and chopping of banana blossom, this is really a very simple recipe and can be cooked very quickly. To top it all, it can be simply stored in a freezer for months together. Banana Blossom Patrode is spicy with mild note of sweet and tanginess from dry red chillies, tamarind, coconut and jaggery used; a taste which is hard to resist and even harder to forget. Without further delay let me give you step by step instructions on how to make Banana Blossom Patrode and please make sure that you go through the instructions carefully before cooking it. I am sening it to this week's Weekend Herb Blogging guest hosted by Zorra & initiated by dear Kalyn.

Photobucket
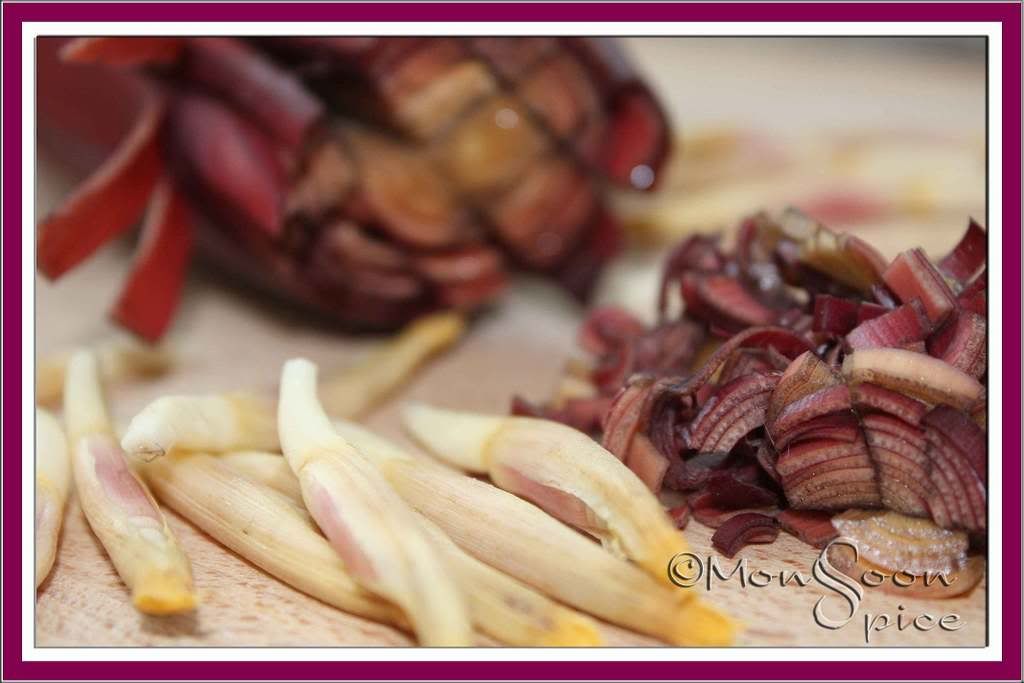
Banana Blossom & Florets

Photobucket Print This Recipe
Banana Blossom Patrode (Steam cooked & Pan fried Spicy Rice Cakes made using Banana Blossoms)
Prep Time: 15-20 mins
Cooing Time: 20-30 mins
Serves: 4-6
Recipe Source: MIL
Ingredients:
1 Banana Blossom
1 large Onion, finely chopped
2-3 tbsp Oil, preferably Coconut Oil
1 tsp Turmeric Powder
10-12 Curry Leaves, finely chopped

Grind to thick Batter (Dosa batter consistency):
2 cups Rice, washed and soaked overnight for about 8-10 hrs
½ packed cup Coconut, fresh/frozen/dried
1 tbsp Coriander Seeds
½ -¾ tbsp Jeera/Cumin Seeds
Medium lime sized Tamarind Pulp (Adjust acc to taste)
6-8 Dry Red Chillies (Adjust acc to taste)
1 inch cube Jaggery
Salt to taste
Photobucket
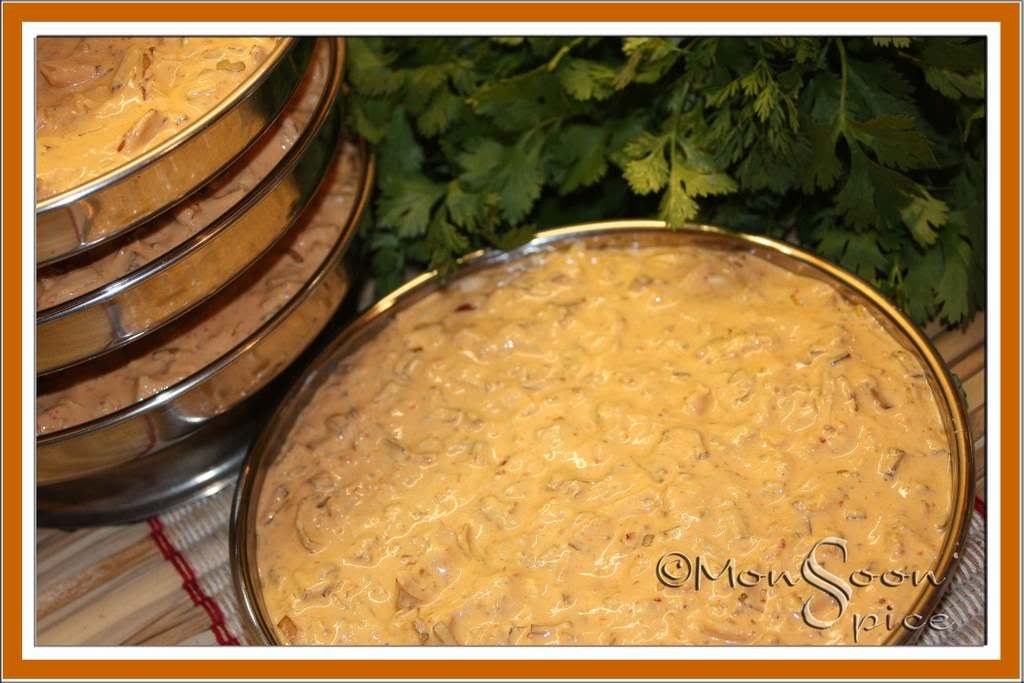
Banana Blossom Patrode- Before Steaming

Method:
Drain water from rice and grind it to smooth batter by adding water and all the ingredients listed above. Make sure that you have little thick batter than that of dosa batter consistency. Adjust tamarind, chillies and jaggery according to your preference.
Now comes the little tricky bit of chopping the banana flower. First apply 1 tbsp of coconut oil to your palm and rub well. Applying oil to your palms help in preventing the sticky sap oozing from banana blossom to your hand which leaves nasty black colour for few days. Remove the outer tougher covering and discard, around 2-4 outer tough skins. In my case I had to remove two outer skins. Don’t discard the florets. Now chop this banana flower and florets into very fine pieces.
Usually these chopped pieces are soaked in very sour butter milk to prevent from discolouring. In spite of doing so it discolours to some extent. So you can simply skip this step as we will be mixing them in the prepared batter.
Add 2-3 tbsp of Coconut oil and mix them well. This way you can easily separate layers which otherwise would be sticking to one another.
Now add this chopped banana flower, finely chopped onion, turmeric and chopped curry leaves to the ground batter and mix well.
Here comes the important step of steaming. You can either use usual Idli stand or flat bottomed vessel and steam cook them in a streamer or pressure cooker without putting its weight. Or another best way is to wrap it in banana leaves and steam cook it, same way as Genasale. I have used Tatte-Idli Stand. Grease the plates with oil and pour the batter with ladle into each plate. Place each plate back in the stand and steam cook in pressure cook or Idli steamer or Steamer for about 20-30 minutes till cooked properly.
Let it cool for 5 minutes before opening the lid. Remove cooked Patrode from plates and cut them into desired shapes. You can serve it with Ghee/Coconut oil or proceed to next step.
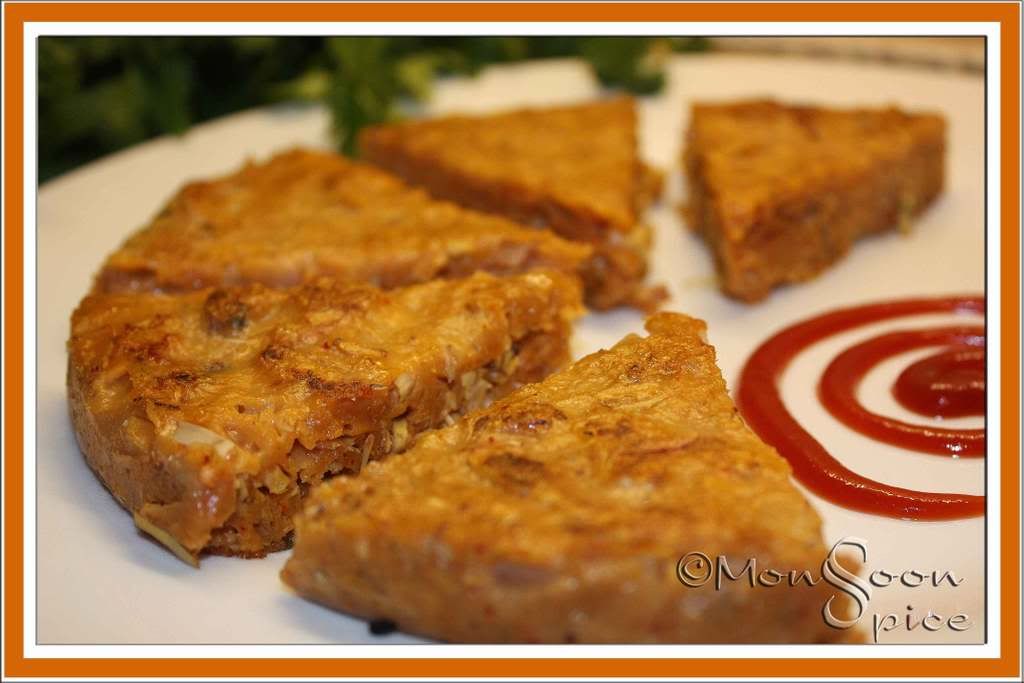
Heat tawa/griddle and place cut Patrode pieces on it. Add a tsp of Oil/Ghee for each piece and cook on both the sides for about 2 minutes till nice brown spots starts to appear on the surface.
Serve it immediately with or without any chutney or plain tomato ketchup and enjoy. It tastes best when roasted with Ghee/Coconut Oil.

Photobucket
Banana Blossom Patrode- After Steam cooked and Pan fried


Notes:
Banana Blossom or Banana Heart grows on the end of long stem holding cluster of Bananas and this deep cherry red blossom is id considered as one of the delicacy in southern Indian states, both when cooked or eaten raw. Banana blossom has layers of tightly packed reddish flaps which wrap around rows of creamy florets with black stigma. Usually this black, hard stigma and transparent covering on every floret is removed as they are difficult to cook. I skipped this step as the steaming process helps in cooking them thoroughly. You can go ahead and remove them or just leave them as they are.
Try to stick to the amount of Tamarind and Jaggery used as they helps in mellowing the bitter taste of Banana Blossoms and spicy red chillies. If using old tamarind, reduce the quantity by ¾ th of the original quantity.
To steam cook, add about water depending on the size of pressure cooker you use. In my case I had to add about 2½ cups of water (about 1½-2 inches). Place the Idli stand and cover the lid without putting its weight and steam cook for about 20-30 mins.
The left over Patrode pieces can be stored in zip lock bag once they are completely cooled and can be frozen for about 1-2 months in freezer. When needed heat then in microwave (don’t thaw) and then roast them on tawa with ghee/oil and serve.

15 September, 2008

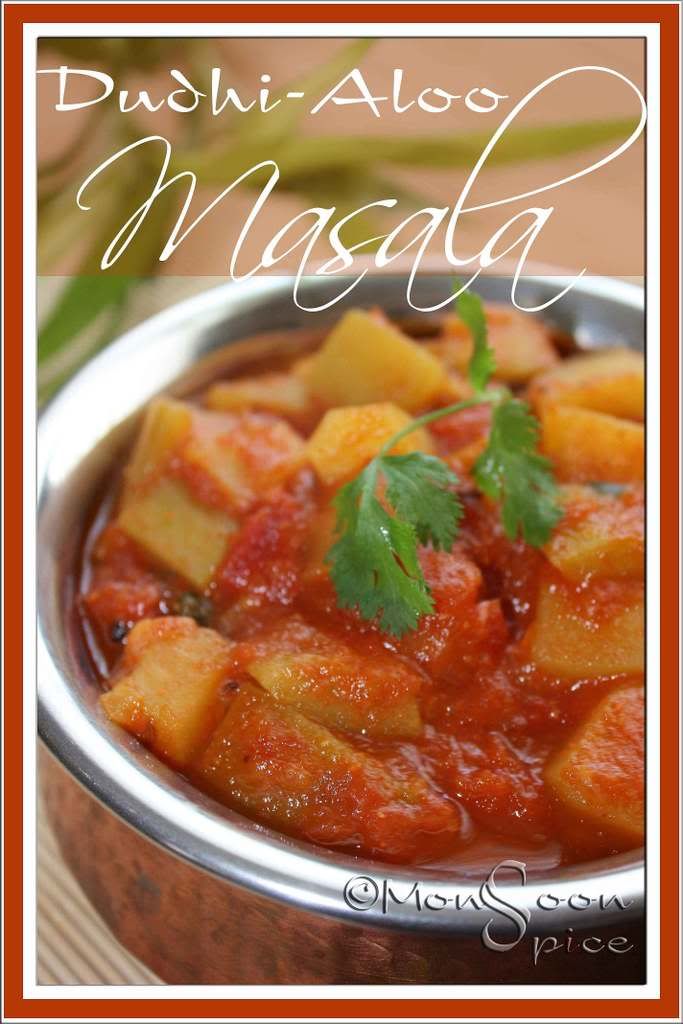
Dudhi-Aloo Masala: What's Your Favourite?

Photobucket
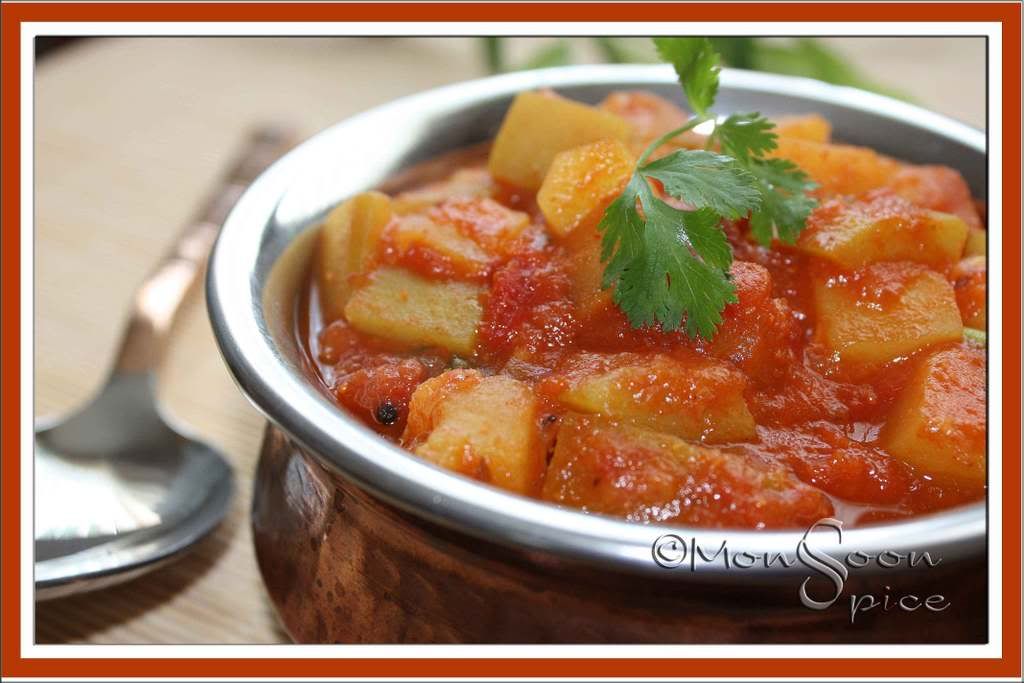
Dudhi-Aloo Masala
6 months back: Mushrooms
4 months back: Bell Peppers
2 months back: Baby Corns
A month back: Fenugreek Leaves
At present: Dudhi/Sorekai/Bottle Gourd
Well, these were the vegetables which ruled our kitchen in the past few months. As I have a short span of memory, I can’t think beyond 6 months as which vegetables played centre role in everyday cooking. You see there is nothing normal in our household, ahem, except us if we can say so;) If we are to fall hard for particular vegetable, we end up cooking it almost day and night till we are tired of it. This obsession of our lasts at the maximum for 2 months and then again we fall in love with some other vegetable and the saga continues.

Our latest obsession is Bottle Gourd and poor gourd is undergoing various operations in our lab, err, kitchen for the past 2 months. Curry, stuffed, fried, chutney, dessert etc etc… you name it and we have tried them all and we are still in love with this unpretentious squash. What I love about this veggie is the way in which it simply compliments and blends with any other vegetable or lentils or spices and yet leaves lasting impression on your taste buds.

This time I decided to pair Dudhi with very much loved Tuber and cook in very delicious tomato gravy. Not wanting to cook with usual Garam Masala, I opted for Sambar Powder giving it a Southern Indian make-over. And it turned out to be one of the most delicious curries I have ever made. I chose to cook it in a pressure cooker to save energy as well as time and within no time this curry was ready to serve with Chapatti out from freezer. Make it in a large quantity as it tastes best on the next day when all the flavours blend well. Cook it little or more but cook for sure as this is one simple yet delicious treat which sure to please you and your loved ones. Off this goes to Lore’s Original Recipe event where she invites the bloggers to send your own creations.

Photobucket
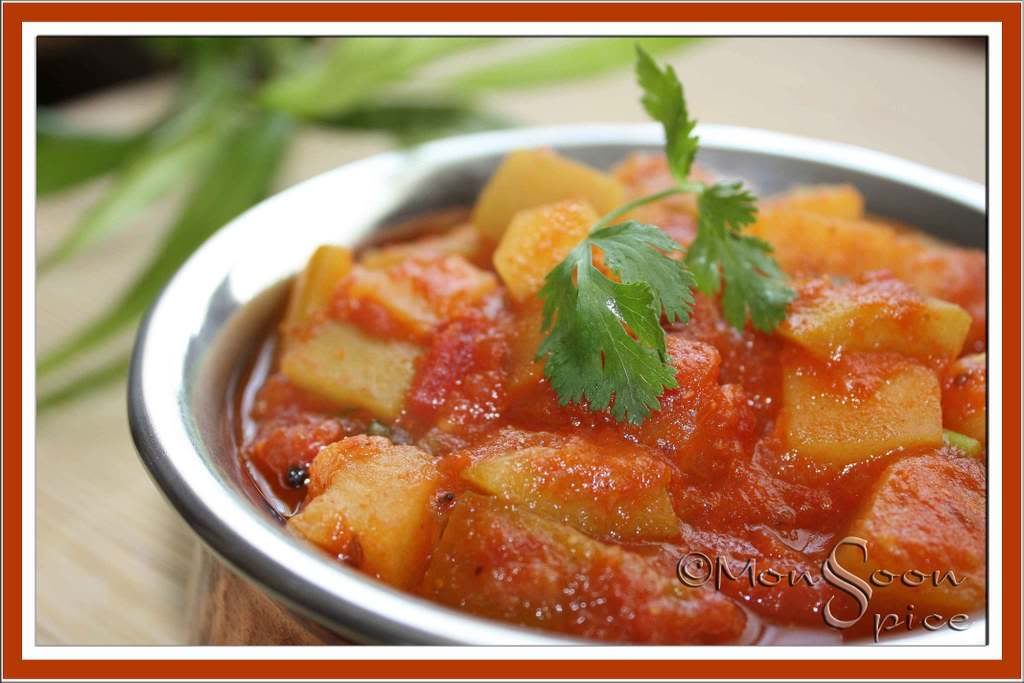
Dudhi-Aloo Masala

Photobucket Print This Recipe
Dudhi-Aloo Masala (Bottle Gourd & Potatoes simmered in tangy Tomato Gravy)
Prep Time: 10 mins
Cooking Time: 20-30 mins
Serves: 4-6

Ingredients:
1 medium Bottle Gourd/Sorekai/Lauki, peeled, deseeded and diced into 1 inch cubes
2 medium Potatoes, peeled and diced to 1 inch cubes
1 large Onion, finely chopped
1 can chopped Tomato/3 large Tomatoes, roughly chopped
1 inch Ginger, finely chopped
2-3 Garlic Cloves, finely sliced
1-2 tbsp Sambar Powder (adjust acc to taste)
½ tsp Turmeric Powder
1 tsp Kashmiri Chilli Powder (Adjust acc to taste)
1 tbsp Jaggery/Brown Sugar
1 tsp Tamarind Paste
2 tbsp Coriander Leaves, finely chopped
Salt to taste

For Tempering/Tadka:
1 tsp Mustard Seeds
½ tsp Jeera/Cumin Seeds
1 Dry Red Chilli, halved
¼ tsp Hing/Asafoetida
Few Curry Leaves
1 tbsp Oil
Photobucket
Dudhi-Aloo Masala

Method:
Heat oil in a pressure cooker and add mustard seeds. When it starts to pop and splutter add cumin seeds, dry red chilli, hing and curry leaves. Sauté on medium flame till jeera turns light brown.
Now add finely chopped onion, ginger and garlic and sauté till onion turns light golden brown, about 3 mins.
Mix in sambar powder and sauté it for 30 seconds. Add chopped tomatoes and cook till it turns pulpy, about 3 mins.
Add 3-4 cups of water, turmeric powder, jaggery, chilli powder and tamarind paste. Increase the heat and bring the water to boil, about 3 minutes.
Mix in cubed potatoes and bottle gourd and reduce the heat to medium. Cover and cook for about 12-15 minutes or 2 whistles till the vegetables are cooked to tender.
Once the pressure is released, open the lid and mix in finely chopped coriander leaves. Serve it hot with Poori, Chapatti or steamed Rice and enjoy. It tastes better the next day.

Notes:
Substitute Sambar Powder with 1- 1½ tsp Garam Masala for different flavour.
Same way, you can also substitute Tamarind with Amchur/Dry Mango Powder.
Replace Bottle Gourd with Zucchini/Courgette or Yellow Cucumber or any other Squash for different taste.
If you don’t have a pressure cooker, make sure that you use cooked potatoes instead of directly adding raw one as cooked ones will reduce the time in cooking. And also make sure you chop the vegetables to bite sized pieces for fast cooking.
This curry tastes superb the next day. So make sure you have cooked enough to have it on next day.

09 September, 2008

Baby Brinjal Masala Palya: Simply Delicious

Photobucket
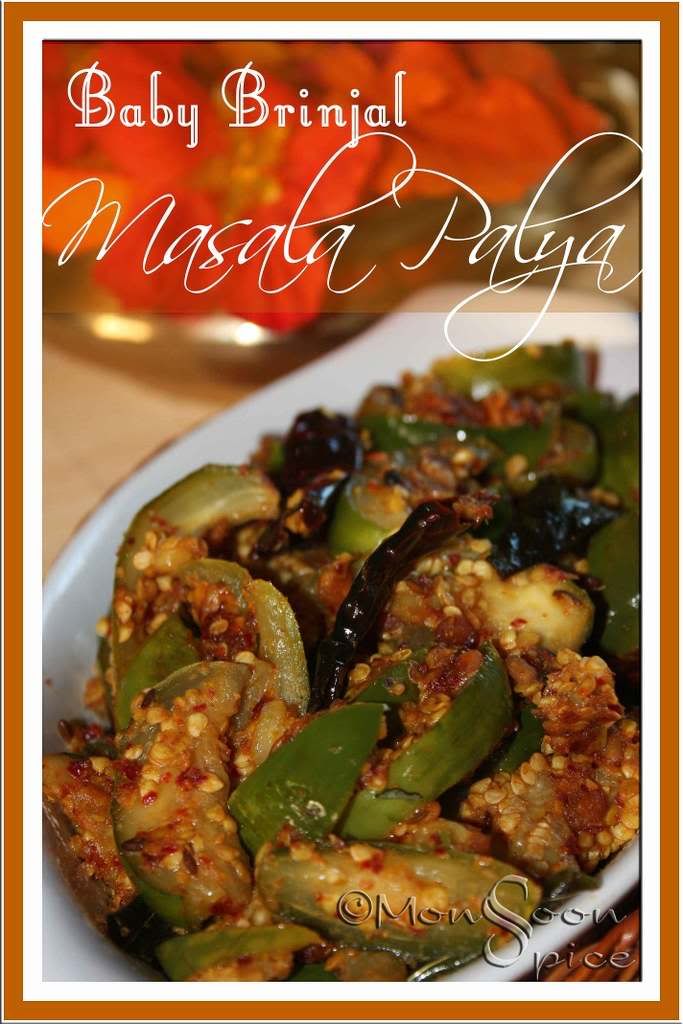
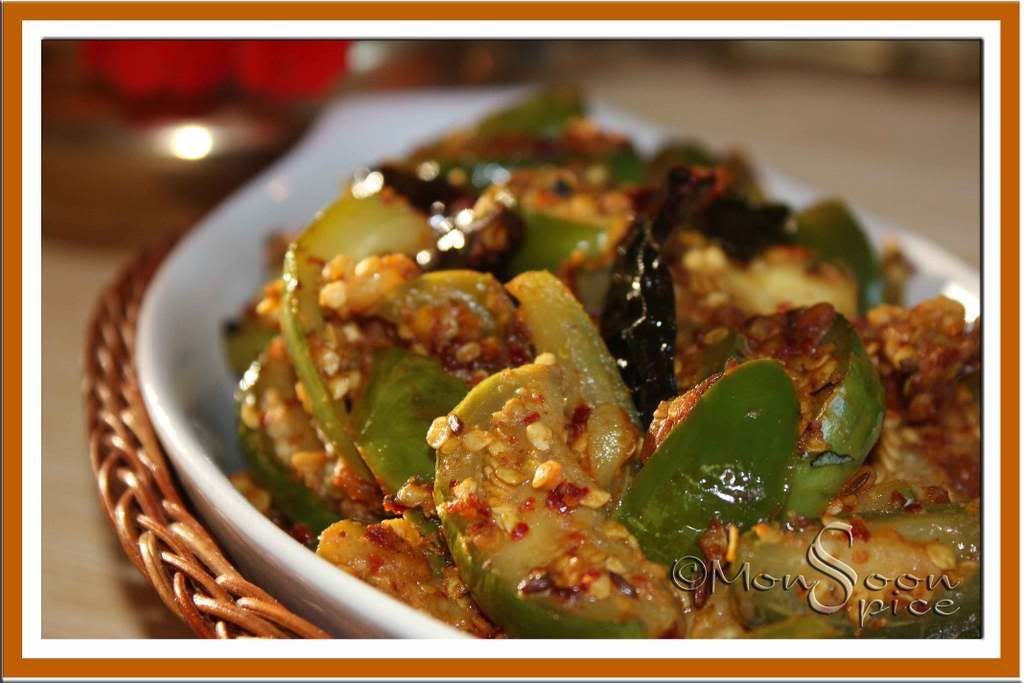
Baby Brinjal Masala Palya

What happens when someone hosts 3 blog events back to back, creating a hatrick!!!
She checks her mail box religiously every morning as soon as she gets up only to realise it’s all over… At last!!!

Not that I have had any second thoughts about hosting the events. In fact I loved being a gracious, ahem, hostess and making sure all my guests were enjoying the party. Well, they were the best parties I have ever hosted, I think! But in the end I did have this small voice in my head shouting I might have over done it this time. I kind of mixed up with the dates and committed myself to host events before I could realise I was about to host three much loved blog events back to back. With ever increasing workload with two new and very important projects to work on, I was literally walking on a tight rope balancing work on my left hand, home on right hand and blog events on my head ;) So no more parties for few more months but you are very welcome to come here and have some home food :)

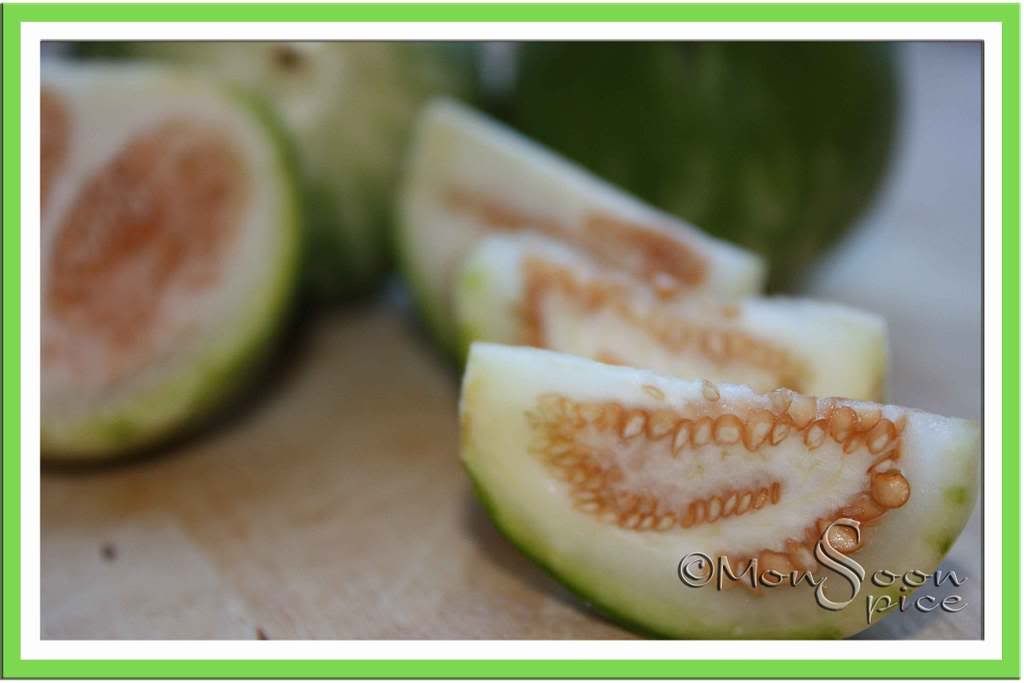
Talking of home food, I have been cooking some simple foods these days. Not many ingredients and no complex techniques. I have been experimenting with few spices, tweaking here and there till I am satisfied with the end result. One such recipe is Stir Fried Baby Green Brinjals or Baby Geen Brinjal Masala Palya. Recent trip to down south, I bought few lovely green baby brinjals which are otherwise not available in my neck of woods. The speciality of these brinjals is that they have thin lovely green skin with lots of seeds within. They take very little time to cook compared to the purple baby eggplants and taste oh-so-wonderful. I didn’t want them to over cook so the option of stuffing them was out of the window. After thinking for a while I opted to slice them and stir fry with just few spices which would bring out the flavour of these green beauties.

The recipe is inspired by recent post of Dondakaya Vepudu but with my own twist. I have used same ingredients for the spice blend but also added few other ingredients to give it little smoky and complex flavours. Addition to cumin, dry red chillies and roasted peanuts, I also added garlic, tamarind and little jaggery. The result was simply delicious where I ended up eating half the content right from the pan. The pungent garlic, sweet jaggery, sour tamarind and smoky dry red chillies were pure pleasure to be experienced. And the best part was hubby dear is allergic to eggplants, so I had it all for myself;) You can try same spice blend with other vegetables like Ivy Gourd/Tindora or even purple eggplants and I am sure it will taste equally good.

Photobucket
Baby Brinjals

Photobucket Print This Recipe
Green Brinjal Masala Palya (Baby Green Brinjal/Eggplants stir fried with roasted spices)
Prep Time: 10 mins
Cooking Time: 15 mins
Serves: 3-4
Ingredients:
6-8 Baby Green Brinjals, washed and towel dried
2-3 Garlic Flakes, finely sliced
½ tsp Turmeric Powder
Salt to taste

For Tempering/Tadka:
1-1½ tbsp Oil
½ tsp Mustard Seeds
¾ tsp Jeera/Cumin Seeds
½ tbsp Channa Dal/Split Bengal Gram
½ tbsp Urad Dal/Split Black Gram
2 Dry Red Chillies
Big pinch of Hing/Asafoetida
Few Curry Leaves

To be Roasted & Ground to Fine Powder:
1 tsp Jeera/Cumin Seeds
5-6 Dry Red Chillies, stems removed and halved (Adjust acc to taste. I used Byadagi Chillies)
2 cloves of Garlic, finely chopped
1½ -2 tbsp Roasted Peanuts, skins removed or leave it as it is
1 small marble sized Tamarind Pulp/½ tsp Tamarind Paste
1 tsp Jaggery/Brown sugar
Photobucket
Baby Brinjal Masala Palya

Method:
Remove the stems of baby brinjals and cut it vertically in the middle. Slice each halves into 1 cm slices. Place the sliced brinjals in a vessel filled with cold water till required. Immersing brinjals in cold water helps in preventing discolouration.
To make spice powder, heat few drops of oil in a pan and add cumin seeds, halved chilles and finely chopped garlic. Roast them in low heat for a minute till garlic turns light brown and cumin seeds too turn light brown. Let it cool down a bit before you proceed to next step.
Place them in a mixer along with roasted peanuts, tamarind pulp and jaggery and grind into fine powder without adding any water. Keep this aside till needed.
Heat oil in a same pan and add channa dal, urad dal, mustard, dry red chillies and hing. Sauté it on medium flame till mustard starts to pop and splutter.
Now add cumin seeds, sliced garlic and curry leaves and sauté till cumin, dal and garlic turns light golden brown.
Drain water from sliced brinjal pieces and add them to the pan. Increase the heat and stir fry them continously for about 5 mins. Add turmeric powder and salt to taste and give it a good stir for another 5 mins.
Mix spice blend and stir fry for another 3-5 mins till all the flavours blend well and brinjal pieces are cooked to tender.
Serve this delicious stir fry with steaming bowl of Rice/Chapatti and Rasam/Dal/Plain Yogurt and enjoy.

07 September, 2008

JFI-Soya... A Power Packed Round-up

Imagine yourself in a restaurant which serves delicious yet healthy food! Sounds too good to be true right? Well, here is one such virtual restaurant which specialises in serving power-packed, nutritious and most importantly lip-smacking, delicious food. Choose your favourite item from our wide selections of starters, main course, sides, drinks and dessert, relax with your favourite music playing in the background and eat to your heart’s content.
Photobucket

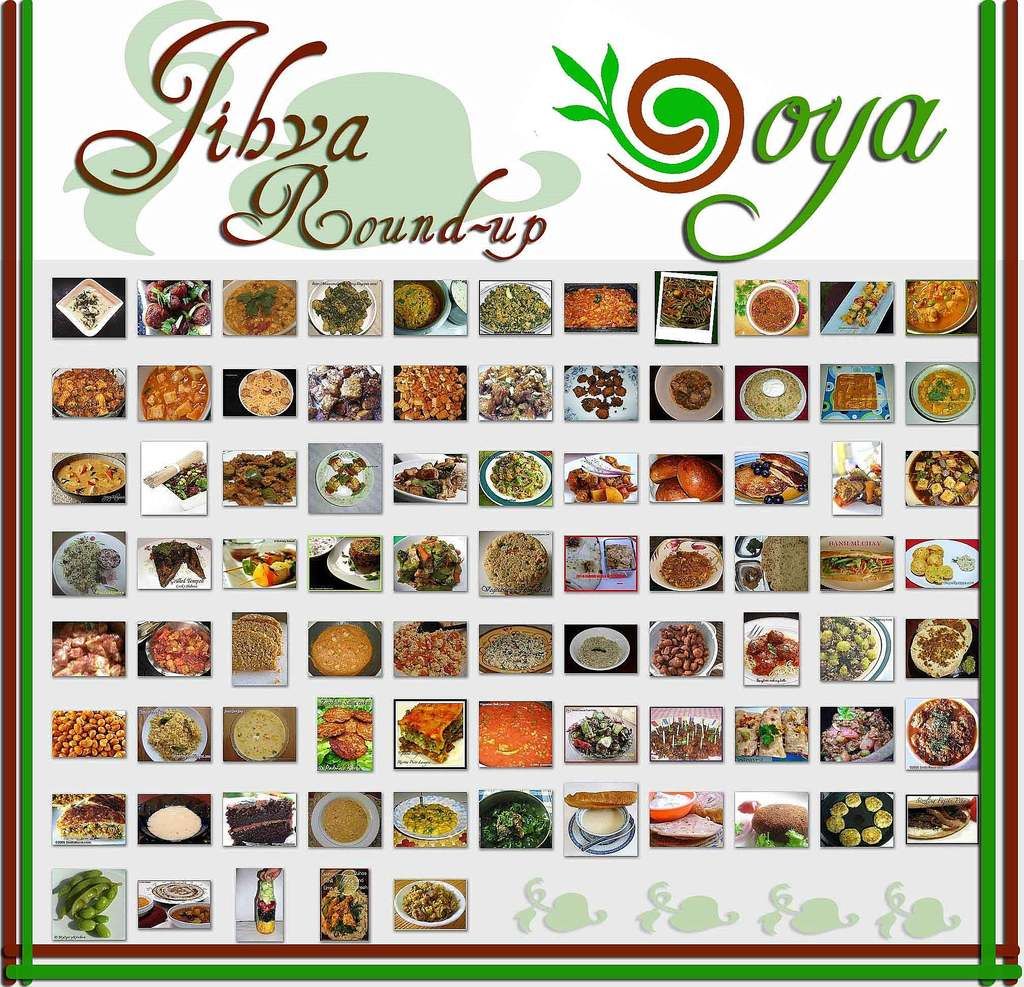
Presenting, the mega round-up of JFI-Soya, with 86 delicious entries from over 75 people from all over the world who are passionate about food. Not just any food, here you will find healthy food which never compromises on taste department. All you food bloggers and non-bloggers never leave a chance to amaze and impress me with your unique and innovative recipes. The response from everyone is quite overwhelming and really inspiring. Some of you cooked Soya for the first time, some cooked it in spite of not being very fond of them and for some bloggers it was the very first food blog event they participated in. Thank you, friends for your enthusiasm and contribution.

Photobucket
Click HERE or on the collage to take you to the JFI-Soya photo gallery
Snacks & Starters
(Crunchy & Munchies, Soups & Salads, Kebabs, Cutlets & Tikkas, Baked & Fried Goodies)
Side Dish
(Curry, Stir Fry, Masala)
Vidya says,
Soy Beans or Edamame or like my daughter, Kiki, calls it Dora Beans! God bless the person to came up with such an innovative idea of putting this nutrient-packed-humble soy bean in a Dora pouch. My girl loves it... the "Dora" pack i mean...& sometimes the soy beans. Thus, i can somehow get this in her diet now. I wish all the good vegetables, someday, come in Dora & mickey & donald & Tinkerbell ... pouches & my girl spots it in the freezer aisle & say "Mommy i want [to eat] that" Being a Konkani only thing that comes to my head is sukke. Do a punn (tadka), add chopped vegetable/green beans, add salt, little water let cook covered. To wards the end add freshly scraped coconut. So here is my entry to JFI – Soy,

Ingredients:
All the dora pouches in a Dora-Soy pack
1 tsp mustard seed
1 tsp cumin
2 greenn chillies
1 tsp urad dal
a salt to taste
3 tsp oil
3 tbsp freshly scraped coconut

Method:
Heat oil. Add mustard, urad dal & cumin. As they crackle, add green chillies.
After a couple of minutes add Dora Beans. Cook on medium heat, covered, for 6-7 minutes.
Add freshly scraped coconut and salt & mix it well. Serve!

Suggestions:
I might also say that Dora beans are just as good when prepared as per instructions on pouch.
May be add bite size potatoes, before adding Dora beans, & fry them golden.
May be add a sprig of curry leaf.
Main Course
(Rice, Noodles, Pasta, Dosa, Uttappam, Pancakes, Breads, Parathas)
Drinks & Dessert
(Milk, Yogurt, Smoothie, Cakes)
… And that’s it friends. I leave with 86 soya recipes which I am sure will inspire you to cook for a very long time. Kudus to all of you for sending power packed entries and making it one-stop-shop for all Soy lovers. Thank you everyone for your active participation and another big thank you to dear Indira for giving me this wonderful opportunity to host Jihva with my favourite ingredient.

As usual, I have double checked all the entries I received through e-mails. Do let me know if your entry failed up to show here. I apologise for any omission and please drop a line at comment section or mail me at sia[at]monsoonspice[dot]com and I will update the round-up accordingly.

Your search for healthy recipes doesn’t stop just here…. Get moving and shop for more whole grains because Sug at Tasty Palettes is hosting this months Jihva-Whole Grains.

03 September, 2008

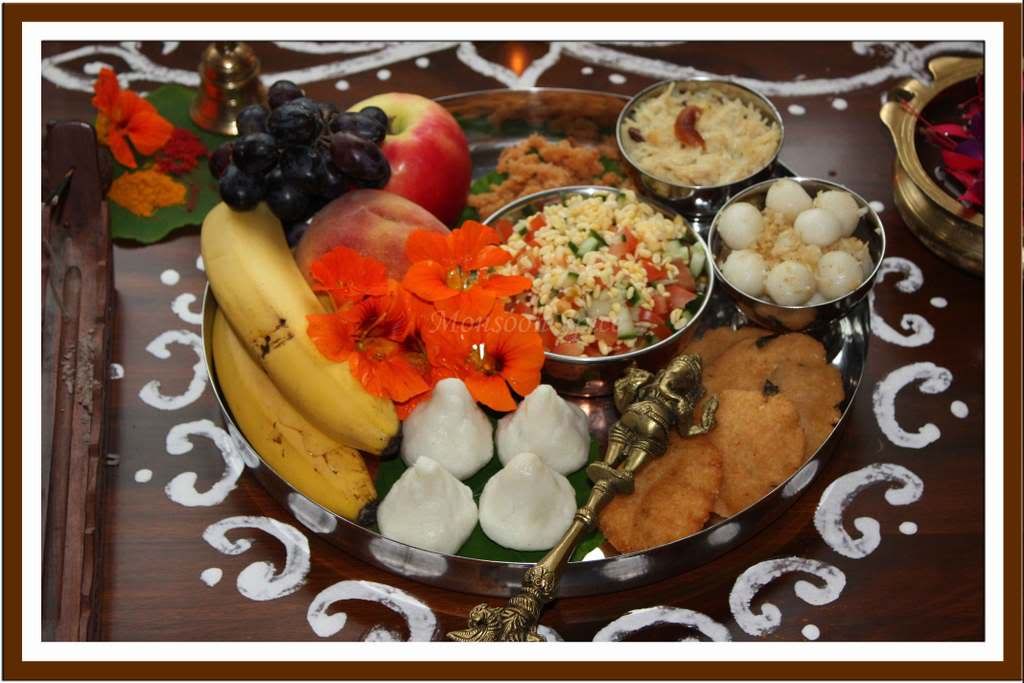
Ganapati Bappa... Morya

|| Shri Ganesha ||

"Vakratunda Mahakaaya, Suryakoti Samaprabha
Nirvighnam Kuru Mey Deva, Sarva Kaaryeshu Sarvada"

Photobucket

Meaning: Lord Ganesha has a curved trunk with a powerful body. He has the brilliance of a million suns. May the Lord, remove all the problems from the actions I aim to achieve.

Photobucket

Wishing All the Readers of Monsoon Spice
A Very Happy Ganesha Chaturthi...

Gowri-Ganesha Habbada Shubashayagalu...

Warm Regards
Sia & Krish

Note:

Dear Zlamushka of Burnt Mouth is featuring Monsoon Spice for this month’s edition of Tried & Tasted a.k.a. T&T event. For those who are new to T&T, every month food bloggers and also non-bloggers try and taste the recipes from featured blog of the month and post about it.

Photobucket

Zu, I am thrilled and honoured and can’t wait to see which recipes will be tried and tasted from Monsoon Spice. Drop a line if you have any doubts/queries about the recipes you want to try and I will try to respond to your queries as soon as possible. I hope you enjoy creating these recipes in your home and also love it as much as we do.

Click on the logo or click HERE to find out details about T&T. Thank you, dear Zu.