She took a deep breath and got up from where she was sitting. She felt a shiver run down her spine and also adrenaline kicking her blood stream at the same time. She felt light headed and exhilarated at the thought of ‘doing it’ with him which surprised her nevertheless. Wasn’t she supposed to feel nervous and scared for doing it for the first time?
Then she took small steps in the beginning, almost hesitatingly. Then she remembered the anguish and pain of not ‘doing it’ and she didn’t want to live regretting for not ‘doing it’ life long. Her tentative steps increased their pace and with in few minutes she was standing facing his parents’ door. She took a deep breath and opened their door bracing her self for any challenge she might have to face.
Then she saw them, sitting quietly and giving her hard and cold stare. She could feel uncertainty creep her thoughts. She could see the rejection in their eyes and she wanted to give up everything and run back to her sanctuary to lick her wounds in her safe domain. But going back was not an option. She had faced rejection from their all her life and she had had enough of it and this was her ultimate revenge for making her suffer all this time.
Half in doubt, she slowly extended her hands towards them. She could hear her heart beating fast and small drops of sweat forming on her forehead. Once she touched them, she felt they were not as bad as she thought them to be. Surprisingly, the feeling was mutual and with in no time they could feel the sweet bond forming among themselves and they set the house literally on fire.
It may have taken quite sometime for her to at last meet him but the long journey she had to make was all worth in the end. And as they say, all’s well that ends well. She had ultimately conquered her fear and ‘did it’. The success tastes better and means lot when you wrap your fear in confidence and move forward with determination. Her story of ‘doing it’ also had a very happy end. Just like fairy tales…
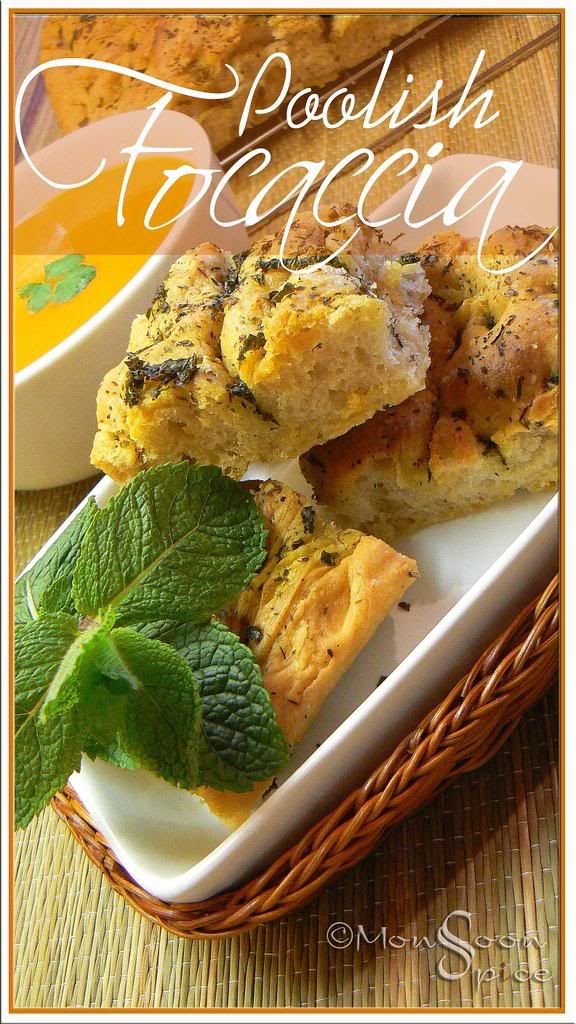
And that’s how ‘did it’, my friends. I baked bread!
I baked bread from scratch. And boy!!! Does it make you feel high! I followed Lolo’s Poolish Focaccia and Poolish from scratch. It is not exactly a complex recipe to follow but it does test your patience as it takes 2 days. First day you prepare the poolish which needs you to mixing the flour, water and yeast and letting it rest overnight to ferment. And on second day the dough and herb oil is prepared for the focaccia. I have almost followed Lolo’s recipe to T. I lost all the step-by-step photos I had taken among thousands of other photographs (Arrgh.!!!...). So goto Lolo's blog for step by step gorgeous photos which are visual treats Without wasting much of your precious time, let me give detailed instructions for making your own Poolish Focaccia.
Day One: I followed Lolo’s instructions and made poolish on the night before baking. She did mention that you can make focaccia without this step but as it was the first time I tried baking bread, I didn’t want to leave option of getting perfect one. You don’t need to be a rocket scientist to make poolish. All you need is little time and the following ingredients.
 Print This Recipe
Prep Time: 10 mins
Cooking Time: -
Makes: About 2-2 ½ cups of Poolish
Ingredients:
2 ½ Cups Unbleached Bread Flour
1½ Cups Water, at room temperature
¼ tsp Instant Yeast (I cheated and used good ½ tsp yeast ;)
Now either you can leave it out all night or store it in refrigerator after 4 hours. Since I had no plan of waking up at 2 in the night, I left it outside all night. This way my poolish was nicely and steadily fermented and it was bubbly, sticky and little stinky too ;)
Day Two: This was the D-day. I had to make dough and herb oil for focaccia. I could feel butterflies in my belli. But Lolo’s instructions assured me enough to plunge into baking spree. So this day I had to combine the poolish prepared last night with some extra flour to make dough for focaccia. And then I was all set to make very fragrant herb oil. The whole process of making the dough was simple enough than I thought it to be. All I had to do is mix the poolish with more flour, water, oil, yeast (the beast;) and of course salt. Yup, simple and straight forward. But then I felt I was back in acrobatics class when I had to fold the dough 3 times (standing in odd positions, and making all sorts of face), and had to wait for the dough to rise between every foldings. Once the dough has risen, I had to transfer it onto a baking sheet (thank god, no was there to watch me in awkward positions ;) and shape it to fill the whole of baking sheet. Then again leave to for its final rise before baking it. Over all it took 4-5 hours (I told you so, you need good amount of patience), but most of it was the rising time between every fold. I can see you yawning there. Hello… Wake up… Time to make Poolish Focaccia.
 Print This Recipe
Poolish Focaccia
Baking Time: 20-25 mins
Serves: 6-10
Recipe Source: Vegan Yum Yum
Ingredients:3 Cups Poolish
2 2/3 Cups Unbleached Bread Flour
1½ tsp Instant Yeast
6 tbsp Olive Oil (I used good extra virgin Olive oil)
¾ Cup lukewarm Water
½ Cup Herb Oil (recipe follows)
2 tsp Salt or to taste
For Herb Oil:
1 Cup Olive Oil, little warmed (I used good extra virgin Olive Oil)
½ Cup freshly chopped or 2-3 tbsp Dried Herbs of your choice or combination of fresh and dried ( I used fresh mint and basil and dried mixed herbs and rosemary)
Take a large mixing bowl and mix in the flour, salt and yeast. Now add the poolish along with water and oil given in ingredient list.
If you are using all those muscle power like me, then be prepared for good 10-15 minutes of mixing and kneading. You need to get smooth and sticky dough. So start mixing and beating the dough till your arm aches and mind goes bonkers! The dough will be very sticky and it will stick to the mixing bowl like clinging baby to his/her mother. Since I don’t have machine I can’t really tell you how to do it. So please head over to Lolo’s website for further instruction on using machine to make the dough.
Next thing is to stretch and fold the dough. Use your work surface for this step by dusting it well with flour. Please be little generous with the flour (not too much also) if you don’t want to end up scraping your work surface for next one hour. Now scrape the dough from mixing bowl and dump it on the bed of flour. Sprinkle the top of the dough with flour.
Start patting the dough to get a rectangle shape. Lolo says patting the dough serves three purposes: one it pushes the dough into a rectangle shape, distributes the flour and also removes the excess flour. Let the dough rest for 5 minutes (and you too, but remember just 5 mins OK?)
After 5 minutes, you’ll need to fold the dough like letter. That is in equal 3 parts. First pick up one side of the dough (it will stretch a lot and make you wonder how many strong words you know ;) Be quick when you fold the sides of the rectangle because the quicker the movement, the easier it will be. Repeat with the other side of the dough. You will end up having small rectangle with folds that looks like folded letter. This is your first fold and remember, we have 2 more folds to come after this. Every time you fold, the dimension of the dough should remain equal. Did you just ask how? Well, after the first fold, you will be stretching the dough out and then folding it back again. Hence, you are not folding the dough into smaller rectangles, but stretching it out and folding it back to make equal sized rectangles. Confused? Don’t worry. You will understand it as we proceed.
Next, brush or spray the dough with oil, cover it in plastic warp and let it sit for half an hour. And then you’ll fold the dough again, brush it with oil, cover it with plastic wrap and let it rest for 30 minutes and then fold it again for the third and final time. Each time you fold, it becomes easier to handle the dough. And every time you fold, make sure that you are folding it in the opposite direction than the last. For example, for the first time if you have folded it from left to right, the next time you will fold it from top to bottom.
After the third fold, let the dough rest, covered with plastic warp, for one hour. The dough will rise at this time, but not necessarily double in size.
While the dough rests, we can proceed to make Herb Oil. It’s very simple and straight forward. Warm the olive oil and mix in all fresh or dried herbs or combination of both. Turn off the heat and let these aromatic herbs infuse the oil.
Now it’s the time to prepare your baking tray for baking Focaccia. Take 17” x 12” baking pan with sides and place a layer of parchment sheet. Spray oil on the baking sheet. Carefully transfer the dough from the counter to the baking sheet, try to maintain the rectangle shape. Don’t worry if the dough stretches little bit as the dough is quite soft and unwieldy.
Pour about ¼ cup of Herb Oil that you had prepared earlier on the top of dough. Now it’s the time for some fun. Using only your finger tips begin to press the dough to distribute the oil and flatten the dough out. The dough will begin to spread out in the pan. The aim is to spread the dough evenly, so that it fills the pan. But don’t worry too much if it doesn’t happen as the dough will gradually spread out in the pan after final rise. And important thing to remember is to use just your fingertips to spread the dough and not your fingers or palm. And also you want to keep the majority of air bubbles that forms on the dough which otherwise will not happen if you use your palm and knead it and destroy all your hard work.
Please make sure that the dough is completely covered in oil. Next cover and let the dough rise for two hours. I promise you, this is the final rise. By the end of two hours, the dough will be very puffy with bubbles and have had filled the pan. Close to the end of this final rise, preheat the oven to 500 deg F. make sure that the rack is placed in the centre.
While the oven is getting heated, add another 1/4 cup, or more, of the herb oil. Spread the dough out to its final size using the same fingertip technique that we had used. It’s a pretty sight to see all those bubbles but restrain your self from pinching them. You want a uniform distribution of bubbles and fingertip dimples. Pinch off any huge bubbles since they’ll just explode in the oven while baking. Sprinkle the top with salt as desired.
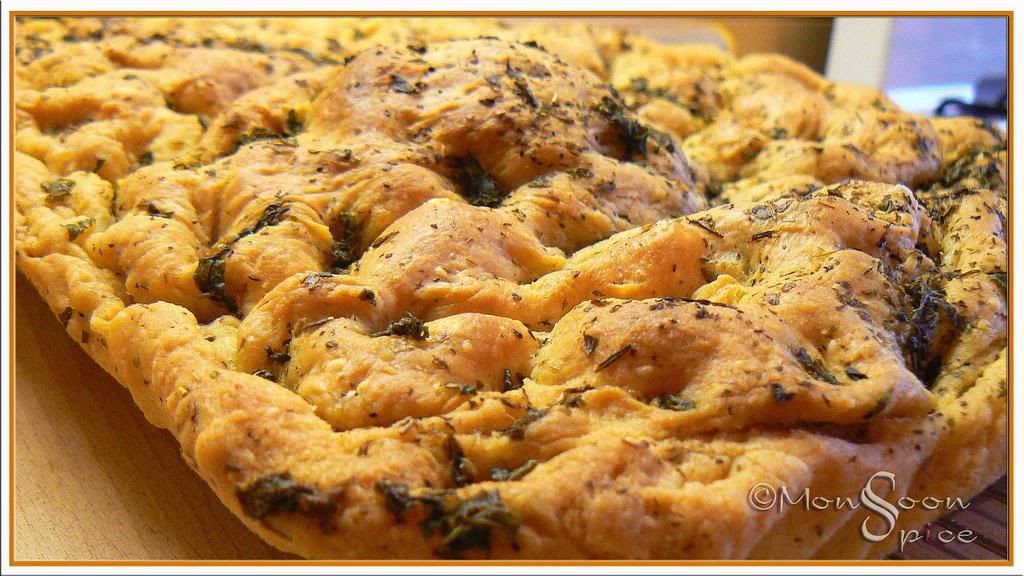
Tada… It’s baking time now. Oops, I forgot about another rest time. Promise, promise! This is the last and very final one. Let the dough rest for another 10-15 minutes. And then place the dough in the oven, turning down the temperature to 450 deg F. Bake it for 10 mins, rotate the sheet for even baking and then bake for another 10-15 mins until its golden brown. By then your whole house will smell of freshly baked bread with heavenly aroma of herbed oil. Just imagine that!!!
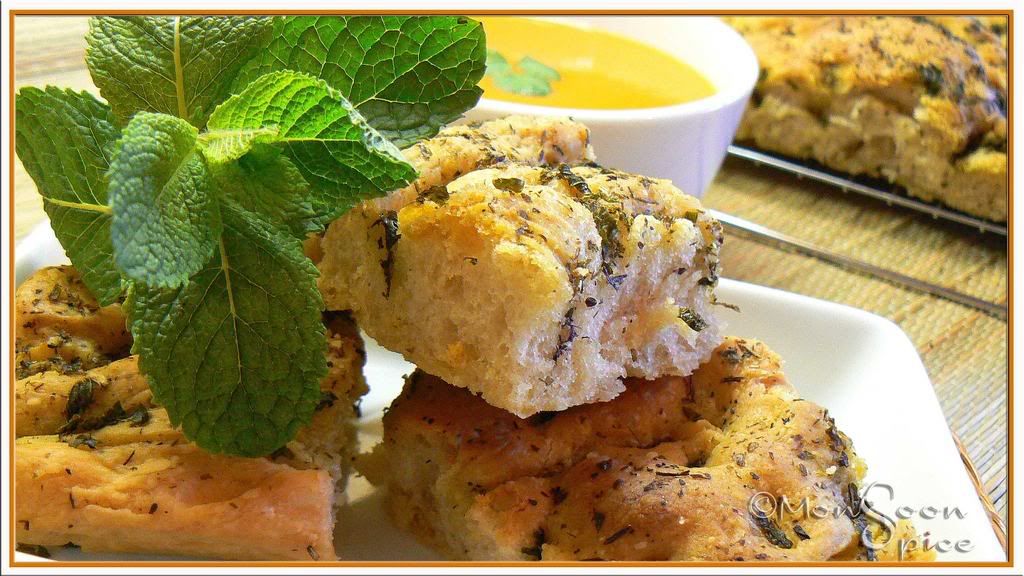
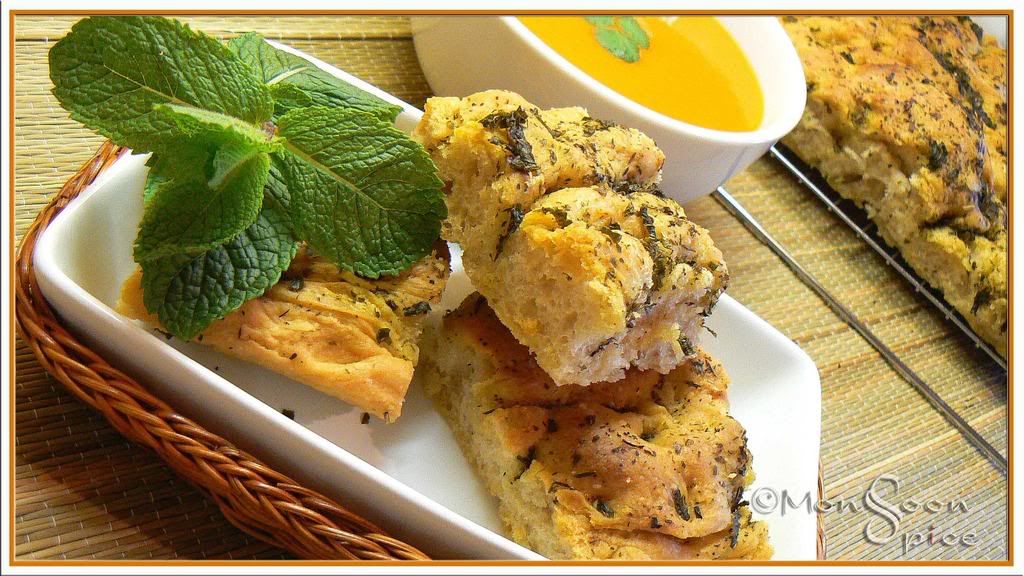
Now it’s the time to take Focaccia out of the oven and let it cool. Remember to remove it from baking pan and place it on cooking rack. Please be patient and let it cool for at least 20 minutes before you attack it. I served mine with hot bowl of Tomato soup.
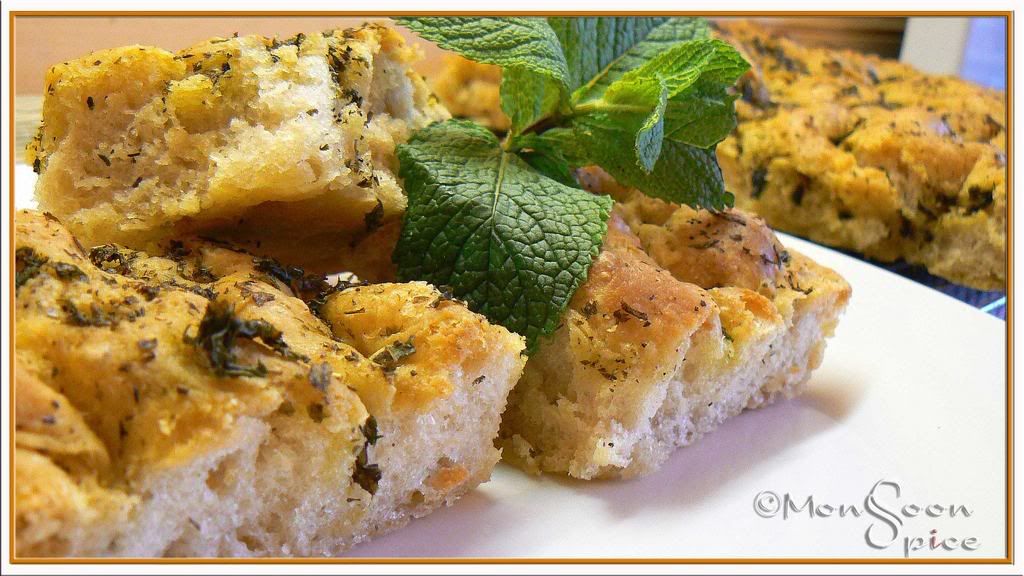
As Lolo suggests, next time I am planning to bake Focaccia with different toppings. For example, some olives, red onions, fresh herbs and may be some garlic too. Or how about some sweet Focaccia? Topped with apples or grapes tossed in little sugar and sprinkled with some aromatic spices like cinnamon or nutmeg? Yum, yum… and yeah, depending on your choice of toppings make sure that you add them just before 5 minutes you take it out from the oven. Thanks, Lolo for helping me get over with the phobia of baking my own bread with this delicious recipe.

Oooo... that one's a complicated recipe....
ReplyDeleteWell, mom used to often bake cakes and breads and biscuits for us..... But i have somehow not inherited that from her yet ;)
I'm still in the same state as you were ill u tried this out! I shud get some courage to get over this bake-o-phobia :)
I'm actually drooling for this poolish focaccia......
First time? It looks extraordinarily beautiful. don't u love that smell of that fresh bread?
ReplyDeleteI had the same experience as u about 5 months back, when I kinda pushed myself to bake a bread from scratch. I used to be scared of the word "yeast".
Soma(www.ecurry.com)
So rustic yet so elegant!! but 2 days...thats the challenge
ReplyDeleteExcellent looking Focaccia. It looks very spongy.
ReplyDeleteYAY!! WOO HOO!! YIPPEE!!!
ReplyDeleteYou started bakingggg!!! Isn't that easy? See, noting impossible if you try. Focaccia looks fab, great to make sandwiches too.
It snowed 6" today, schools are out, kids are at home. more work for me! ;D
Looks gorgeous though, Sun hitting the white snow, it's a wonderland here.
Baking from scratch always terrifies me. But love ur instructions and the end result. Pics are great dear. Ur poolish focaccia makes me hungry.
ReplyDeleteCongratulations on finally "Doing it",i am still to overcome my fears for Doing it....
ReplyDeleteThe bread looks Stunninnnnnnnnnng :-)
and if u had it in excess,u should have shared it with us,shudn't u??
Ooooooooh, isn't bread baking the best? The aromas in the house :)
ReplyDeleteAnd do try onions next :D it comes out all crisp and caramelized. Or tomato with cheese thrown in on top of them ( do this in the middle) and you will eat focaccia for life :D
Congragulations on your first home made bread and they do look so yummy delicious, you are a born baker.
ReplyDeleteHey,
ReplyDeleteLooks as good as store bought and yes, U truly feel a sense of accomplishment when you succeed in baking. I have tried baking bread twice, but it was a big flop.
This one I have to try when time permits. WIsh me luck this time:)
GREAT work ,Sia.. I couldn't take my eyes off from your pics..They are absolutely gorgeous :)
ReplyDeleteA fav bread of mine and it looks gorgeous.
ReplyDeleteLook who's baked bread! And such a gorgeous looking one too.Well done!
ReplyDeleteLooks great, perfect match with a bowl of hot soup!!!
ReplyDeleteIs that ur first bread, gal u ve done perfectly, Voila another baker in the camp! Looks perfect with soup in the background!
ReplyDelete:) Wonderful write up Sia :)!..
ReplyDeletecan understand you quite well as I too the similar exp while baking bread for the first time...that too the same focaccia(nuts and dry fruits-from boston globe)..
and of course this baking makes us nervous...and soooo confident and proud when we succeed,,,right!..
You have such a perfect Focaccia here, girl...Rock on.. :)!!!
these are amazing pictures of focaccia sia. lovely.. u have an amazing talent of photography. keep it up!
ReplyDeleteThis looks so inviting and I like how you make it sound simple/explain.
ReplyDeleteLovely ...
ReplyDeleteI didn't think otherwise about you and him :-)I knew this was virgin territory for you! And the post title confirmed it, of course!
ReplyDeleteOh, you bad, bad girl, you actually did it! :)
ReplyDeleteThe focaccia looks wonderful, Sup! Spongy and from the ingredients, tasty too.
What a great looking bread and that too first time?? Excellent Sia! It looks delish and loved your narration! So now there's no stopping you from bread baking.
ReplyDeletePic looks tempting..My first baking made me all excited to..:)
ReplyDeleteYou "did it" ;-)
ReplyDeleteBread looks awesome
wow love the pics
ReplyDeleteSia, that focaccia looks perfect!
ReplyDeletebeautiful bread... seriously... it looks awesome... and I loved your introduction :)
ReplyDelete- Indhu (www.thayirsaadham.com)
The herbs on top are tempting me - what a beautiful focaccia, Sia!! Very tasty looking. Wish I could tear off a piece and munch, munch....
ReplyDeleteYum yum...the picture and the recipe both look awesome :)
ReplyDeleteWhat a fantastic 'first time' Sia -- wow!!! Foccacia -- I would never dare to try. Looks beautiful :)
ReplyDeleteThat's one beautiful loaf - I guess that was love at first sight then! :)
ReplyDeleteWhat a buil-up to the bread baking story. Stunning pics. Though the time taken can put you off, the pics are compelling enough to give a try.
ReplyDeletefoccacia looks wonderful..loved the write up...
ReplyDeleteThe bread looks so delicious!!! It looks way better than a forst time attempt :)
ReplyDeletewow .. some really tempting pics there
ReplyDeleteGorgeous..Fantastic..Awesome pictures..Does not look like itz ur first time in baking...Perfect ones...Beautiful, what else to say, am searching out the words now...Superb Sia...
ReplyDeletethis doesnt look like first time,.:-)nd ya bakin is addictive,..:-)waitin for more form ur side,..
ReplyDeleteCant believe that u baked a bread for the first time..really wonderful, eyecatching pictures:)
ReplyDeleteI am a very scary baker :) but an ardent admirer of friends who bake..Looks so great Sia
ReplyDeleteHi Sia,
ReplyDeleteI loved the foccacia...its incredibly beautiful. reminds me of potato leek soup and warm bread.
regards,
shobha
What a complicated bread Sia, Really wonderful work !! I'm drolling over the pic, its like i'm in front of it, but i cant pick it :)!!
ReplyDeleteYippe, My first experiment in baking bread was also Focaccia.I did not let the dough rest for overnight though.
ReplyDeleteThis Focaccia looks perfect.Well done Sia :)
That is such a lovely looking bread! I am not sure if I can invest such a lot of time but definitely want to try this out.
ReplyDeleteWow Sia! Bread looks delicious...
ReplyDeletewell, it has come out fluffy and yummy, and I don't beleive you're baking for the first time?! lovely clicks , I think you've got the lens on your fingers!!
ReplyDeletethe Poolish Focaccia looks so perfect and it's a cute way of describing yourself as a third person, lovely site.
and thank you for the visit and the comment dear.
B-E-A-utiful looking bread...You have a lot of patience to wait that long, but by the looks of it, its worth the wait...Awesome, simple awesome !
ReplyDeleteAs I just told another blogger, I'm waiitng for the right muhurtam to bake bread! Well Sia, for your first attempt the bread looks so gorgeous!! Looks most tempting to go with some chai...
ReplyDeleteWow.. I'm speechless!
ReplyDeleteLooks inviting! Nice and fluffy Focaccia. I dont think i can wait for 2 days to make this ;D I can sense the beautiful aroma here.. Hmmmmm...! Bookmarked!!
Your bread looks absolutely delicious! Lovely pictures too. And thanks for visiting my blog, hope to see you often :)
ReplyDeletevery nicely done! i can tell from the pictures that the focaccia turned out great! baking your own bread can be very satisfying and addictive!
ReplyDeleteI'm so happy to see you finally took the plunge and did it!!
ReplyDelete"It" looks gorgeous.
Of all the things I cook, baking bread is something that gives a particular kind of satisfaction.:)
now, there's no going back. sia, i've warned you. i'm looking forward to more bread recipes here.
ReplyDeleteYour writing is wicked!
ReplyDeleteBaking bread is like one of the best experiences, it gives you such a high! Especially when it turns out right (lol)
Excellent work honey.
Boootiful bread! I'm no expert but it is fun to bake your own bread.
ReplyDeleteSia, first attempt, i cant believe it. Looks perfect.
ReplyDeleteOh bread looks elegant, my fav. Great entry!!!
ReplyDeletelooks gr8 as usual. as for ur story i was in suspense till the end! :P
ReplyDeletecongrats on success the FIRST time :)
Whenever I drop by ur posts...I think of only one thing -"This girl has read too many novels in her life - esp the M&B kinds :)"
ReplyDeleteBut which actually makes you the perfect candidate for Novel writing...tried ur hands at those? :)
By the time I finish - I am done and dont find the energy to comment ..But 2day u baked bread!!!! I had to force myself to skip after the first para and come stright down to congratulate you for "doing it" ! :) And how! ;) ;)
Take a bow Sia Dahling - the audience is clapping :)