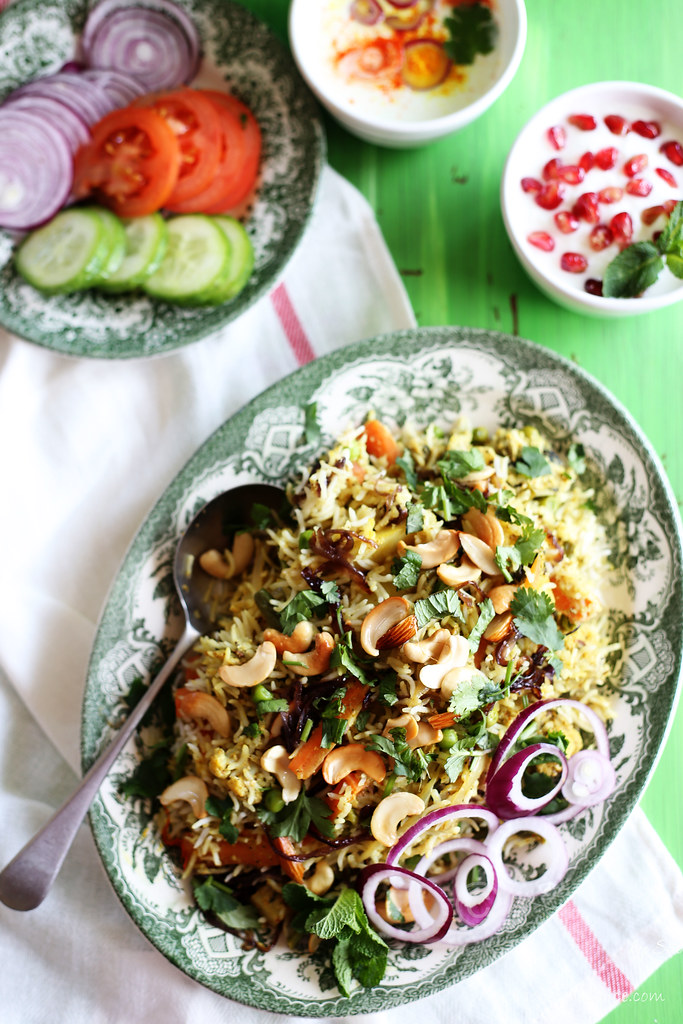
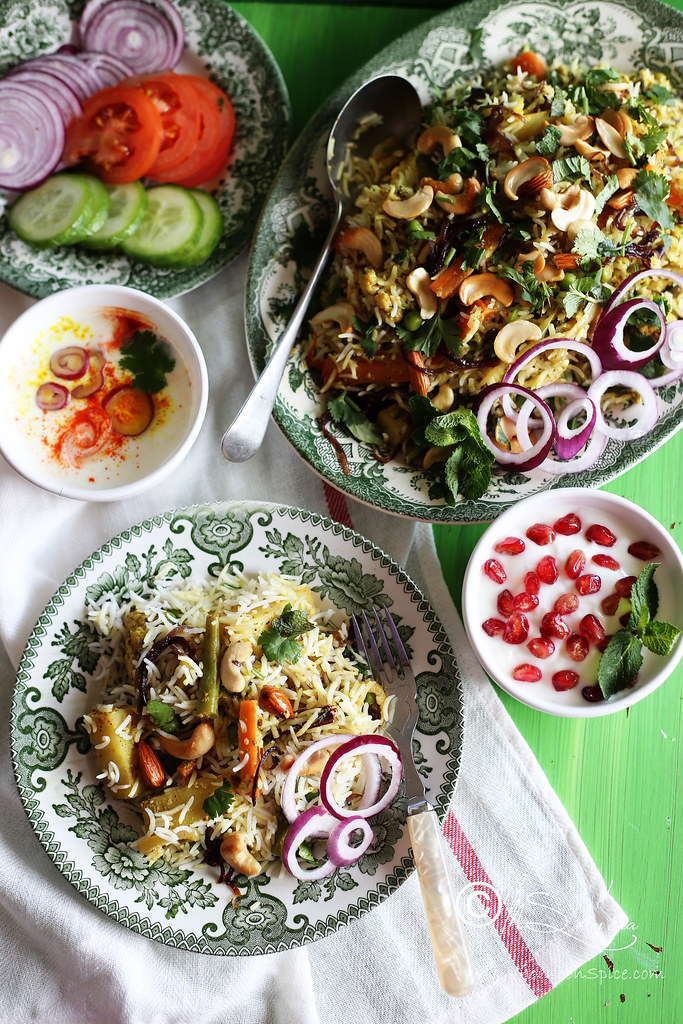
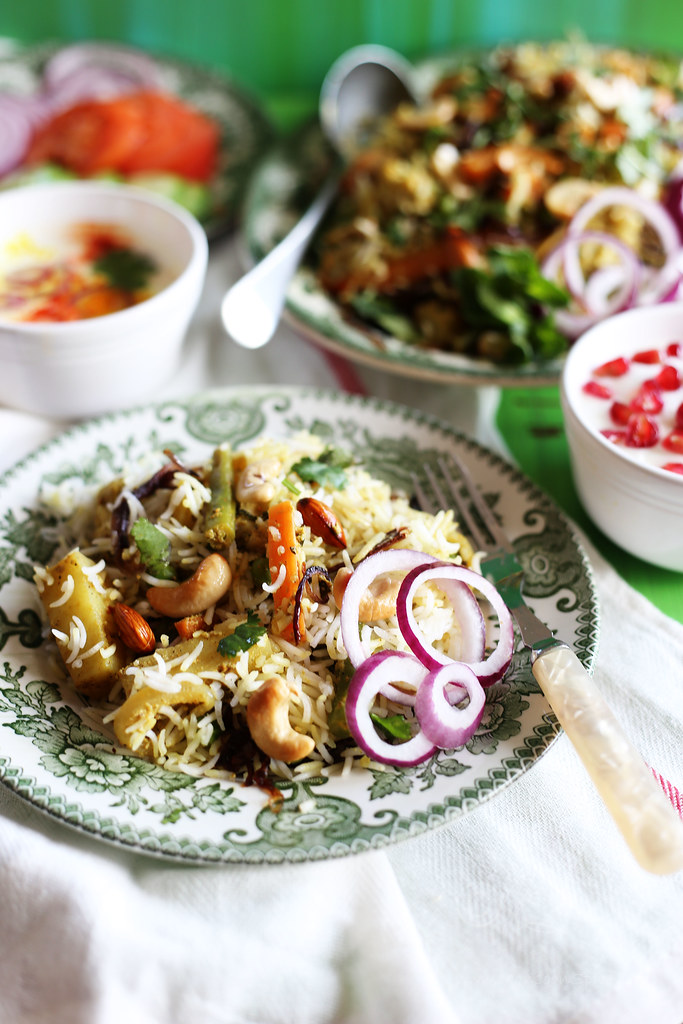
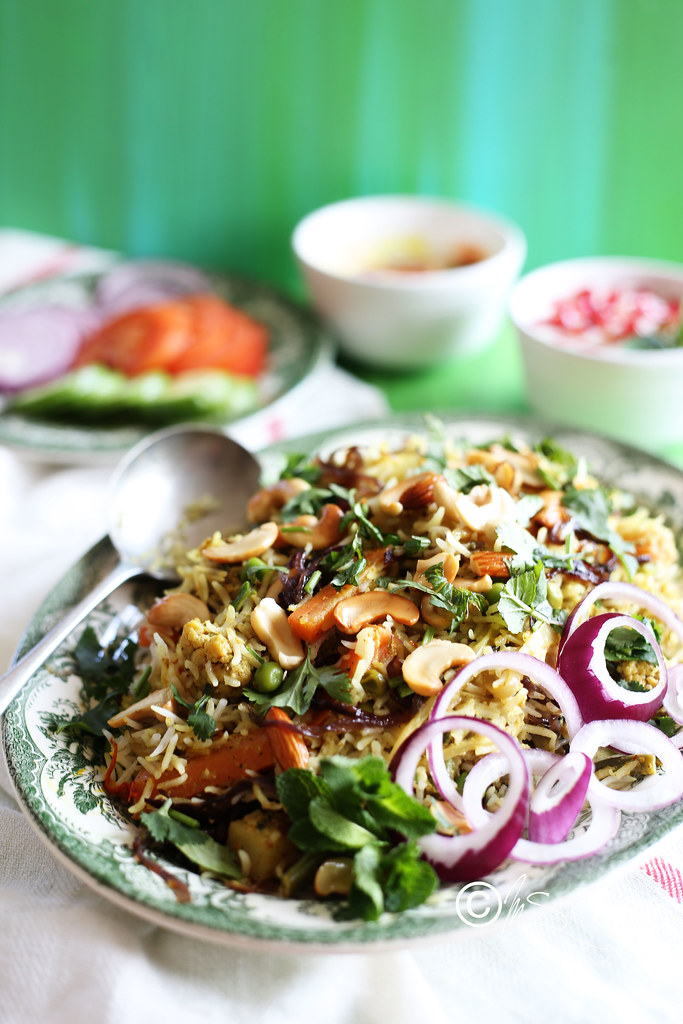
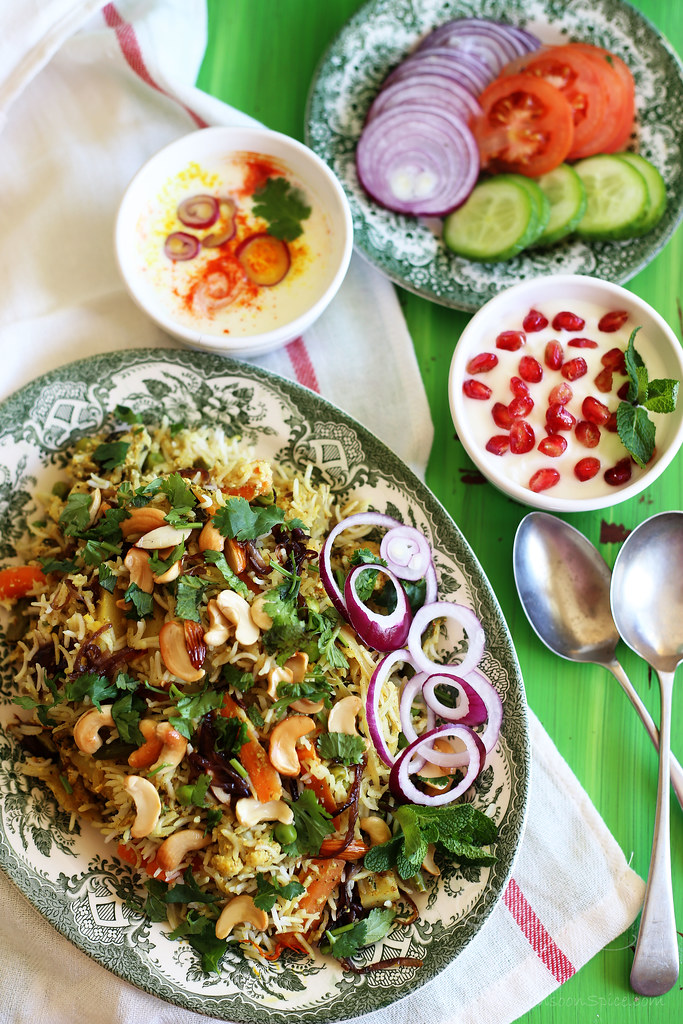
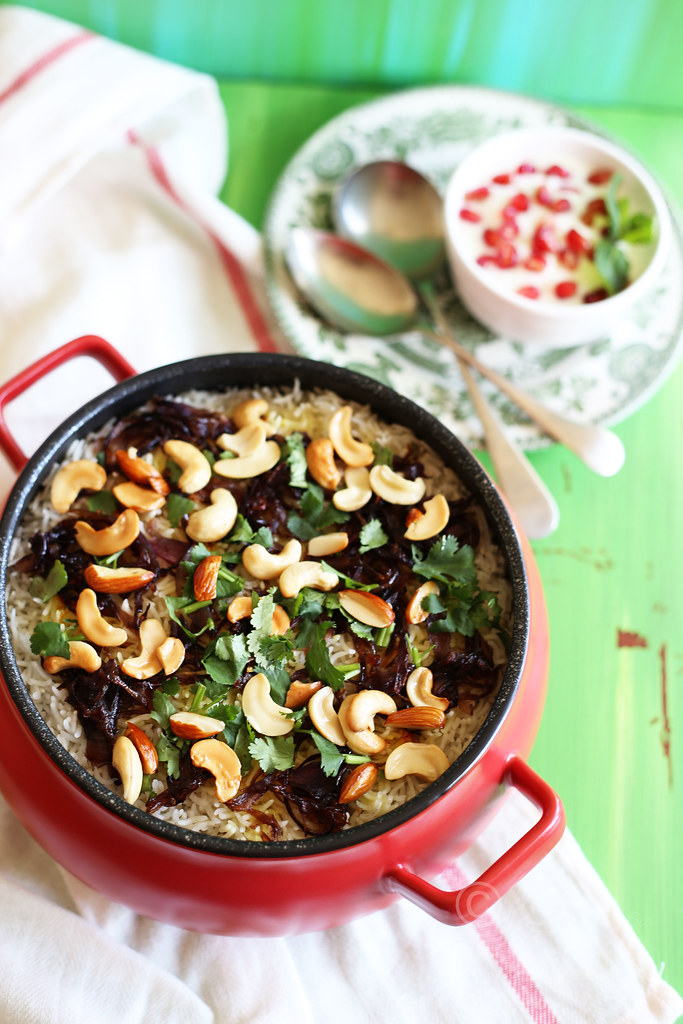
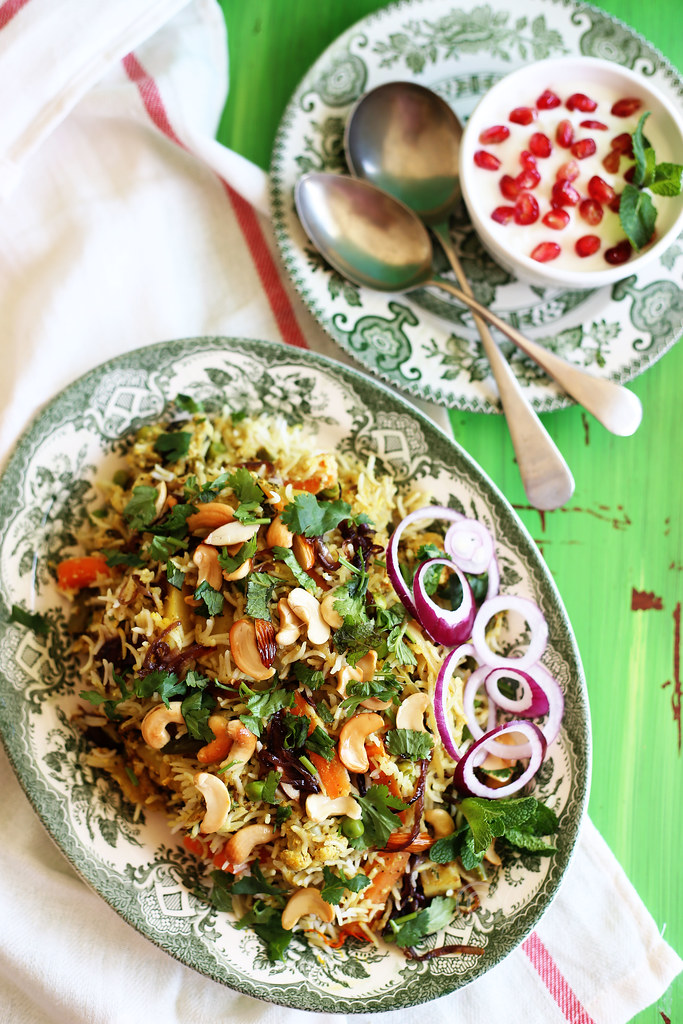
Learn how to make Hyderabadi Vegetable Dum Biryani ~ Layered and dum cooked aromatic basmati rice with curried vegetables flavoured with saffron, ghee roasted nuts and fresh mint and coriander leaves
A very, very good pot of Hyderabadi Vegetable Dum Biryani is one of the top 5 favourite foods of mine. It is one dish that I can have it for breakfast, lunch and dinner! Yes, that’s how much I LOVE it. There is something quite magical about the whole process of making and eating it, right from carefully roasting the spices for Biryani Masala Powder to layering it. It is quite exceptional experience to open the sealed lid to reveal the perfectly cooked biryani with its heady aroma to finally eating a morsel of this heavenly meal where each grain of rice is kissed by the spices.
As a teenager, I had mastered 3 of my most favourite ‘fancy’ dishes;
Malai Kofta,
Gobi Manchurian, and
Veg Cutlets. When I was in 11th, our science teacher Miss Maria who also happened to head exclusive ‘Ladie’s Club’ for the young ladies taught us to make
Hyderabadi Vegetable and Chicken Dum Biryani. This is her recipe,
Miss Maria’s Hyderabadi Veg Dum Biryani.
Although I had misplaced the original recipe that a 16 year old painstakingly wrote on her special diary, thanks to my photographic memory, I quite well remember the ingredients used in making it. It may be because I had cooked it many times during my bachelorette days to impress my parents, friends and guests. This recipe is a result of my 10 years of trials and errors, trying to perfect the dish. Being a perfectionist means I don’t give up until I am 100% happy with the result. The good thing is I have finally got a recipe for Hyderabadi Veg Dum Biryani. The bad news is those extra inches around the waist which may or may not have something to do with the consumption of heavenly biryani which is fit for the royalties! I must warn you in advance that this is one lengthy post heavily loaded with LOT of photographs and words. So feel free to scroll down to the recipe part if you are not interested read about the history of the biryani or my rants. Please make sure that you read the ingredients and recipe twice before attempting to make this dish and also try not to skip the tips/notes at the end.
According to Wikipedia, the word “Biryani” is derived from the Persian language, which was the official language in Indian subcontinent at medieval period which was ruled by various Turkic and Mughal dynasties of Central Asian origin. One theory is that it originates from ‘birinj’, the Persian word for rice. Another popular theory is that it derives from Persian word ‘biriyan’ or ‘beriyan’ meaning to fry or to roast.
Who created biryani? Where did it come from? How did it spread all over India? There are no clear answers, but many interesting theories. The origin of the dish is uncertain. Some say that a rice pulao or pilaf with meat, called büryan made by the Turkish and other Muslim communities of Macedonia was supposed to be an origin of Biryani. Lizzie Collingham, the author of ‘Curry: A Tale of Cooks and Conquers’, states that the modern biryani was created in the Mughal royal kitchen, as a confluence of the native spicy rice dishes of India and the Persian pilaf. The 16th century Mughal text Ain-i-Akbari, or the "Constitution of Akbar", is a 16th-century, detailed document recording the administration of emperor Akbar's empire, written by his vizier, Abu'l-Fazl ibn Mubarak, makes no distinction between biryanis and pulao: it states that the word "biryani" is of older usage in India. A similar theory, that biryani came to India with Timur's invasion, also appears to be incorrect, because there is no record of biryani having existed in his native land during that period.
There is another interesting story of origin of Biryani in Mughal period. Mughal Emperor Shah Jahan’s most beloved wife, Empress Mumtaz Mahal is reportedly thought to have inspired the dish in the 1600’s. She accompanied her husband, the emperor, on his every war conquest. During one such quest, she visited the Mughal army barracks and found the soldiers heavily undernourished. She asked the army cooks to prepare something that combined both meat and rice and provided a balance of rich nutrition and high protein and the result was Biryani. Because of its connection to the royal courts, biryani also became a favourite dish reserved for the special occasions. Since the Mughal Emperors were known for their over the top lavish lifestyle in terms of luxury, wealth and fine dining, Biryani became a perfect staple dish to show off all of the above by serving Moti (pearl) biryani or Son eke varak (beaten golden leaf) ki biryani or even serving biryani with prized birds and exotic ingredients. With the Mughals who ruled a vast portion of the Indian subcontinent, the biryani took on a new connotation and style, so much so now it’s recognised as a dish from India rather than its actual Persian or Afghani origins.
Another story of the origin of biryani is somewhat similar to the story of how Mumtaz Mahal’s idea behind preparing this dish for the royal army. According to this story, biryani was not a royal dish. It was cooked to feed the soldiers because it was a one-pot dish which had everything in it; the meat, the rice, the veggies. The rice, vegetables, and fried meat were partially cooked and layered in an earthen pot in the night. Then these earthen pots were sealed with dough and buried in the ground filled with burning charcoal. Even though this ‘dum’ cooking technique took time to cook, it was easier to do. This gave the soldiers enough nutrition and protein in the form of energy for the long days of battle. The story goes like the Nawabs of Awadh have been famous for their love for luxurious lifestyles and fine dining, once a Nawab of that time was strolling in his garden when the aroma from his solder’s kitchen reached him. It enchanted him so much that he enquired about it. On his command, the royal guard brought a plate of biryani from solder’s kitchen and after tasting the Nawab said the biryani should be part of the royal cuisine. So a version was created for him with reduced spices but enhanced flavours and exotic ingredients to suit royalty.
However, another theory claims that the dish was known in India before the first Mughal emperor Babur invaded India in the 14th century by defeating Ibrahim Lodhi of Afghan Lodi Dynasty in the battle of Panipat. According to Pratibha Karan, the biryani is of South Indian origin, derived from pilaf varieties brought to India by the Arab traders to Calicut or Kozhikode in south Indian state of Kerala. She speculates that the pulao was an army dish in medieval India. The armies, unable to cook elaborate meals during war time, prepared a one-pot dish where the rice and meat was cooked together. Over time, the dish became biryani due to different methods of cooking, with the distinction between "pulao" and "biryani" being arbitrary.
According to chef Jacob Sahaya Kumar Aruni, Oon Soru or mutton rice, mentioned in 2nd century CE Tamil Sangam literature is an early predecessor of modern-day biryani. Served as a feast for Pandyan soldiers, it was prepared by adding spiced mutton to rice, dal and jeera on the boil in a kadhai made of clay. It was made without onions, tomatoes and modern spices, which were not available in the area until the 16th century. (Source: Wiki)
So the origin of Biryani continues to be uncertain, debatable and quite mysterious. In North India, different varieties of biryani were developed in the Muslim centres of Delhi (Mughalai cuisine), Lucknow (Awadhi cuisine) and other small principle states. In South India where rice is a staple food, several distinct varities of biryani emerged from Tamil Nadu, Karnataka (Donne Biryani), Kerala (Malbar Biryani), Telengana and Andhra Pradesh (Hyderabadi Biryani) states. Then there is biryanis from Gujarati muslims (Bohra cuisine), Bengal (Calcutta biryani), Pakistan (Lahori, Peshawari biryani) etc.
As much as the mystery behind the origin of Biryani still haunts many foodies, there is no doubt about the difference between pulao/pilaf and biryani. Although many still argue that the modern day biryani is inspired by the Turkish pilaf, that’s where their argument ends. While the rice, vegetable and meat is cooked together in pilaf or pulao, they are cooked separately when making biryani. Lizzie Collingham in her book Curry suggests that the principal difference between a pulao and biryani is that the Central Asian Pulao depended on the fragrance of the rice, the Mughal biryani was much spicier. But in India, most Indians prefer their pulao quite spicy and find it difficult to eat it on its own and hence assorted side dishes are served along. But biryani is served with nothing more than a bowl of chilled raita. While the pulao is part of a meal, biryani is a main meal in itself.
Other difference between pulao and biryani is that biryani has meat cooked in thick fragrant gravy and layered carefully into rice, whereas pualo, on the other hand has relatively dry cooked meat added to the rice. Another difference is biryani has more complex and stronger spices compared to pulao which in turn means the biryani has stronger tasting curried rice due to higher amount of spices. But most important difference is in biryani, meat and rice are cooked separately before being layered and cooked together. Pulao is a one pot dish where meat and rice are simmered in a liquid until the liquid is absorbed.
The cooking technique used in making this Hyderabadi Vegetable Dum Biryani is called Dum Pukht where Dum means to ‘breathe in’ and Pukht means ‘cook’. There are conflicting statements when it comes to the origin of this technique of cooking which dates back to early 16th century. Some state that the origin of Dum Pukht is from Persia which was then introduced to India by the Mughals and others argue that it belongs to the Awadh or Oudh region (present Uttar Pradesh in India) in India. And some other sources simply states that the technique is based on traditional Indian method of cooking dishes buried in the sand.
The earliest documented recipe of Dum Pukht technique can be found in Ain-I-Akbari which was what the Nanbais or the Bazaar cooks employed by the philanthropist Nawab Asaf-Ud-Daulah of Awadh resorted to. Legends claim that the Nawab in an attempt to feed the poor during great famine in his kingdom, he created a “food for work” employment with masonry work at the Barra Immambara shrine. To feed thousands of workers, the Nanbais resorted to the ancient recipe found in Ain-I-Akbar where the beef was cooked overnight in a ‘deg’, a Dum Pukht technique. The turnip which was introduced by the Kashmiri Pandits in Awadh replaced the beef and this way the Nanbais could feed the workers a warm food at moment’s notice. Large cauldrons were filled with rice, meat, vegetables and spices and sealed tightly to make a one-pot meal that was available to workers day and night. Is it said that one day when the Nawab visited the construction site he caught a whiff of the aromas emanating from the cooking tents and he immediately ordered the royal kitchen to cook and serve the dish using Dum Pukht technique! (Source – Wiki).
Dum pukht cooking uses heavy bottomed pot called Handi. It is a round, spherical shaped clay pot which has thick bottom to help in preventing the food from getting stuck or burnt during the long hours of slow cooking. The top has wide mouth with a narrow neck that flares out to form broad rim. Since there are no handles, the pot is lifted by grabbing the broad rim of Handi. A wide clay saucer is used as a lid to cover the handi and is sealed with dough made of flour and water to prevent the heat from escaping. The Handi is left on a bed of hot charcoal for several hours and in some cases the hot charcoals are distributed on the lid for even distribution of heat. The heat creates the steam, the steam condenses and it rolls down the curved walls of the Handi, which in other words is the heat is choked before it can escape and thus conjures the term Dum Pukht. (Source – India Curry) Ingenious, isn’t it?
I must warn you in advance that this Hyderabadi Veg Dum Biryani is probably one recipe with a very lengthy list of ingredients and cooking steps. I am also well aware of this lengthy post heavily loaded with pictures and words, but it’s not every day one cooks such an elaborate dish which demands our time, bit of elbow grease and our respect! I prepare the Biryani Masala Powder from scratch but if you can use the store bought spice powder if one is short of time or don’t have all the spices in pantry. I must tell that making your own spice powder does make a huge difference to flavour and aroma as you are in full control of the amount of ingredients used and also roasted to perfect to bring out their best flavour. Please make sure that you use the best and top quality ingredients, here the spices and the basmati rice to get the best result.
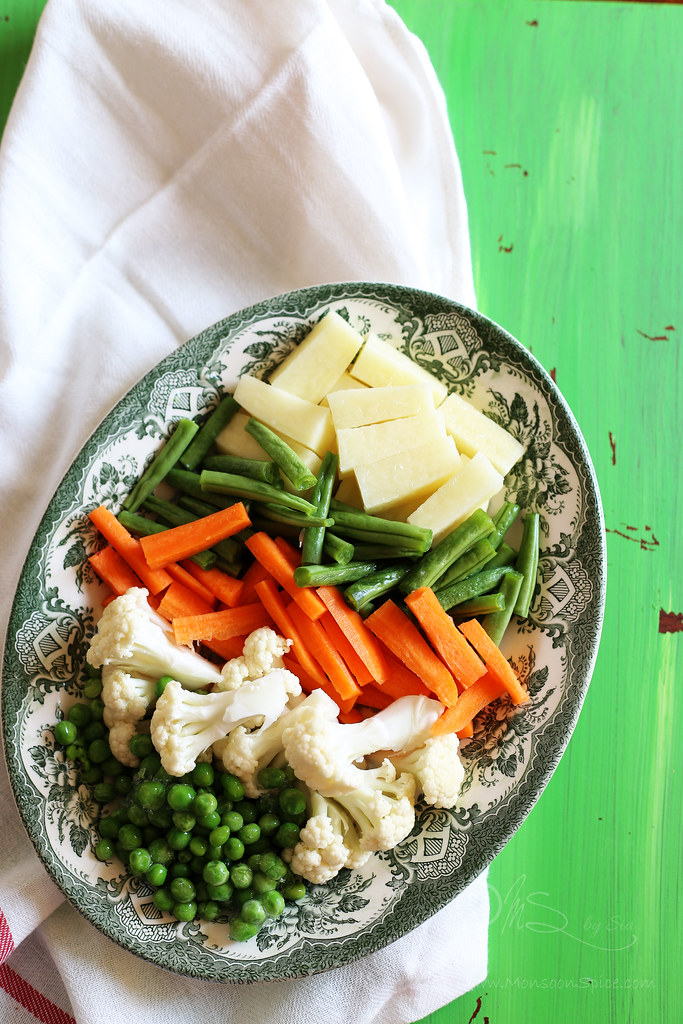
I personally prefer using the vegetables like carrots, peas, potato, cauliflower and beans and avoid using veggies like eggplants, mushrooms or capsicums as that’s how I was taught. Ms. Maria taught us to use deep fried onions for making a good Hyderabadi Veg Dum Biriyani. But I prefer using shallow fried onions as my waistline cannot take this kind of assault any more. For deep frying the onions, you have to deep fry the thinly sliced onions in hot oil until they turn crisp and golden. The aroma of these fried onions is great and cannot be substituted with any other ingredient and not even with pan fried onions. You can find these deep fried onions sold in Indian stores too (not onion flakes). If you have a fear of burning the biryani, make sure you use thick bottomed pot by using enough yogurt or coconut milk (in case of vegan) or dum cook in an oven.
Please make sure you read the recipe slowly, making sure not to skip any step. Read it twice, or thrice if needed and also read the notes which will help you. I have tried to make the recipe easy to follow by breaking them into many steps with easy to follow instructions. Don’t be intimidated by the long list of ingredients and cooking steps. I honestly believe that making a very good pot of Hyderabadi Veg Dum Biryani is not really a rocket science. All you need is little it of patience, time and top quality ingredients. Put on your favourite apron, play your favourite music, sprinkle little fairy dust and create some magic in your kitchen! The legends say that the sign of a good biryani is when you drop a
spoonful of biryani on floor, the grains should not stick together and
remain separate! Please note that this recipe has cleared that test with
flying colours. ;) I will consider my hard work being paid off if you find the recipe interesting enough and the photographs makes you to want to cook and taste it. :) So let’s get started cooking a delicious pot of Hyderabadi Veg Dum Biryani.
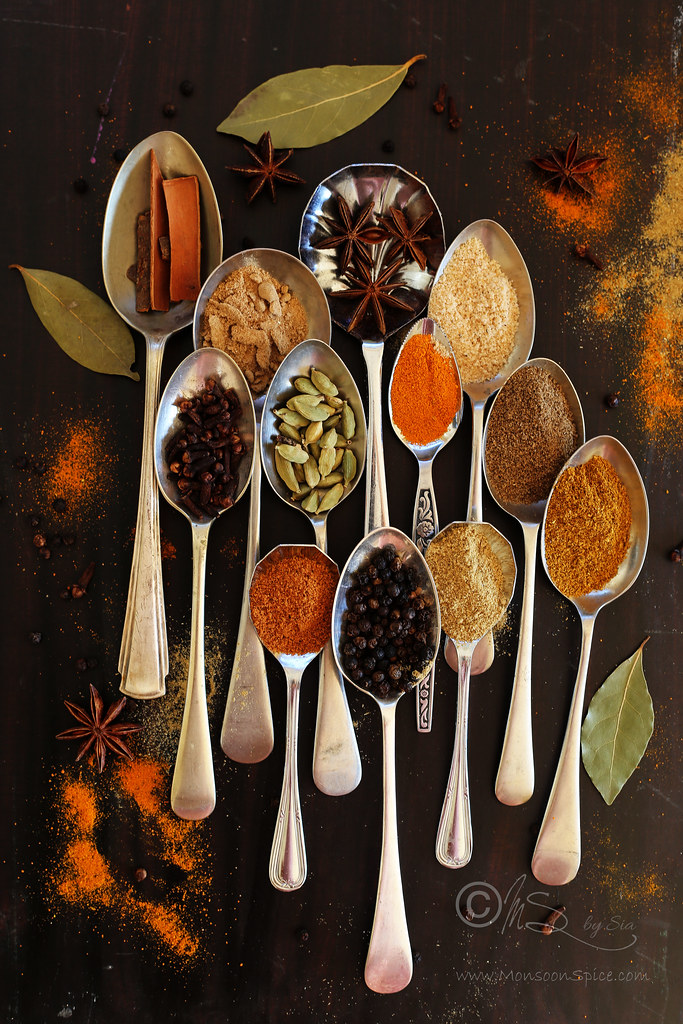
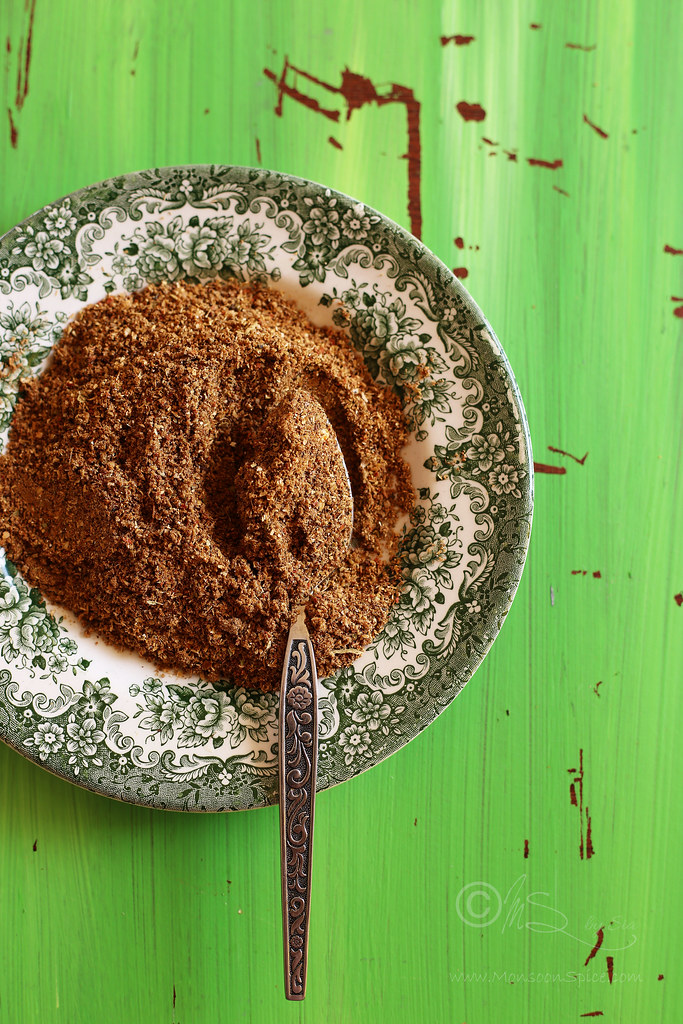
Biryani Masala Powder (Aromatic spice blend used in making Biryani)
Prep Time: N/A
Cooking Time: 10-15 mins
Makes: Around ½ cup
Shelf Life: Best used fresh, but can be stored for upto 2-3 months at room temperature in an air tight container
Ingredients:
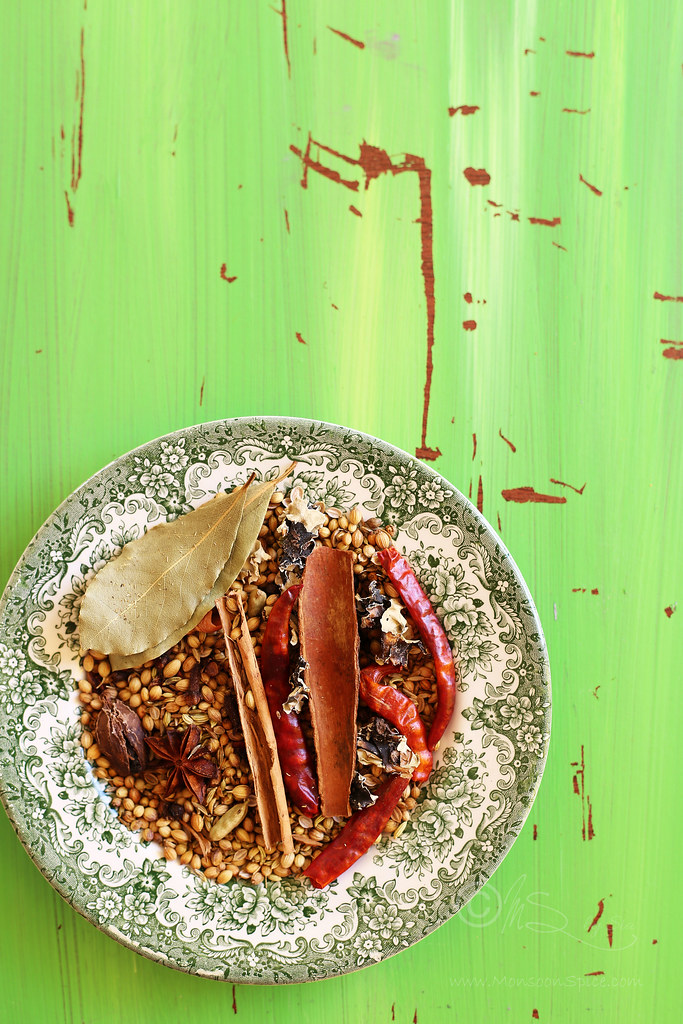
1 heaped tsp Jeera/Cumin Seeds
2 tbsp Dhania/Coriander Seeds
1 tsp Fennel Seeds
2 Bay Leaves
1 inch Cinnamon Stick
1 inch Cassia Stick
2-3 Dagaad Phool/Black Stone Flower (Optional)
5-6 Cloves
1 Black Cardamom
6 Green Cardamoms
1 Star Anise
¼ Mace
1/8 Nutmeg
10 Black Peppercorns
3-4 Dry Red Chilli
 Method:
- Dry roast cinnamon, cassia stick, clove, green cardamoms, black cardamom, star anise and nutmeg on a low flame for 2 - 2½ minutes until the aroma of roasted spices fills the room. Transfer the roasted spices on a large plate or tray to cool down to room temperature.
- Next in the same pan, add coriander seeds, cumin seeds, black stone flower, mace, dry red chillies and pepper corns. Dry roast the spices on low flame for a 1 ½ -2 minutes until the cumin and coriander seeds change colour to deeper shade and are well roasted. Transfer them to the plate with other roasted spices and let them cool down to room temperature.
- Once the spices have cool down completely, grind the spices in a spice blender or a mixer grinder to fine powder. If not using immediately, transfer the ground Biryani Masala into a clean and dry jar with air tight lid and pop it in a cupboard. This spice blend stays fresh for 2-3 months at room temperature or in refrigerator.
Sia’s Notes:
- I prepare the Biryani Masala Powder from scratch but if you can use the store bought spice powder if one is short of time or don’t have all the spices in pantry. I must tell that making your own spice powder does make a huge difference to flavour and aroma as you are in full control of the amount of ingredients used and also roasted to perfect to bring out their best flavour. Please make sure that you use the best and top quality ingredients for best results.
- Always roast the spices in low heat. It not only prevents the spices from browning and burning, but also helps to release their essential oils which in turn make the spice powder more aromatic and flavourful.
- Cool the roasted spices to room temperature before grinding them as the warm spices when ground will release moisture which reduces the shelf life.
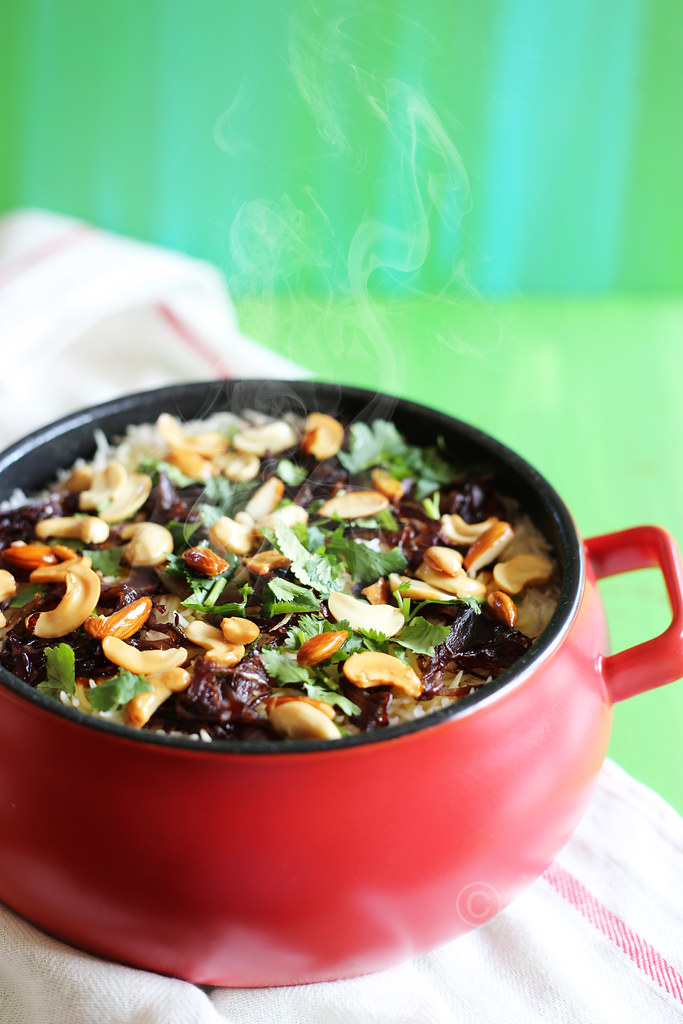
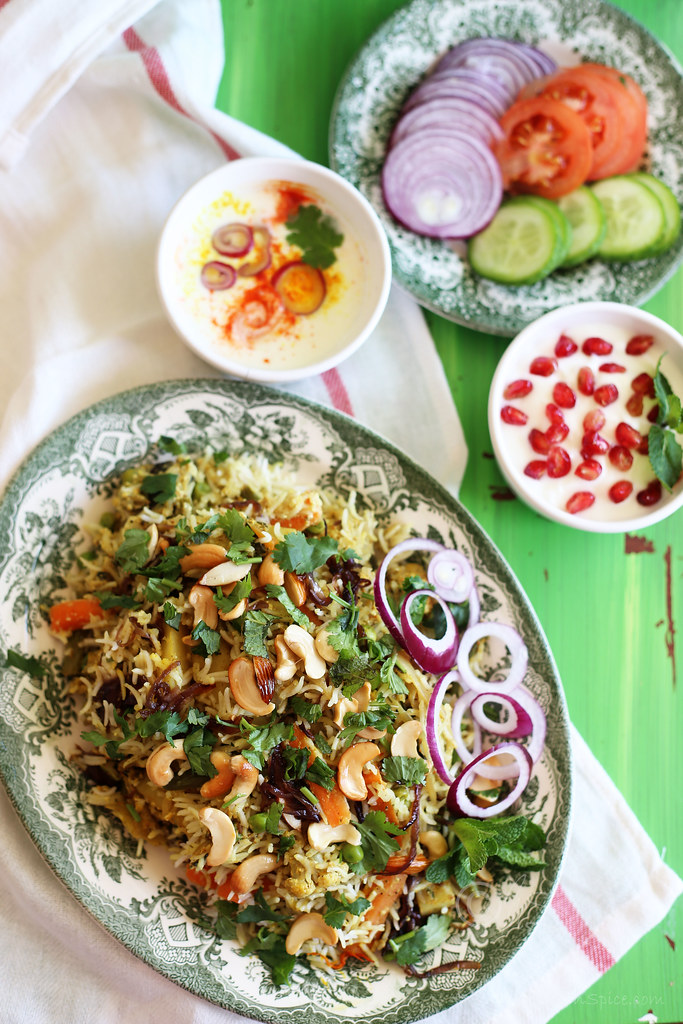
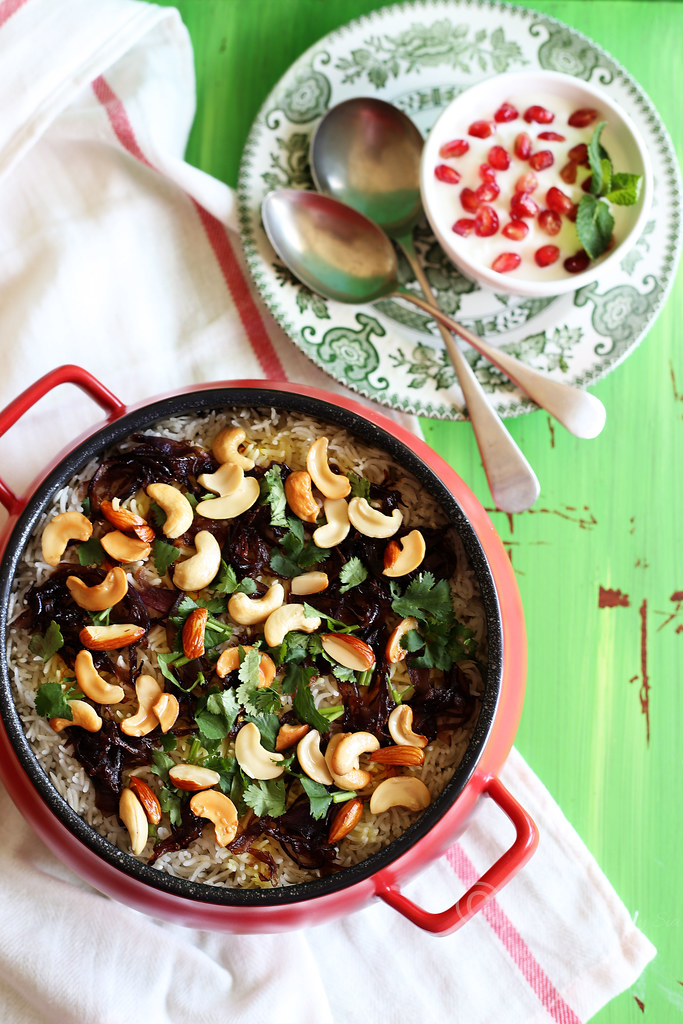
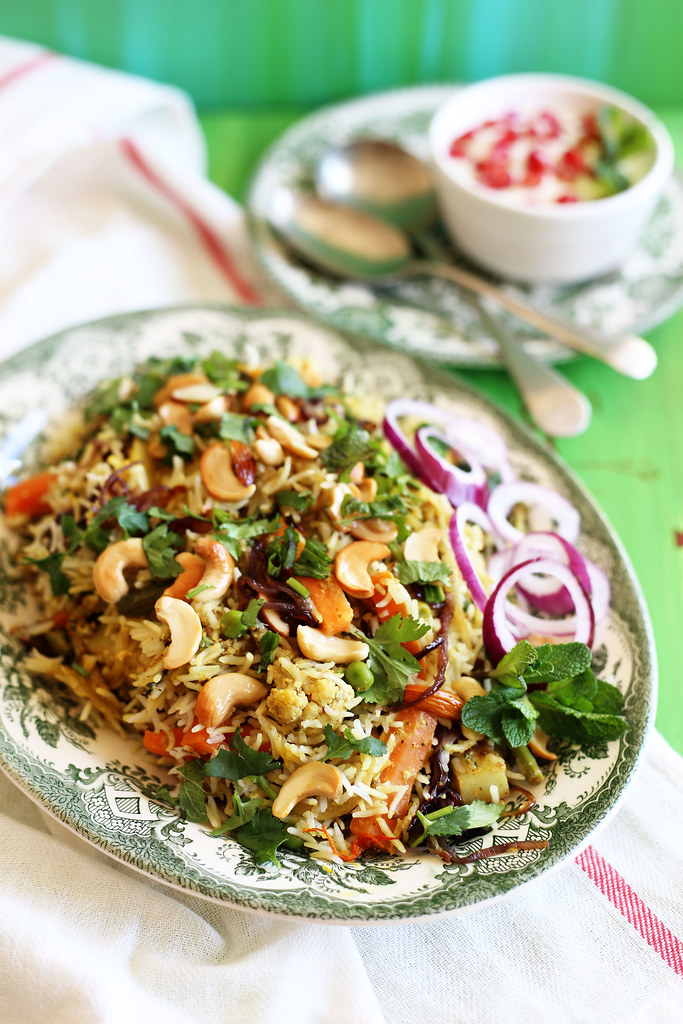
Hyderabadi Vegetable Dum Biriyani (Layered and dum cooked aromatic Basmati rice with curried vegetables flavoured with saffron, ghee roasted nuts and fresh mint and coriander leaves)
Prep Time: 20-30 mins
Cooking Time: 65-80 mins
Recipe Level: Intermediate to Difficult
Spice Level: Medium
Serves: 6-8 people
Recipe Inspiration: Ms Maria Pinto
Shelf Life: Best served fresh, but can be refrigerated for up to 3 days
Serving Suggestion: With any raita, pickle and papad
Ingredients:
Rice Layer:
3 cups Basmati Rice
2-3 tbsp Ghee/Oil
2 inch Cinnamon Stick
2 Bay Leaves
4 Green Cardamoms
1 Black Cardamom
4 Cloves
1½ tsp or Salt to taste
Vegetable Masala Layer:
1 large Onion, thinly sliced
1½ tsp Ginger-Garlic Paste
2-4 Green Chillies, sliced (Optional, adjust as per taste)
1½ cups Potato, peeled and cut into ½ inch by 2 inch wedges or pieces
1½ cups French Beans, cut into 2 inch long pieces
1 ½ cups Carrot, peeled and cut into ½ inch by 2 inch long pieces
1 cup Green Peas
2 cups Cauliflower, cut into large bite size florets
1½ cups Greek Yogurt or thick Coconut Milk
¼ packed cup Coriander Leaves, finely chopped
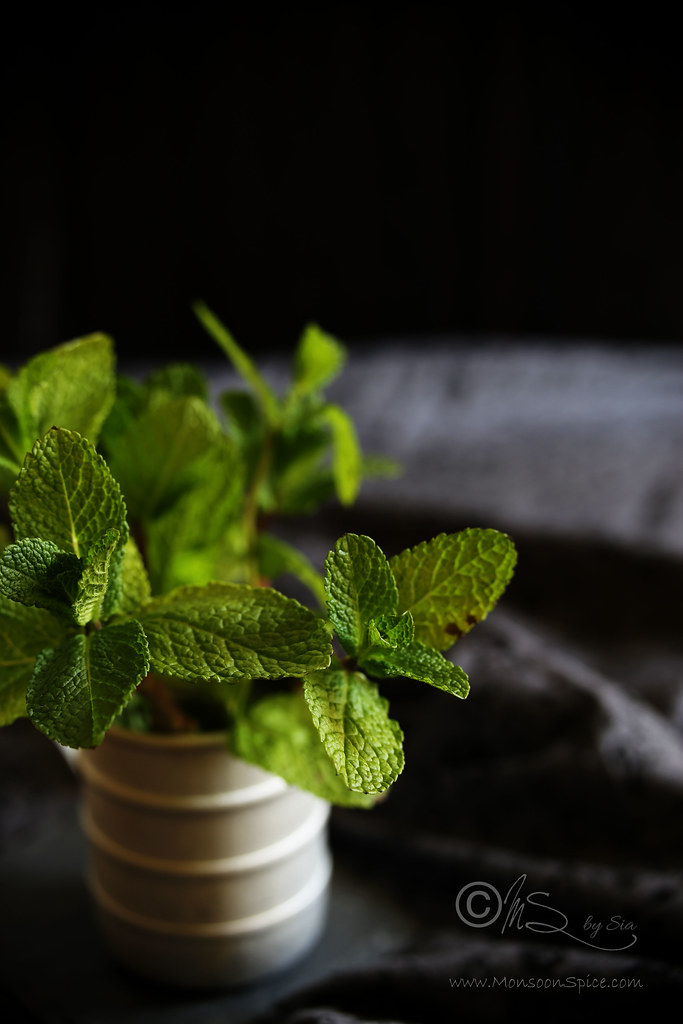
¼ packed cup Mint Leaves, finely chopped
Salt to taste
1 tbsp Ghee/Oil
Ground Masala or Spice Powder used in Veg Masala:
2½ tbsp Biriyani Masala
1 tsp Haldi/Turmeric Powder
Whole Spices Used in Veg Masala:
1 inch Cinnamon
3 Green Cardamoms
1 Black Cardamom
3 Cloves
1 Bay Leaf
1 tsp Jeera/Cumin Seeds
1 tsp Fennel Seeds
For Garnishing:
2 large Onions, thinly sliced
¼ packed cup Mint Leaves, finely chopped
¼ packed cup Coriander Leaves, finely chopped
¼ cup Cashew Nuts
¼ cup Almonds
¼ tsp Kesar/Saffron
¼ cup Milk or Coconut Milk or Water
1 + 2 tbsp Oil or Ghee
 Method:
Preparation:
- Wash the rice 3-4 times until the water runs clear. Add 5 cups of water to the washed rice and let it soak for 30 mins.
- While the rice is soaking, chop all the vegetables listed above and keep them aside. Chop the coriander leaves and mint leaves finely and keep them aside.
- Heat milk or coconut milk or water in a microwave for a minute
- Prepare the ingredients for garnishing:
- Heat 1 tbsp of oil or ghee on medium flame and fry the almonds and cashews until they turn golden brown. Remove the fried nuts and place them in aside in a bowl or plate.
- In the same pan, heat the remaining 2 tbsp of oil or ghee on medium flame and fry thinly sliced onions until they caramelise, crisp up and turn brown, stirring occasionally. It can take any time between 10-15 minutes. While the onions are frying, proceed to make the vegetable masala.
Prepare the vegetable masala for the biryani:
- Heat 1 tbsp of oil or ghee in a kadai/wok or a pressure cooker or pan on medium flame. Once it’s hot, add cinnamon stick, green cardamom, black cardamom, cloves, and bay leaf and fry them for a minute.
- Add cumin seeds and fennel seeds and fry them until the cumin seeds changes colour to deep brown, about 1 minute.
- Next add the thinly sliced onions and fry them on medium to high flame until they change colour to golden brown, about 2 minutes. You can add a pinch of salt to speed up the cooking process.
- Mix in slit green chillies and ginger-garlic paste and fry until the raw smell disappears, about 1 minute.
- Next add all the vegetables (potato, cauliflower, carrot, beans and peas) and stir fry for 2 minutes on the medium flame.
- Mix in turmeric powder and biryani masala powder and stir fry for 2 minutes until every piece of vegetable is coated well with the spices.
- Add 1 cup of whisked yogurt or the coconut milk, chopped coriander leaves, chopped mint leaves and salt to taste. Mix them well, cover and let it cook for 3 minutes.
- Add ½ - ¾ cups water and mix them well. Cover and pressure cook for 1 whistle on medium to high flame. If cooking in a kadai or wok, cover and let it cook for 7-8 mins on medium flame, stirring in between. Please make sure that the vegetables are al dente meaning it’s just cooked and vegetables still retain their light crunch and shape and you don’t overcook the vegetables. I prefer cooking the vegetables in a heavy bottomed pan to pressure cooker as you have a control over cooking process and know exactly when the vegetables are ready.
- Let the pressure release before opening the lid of the pressure cooker. If the vegetables are not cooked well, keep the cooker on the stove top and simmer the masala without the lid until the vegetables are cooked. If there is too much of water or stock in the vegetable masala, then simmer until the quantity of water reduces or dries up. The Biryani Masala gravy should have slightly thick consistency and should not be too thin or watery.
- The vegetable masala for the biryani is ready. While the masala is getting cooked, proceed to make the rice for the Vegetable Dum Biryani.
Prepare the rice for biryani:
- Drain the water from the soaked rice using a colander.
- Take a thick bottomed pan or a pressure cooker/pan. Add 6 cups of water and heat it on a high flame.
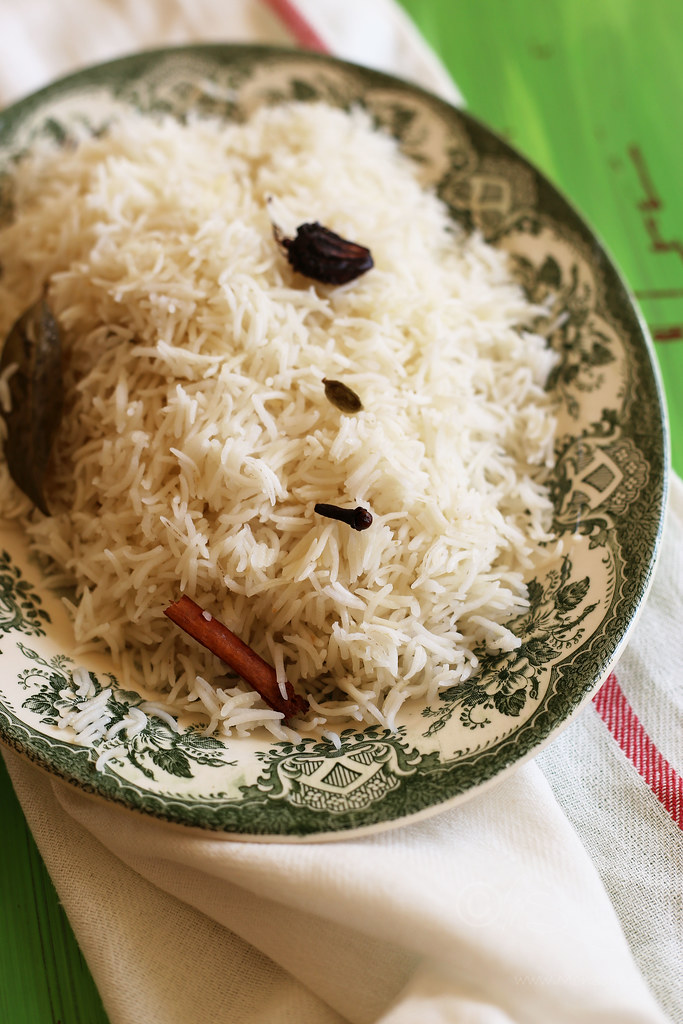
- To this add the whole spices (cinnamon, green and black cardamoms, cloves, bay leaves), ghee or oil and salt to taste and bring the water to boil.
- Once the water comes to boil, reduce the heat to medium. Add rice and gently stir it with a wooden spoon. Cover the lid (without the weight if using pressure cooker lid) and let it cook undisturbed for 6-8 mins. The rice should be cooked 75% or al dente meaning the grains should have a slight bite to them and not fully cooked.
- Drain the water from the rice using a colander and retain ½ cup of water in which the rice is cooked. Spread the rice on a large plate and gently fluff the rice with a help of a fork to separate each grain.
Layer the biryani and dum cook it:
- If dum cooking in an oven, place the rack in the middle and preheat the oven at 180 deg C.
- Take a heavy bottomed pan or pressure cooker (if dum cooking on stove top) or oven safe dish with lid (if dum cooking in an oven). I usually make 2 layers of rice and vegetable masala in 26 cm wide pot, so divide the rice and vegetable masala in half. If using small pot, you can make 3 each layers of rice and vegetables by dividing 1/3 of rice and vegetable masala. But if you are using a wide pot, it’s best to stick with single layer of rice and vegetable masala.
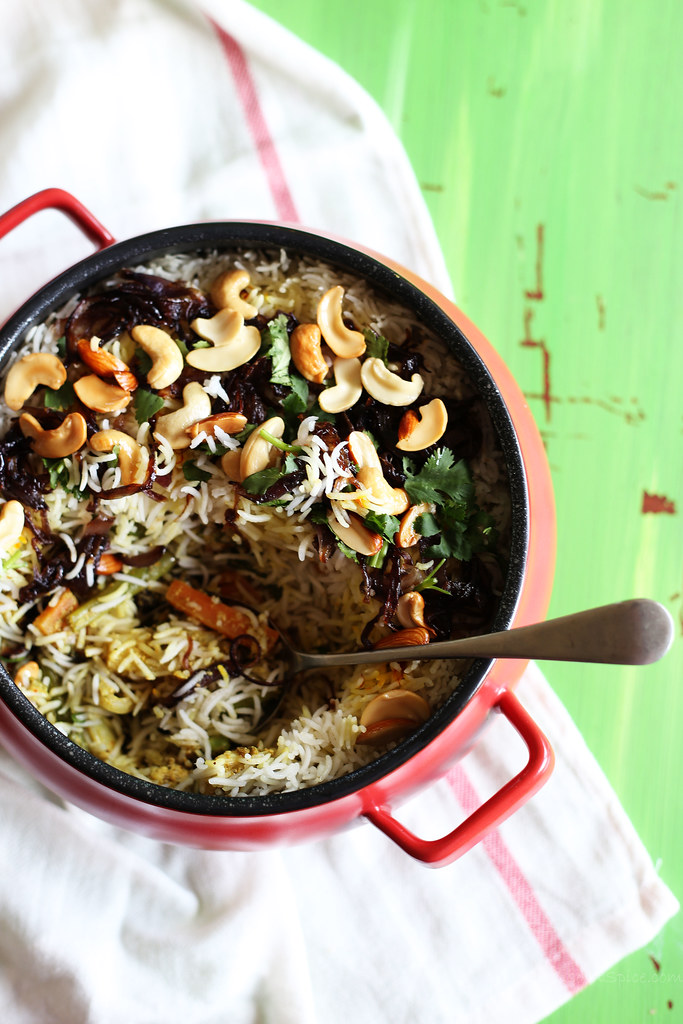
- Spread half of vegetable masala in the pot and drizzle ¼ cup of whisked yogurt on top. Next spread half of rice evenly and sprinkle half of finely chopped coriander and mint leaves. Drizzle half of saffron mix and the roasted almonds and cashew nuts. Next add half of fried onions. Repeat by adding another layer of vegetable masala, yogurt, rice, chopped mint and coriander leaves, saffron mix and the roasted nuts. Finally add the retained water in which the rice is cooked. This water will help in steam cooking of biryani. Press them down gently with a help of a ladle for all the layers to set well.
- Now comes the dum cooking part. You can seal the lid with dough made of whole wheat (like chapatti dough) or simply use tight fitting lid. If cooking on stove top, place the pot or pressure cooker (without whistle) on top of a griddle or tawa. This helps in preventing the biryani stick to the bottom and burning. Cook on high flame for 4 minutes and then lower the flame and let it simmer for another 10-15 minutes without disturbing.
- If cooking in an oven, cover the oven proof pot with a tight fitting oven proof lid or seal the top with aluminium foil. Place the pot in a mid-rack and let it cook undisturbed for 16-20 mins.
- Remove the pot from gas top or oven and let it rest for 10 minutes with the lid on for the flavours to blend well.
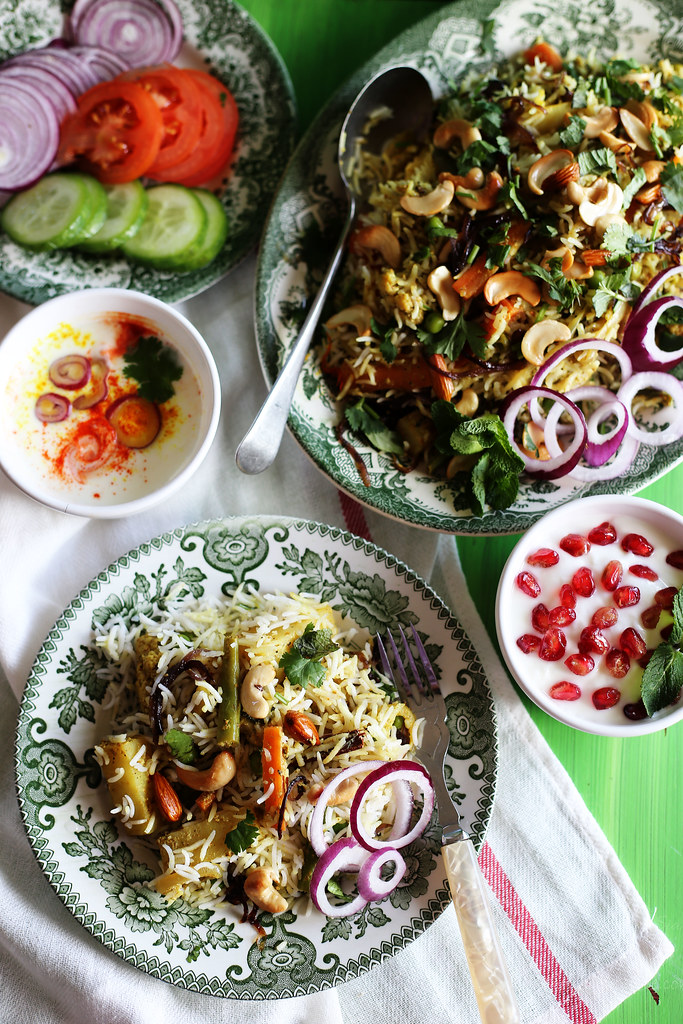
- Just before serving, open the lid and gently mix the rice and vegetables. Serve this delicious Hyderabadi Veg Dum Biryani with raita or biryani masala (special creamy curry served with biryani) and slices of onions, tomato and cucumber with lime/lemon wedges. Enjoy!
Sia’s Note:
- I prepare the Biryani Masala Powder from scratch but if you can use the store bought spice powder if one is short of time or don’t have all the spices in pantry. I must tell that making your own spice powder does make a huge difference to flavour and aroma as you are in full control of the amount of ingredients used and also roasted to perfect to bring out their best flavour. Please make sure that you use the best and top quality ingredients, here the spices and the basmati rice to get the best result.
- I personally prefer using the vegetables like carrots, peas, potato, cauliflower and beans and avoid using veggies like eggplants, mushrooms or capsicums as that’s how I was taught.
- Ms. Maria taught us to use deep fried onions for making a good Hyderabadi Veg Dum Biriyani. But I prefer using shallow fried onions as my waistline cannot take this kind of assault any more. For deep frying the onions, you have to deep fry the thinly sliced onions in hot oil until they turn crisp and golden. The aroma of these fried onions is great and cannot be substituted with any other ingredient and not even with pan fried onions. You can find these deep fried onions sold in Indian stores too (not onion flakes).
- The rice should be cooked 75% or al dente meaning the grains should have a slight bite to them and not fully cooked.
- When cooking vegetable masala for the biryani, I prefer cooking them in a heavy bottomed pan to pressure cooker as I have a control over cooking process and know exactly when the vegetables are ready. The vegetables should be al dente and retain their crunch and shape. If there is too much of water or stock in the vegetable masala, then simmer until the quantity of water reduces or dries up. The Biryani Masala gravy should have thick consistency and should not be too thin or watery.
- I usually make 2 layers of rice and vegetable masala in 26 cm wide pot, so divide the rice and vegetable masala in half. If using small pot, you can make 3 each layers of rice and vegetables by dividing 1/3 of rice and vegetable masala. But if you are using a wide pot, it’s best to stick with single layer of rice and vegetable masala.
- If cooking on stove top, place the pot or pressure cooker (without whistle) on top of a griddle or tawa. This helps in preventing the biryani stick to the bottom and burning.
- If cooking in an oven, make sure that you use oven proof dish and the lid.
- If you have a fear of burning the biryani, make sure you use thick bottomed pot by using enough yogurt or coconut milk (in case of vegan) or dum cook in an oven.
- Remove the pot from gas top or oven and let it rest for 10 minutes with the lid on for the flavours to blend well.
- Just before serving, open the lid and gently mix the rice and vegetables. Serve this delicious Hyderabadi Veg Dum Biryani with raita or biryani masala (special creamy curry served with biryani) and slices of onions, tomato and cucumber with lime/lemon wedges.


A beautiful and extremely mouthwatering biryani! Great post and lovely pictures.
ReplyDeleteCheers,
Rosa
www.reveriesbramblesscribbles.com/blog/
Thank you, Rosa!
DeleteSia...You did a wonderful job.I can see you put all your heart and love for biryani in this post. Agree this can be eaten for all 3 meals a day..loved reading the history of biryani and the photos are a feast !
ReplyDeleteSiri
Thanks a lot, Sireesha! It sure tested my patience, but it was really fun to put together this mammoth post. :)
DeleteEnjoyed reading every word in this post,who knew there were so many different versions on the origin of a biryani. Hats off to you Sia you had the patience to do such an extensive research.
ReplyDeleteI have personally tried many kinds of biryanis, but somehow mine always turn out a tad dry. Yours looks so good, next time am in the mood for biryani am surely going to try your recipe and report back. Great work you are doing with experimenting and sharing your recipes, looking forward for your next post :)
Thank you, Shilpa! It's just mind boggling to read and learn about the different types of biryani! One life is not enough to try and taste the amazing array of food that India has!
DeleteI hope you find that perfect recipe here. I wouldn't say I have mastered the art of cooking that 100% perfect biryani, but I am slowly getting there ;) Do let me know when you try this recipe and leave a note how you like it.
Spectacular post, Great write up and awesome presentation... Feeling like a feast is just about to begin...
ReplyDeleteThank you, Jeena! You are too generous with your compliments :)
DeleteWhat a wonderful post! I've found you on Instagram and now I can see that your blog is so nice.
ReplyDeleteThanks for sharing
Thank you, Manu and welcome to Monsoon Spice :)
DeleteThe pictures are a treat Sia! Such panache and beauty in one post, Biryani is truly an emotion. This recipe is a hit at my place and is every Sunday’s demand. I personally believe Biryani’s are better cooked with ghee, it gives a richer taste and fragrance. I cook it in Gowardhan Ghee and it tastes divine. I’d recommend you to try it out once. :D
ReplyDeleteThe pictures are a treat Sia! Such panache and beauty in one post, Biryani is truly an emotion. This recipe is a hit at my place and is every Sunday’s demand. I personally believe Biryani’s are better cooked with ghee, it gives a richer taste and fragrance. I cook it in Gowardhan Ghee and it tastes divine. I’d recommend you to try it out once. :D
ReplyDeleteThank you for this interesting article..
ReplyDeleteLyrics
Hi Sia, I loved this vegetable recipe. It was pretty well explained, full of awesome pictures. This will be my next dish for sure. Thanks for sharing!
ReplyDeleteJenny from Pressure Cookers HQ